The Complete Guide to Camper Trailer Power Systems (Australia 2026)
Everything you need to know about 12V camper trailer power systems in Australia — batteries, solar, DC-DC chargers, inverters, 240V shore power, wiring, and per-model specs.
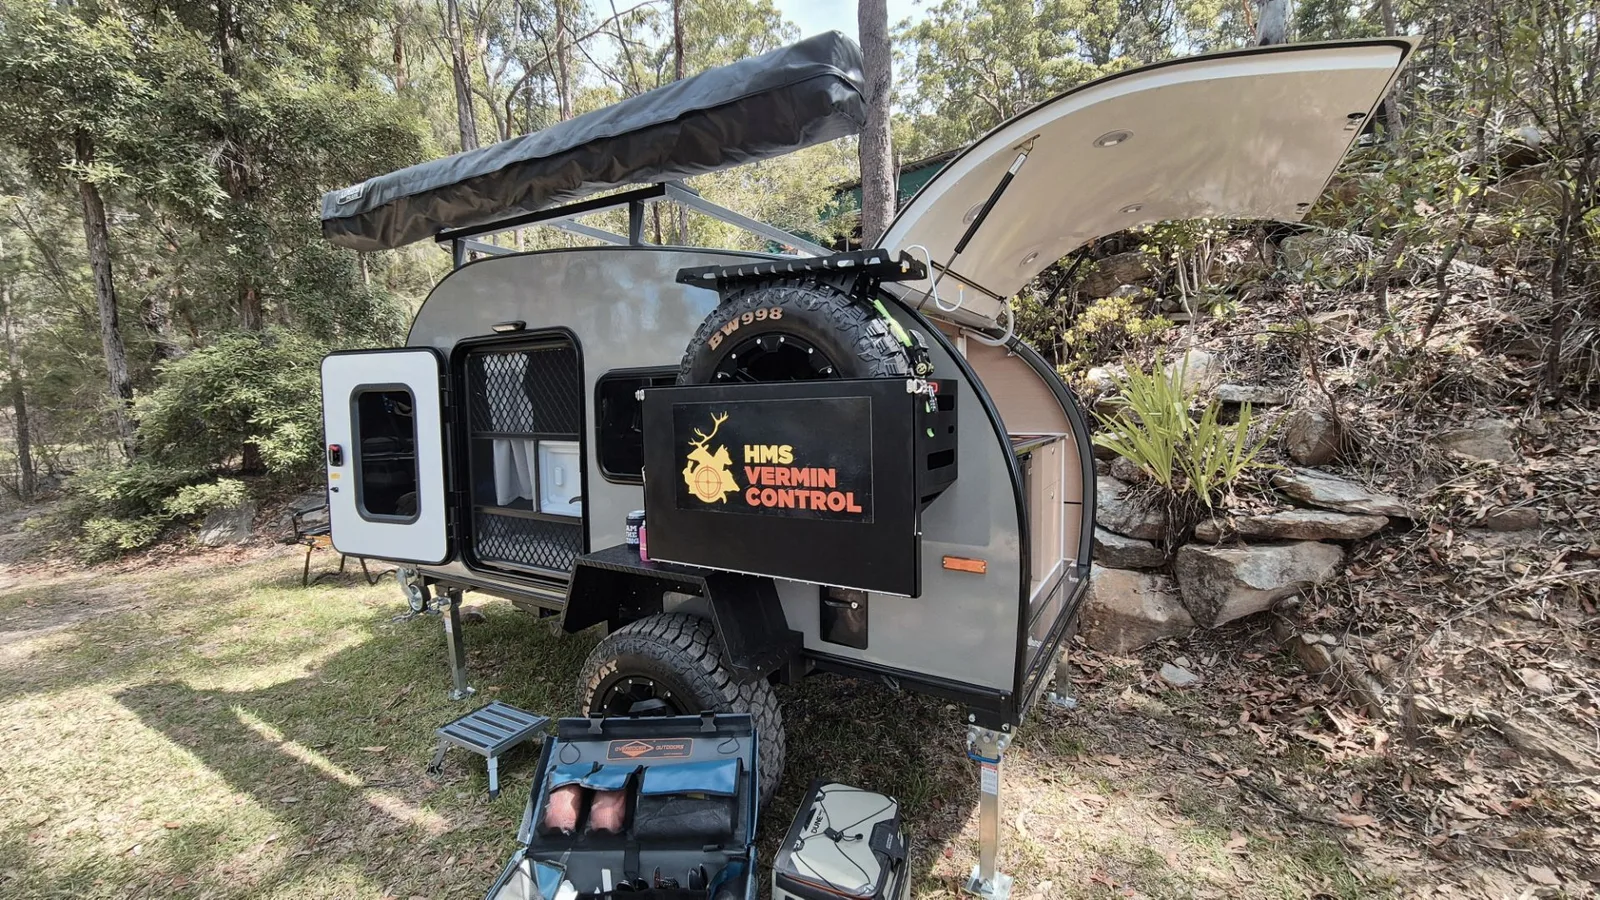
A modern camper trailer parked on a remote NSW high-plains site will draw 80 to 120 amp-hours a day — more if the nights are hot and you are running a fan, or less if it is a quick overnight trip with a light load. That single number — your daily energy budget — is the foundation of every power decision you make: battery size, solar panel area, whether you need a DC-DC charger, and what inverter (if any) makes sense.
This guide pulls together every component of a 12V camper trailer electrical system, explains how the pieces connect, and gives you sizing rules you can apply to your specific camping style. It also links to the deep-dive articles we have published on each component so you can go further on any topic without wading through a single 10,000-word monolith.
How a 12V Camper Trailer Power System Works
A camper trailer power system is a closed-loop energy store. Energy comes in from multiple sources (solar panels, your tow vehicle’s alternator, mains power at a caravan park, or a generator), it is stored in a battery bank, and it is drawn out by your appliances. The battery is the buffer between what you generate and what you consume — the bigger the buffer, the more freedom you have.
The system wiring runs at 12V DC for almost everything except a hard-wired inverter, which converts battery DC into 230–240V AC for household appliances. A bus bar or distribution fuse box is the heart of the circuit: all positive feeds to appliances branch from it, and a master battery isolator lets you disconnect everything cleanly.
Solar panels → MPPT charge controller ─┐
                                        ├─→ Battery bank → Fuse box → Loads
DC-DC charger ←── Tow vehicle ──────────┘           ↓
240V mains charger ←── Shore power ──────────────→ Battery      ↑
                                                     └→ Inverter → 240V loads
Every charged electron eventually returns to this loop.
Your 5 Sources of Charging Power
Understanding which charging source does the heavy lifting — and when — lets you size the system correctly.
1. Solar panels (primary off-grid source)
Solar is the workhorse of any off-grid setup. A 200W panel in Queensland summer will produce around 1,000 to 1,200Wh on a good day (5–6 peak sun hours); in Tasmanian winter, the same panel may produce 400Wh. The practical takeaway: size your solar for your worst camping conditions, not your best.
For a detailed treatment of panel types, MPPT vs PWM, and step-by-step sizing, see our Understanding Camper Trailer Solar Systems guide.
2. DC-DC charger via tow vehicle alternator
When you are towing, your tow vehicle’s alternator is generating electricity whether you use it or not. A DC-DC charger (also called a battery-to-battery or B2B charger) harnesses that energy and pushes it into your trailer battery at the correct charge profile — without the voltage-spike risk that a simple Anderson-plug-direct connection carries, and without confusing modern smart alternators that reduce output to protect the Euro 5/6 charging system.
A 40A DC-DC charger will add roughly 480Wh per hour of driving — about 80–100Ah over a four-hour highway run. That is frequently enough to recover a depleted 100Ah lithium battery before you reach camp.
Full component comparison at Understanding Battery Chargers and DC-DC Chargers.
3. 240V shore power (powered caravan park sites)
Many Australian caravan parks offer 10A or 15A powered sites. A 10A site provides 2,400W — enough to run a mains-rated battery charger (240V → 12V/DC) plus your trailer’s 240V appliances simultaneously. You need:
- An IEC C13 or caravanning-standard 240V inlet socket on the trailer
- A multi-stage mains charger (e.g. Enerdrive 20A 240V-to-12V, ~$240) or an inverter/charger combo
- A 10A rated extension lead rated for outdoor use
Shore power completely resets your battery in a single overnight stay — very useful mid-trip if you have been overcast for several days.
4. Portable generator
A petrol generator (e.g. Honda EU22i, ~$1,700) gives you 2.2kW of 240V power anywhere, but it is noisy, requires fuel, and is banned at most national parks during quiet hours. Most camper trailer owners treat generators as emergency backup rather than primary charging. If you need generator-level power regularly, you are probably better served by a larger battery bank and more solar.
5. Portable power station
For very small loads (phone, laptop, LED lighting) without a 12V system, a portable lithium power station (e.g. EcoFlow River 2, $449 / 256Wh) works well as an entry point. These units are not discussed further in this guide, which focuses on installed camper trailer systems.
Batteries: The Heart of the System
Your battery bank determines how many hours you can run your loads without any charging input — your “reserve capacity”. Two chemistry choices dominate the Australian market.
AGM vs LiFePO4 comparison
| Specification | AGM | LiFePO4 (lithium) |
|---|---|---|
| Usable capacity (DoD) | ~50% (use 50Ah from 100Ah) | ~90% (use 90Ah from 100Ah) |
| Weight (100Ah) | ~28–32 kg | ~10–13 kg |
| Cycle life | 300–500 cycles (50% DoD) | 2,000–5,000+ cycles |
| Charge efficiency | ~85% | ~99% |
| Price per 100Ah | $150–$280 | $350–$650 |
| Cold-charging limit | Fine to −20°C | BMS cuts off at ~0°C |
| Self-discharge/month | 3–5% | 1–2% |
| Best for | Budget weekender, mild climates | Tourer, full-timer, serious off-grid |
The cost-per-cycle maths almost always favours lithium for anyone camping more than 30 nights a year. The exception is cold-weather camping in alpine Victoria or Tasmania: if ambient temperatures approach 0°C overnight, check that your LiFePO4 battery has a built-in self-heating BMS (most quality brands do at the 2026 price point).
For the full AGM vs lithium analysis, see our AGM vs Lithium Batteries for Camper Trailers deep-dive.
How much battery do you actually need?
| Camping style | Typical daily draw | Recommended battery |
|---|---|---|
| Weekend (no fridge) | 20–40Ah | 100Ah AGM or 60Ah LiFePO4 |
| Weekend (with fridge) | 50–80Ah | 100Ah LiFePO4 |
| Touring 1–2 weeks | 80–120Ah | 200Ah LiFePO4 |
| Full-timer | 100–150Ah | 300–400Ah LiFePO4 (2× 200Ah) |
A 200Ah LiFePO4 at 90% DoD gives you 180Ah of usable capacity — around two full days without any solar replenishment for a couple with a compressor fridge, LED lights, fans, a water pump, and device charging.
Solar Panels: Sizing and Types
Solar panels are rated in watts peak (Wp) under Standard Test Conditions (STC: 1,000 W/m² irradiance, 25°C cell temperature). Real-world output in Australian summer runs 70–80% of STC — meaning a 200Wp panel genuinely produces around 140–160W on a good day. Heat reduces output: a panel at 60°C (common in outback summers) may lose another 10–15%.
Panel types
| Type | Pros | Cons | Best use case |
|---|---|---|---|
| Rigid monocrystalline (rooftop) | Highest efficiency, most durable, permanent | Fixed, potential shading impact | Permanent installation |
| Flexible monocrystalline | Low profile, lightweight | Shorter lifespan, traps heat on roof | Curved surfaces, pop-top roofs |
| Portable folding | Pack away when parked, reposition for shade | Need storage space, manual setup | Supplemental charging, tents |
Most hard-shell camper trailers — including all Breath Trailer models — use rigid monocrystalline panels permanently mounted on the roof lid. They are production-ready and protected when the trailer is closed.
Quick sizing rule: aim for 100W of solar per 50Ah of daily consumption. A 200Ah daily draw needs 400W of solar to recover in six peak sun hours. In practice, most Australian tourers balance 160–200W of roof solar with the DC-DC charger topping up on driving days.
For step-by-step sizing worked examples by location and season, see How Much Solar Do You Need for a Camper Trailer?.
MPPT Solar Charge Controller
The solar charge controller sits between your panels and your battery, regulating voltage to prevent overcharging. There are two types:
- PWM (Pulse Width Modulation): cheaper but wastes up to 30% of potential harvest by clipping the panel voltage to battery voltage
- MPPT (Maximum Power Point Tracking): tracks the panel’s optimal voltage-current combination; delivers 20–30% more energy into the battery than PWM under Australian conditions
For a 160W or larger panel, the MPPT price premium pays for itself within a season. A quality 20A MPPT controller (e.g. REDARC SRP0120D, Victron SmartSolar 75/15) costs $100–$200 — a modest fraction of the total system cost.
Always match the controller’s voltage window to your panel array: a single 12V panel array typically has an open-circuit voltage (Voc) of 20–22V; two panels in series would double that, so check the controller’s maximum input voltage first.
DC-DC Charger: Charge on the Move
The DC-DC charger (covered extensively in our DC-DC Charger deep-dive) is the component most people underestimate. A simple Anderson plug connection from tow vehicle to trailer sends raw alternator voltage (13.6–14.4V) to the trailer battery, but:
- Modern Euro 5/6 engines use smart alternators that drop output to 12.8V when not actively charging — the plug connection provides almost zero charge
- There is no proper charge profile — AGM and lithium batteries need staged charge cycles (bulk → absorption → float) that a raw connection cannot provide
- Voltage drop over a long cable run further reduces what actually reaches the trailer
A DC-DC charger solves all three: it isolates the systems, handles any input voltage down to 9V, and applies the correct multi-stage profile for your battery chemistry.
Popular 40A DC-DC chargers (AUD, 2026)
| Model | Price | Compatible chemistry | Smart alternator safe |
|---|---|---|---|
| REDARC BCDC1240D | ~$299 | AGM, Lithium, GEL | Yes |
| KickAss 40A DCDC | ~$189 | AGM, Lithium | Yes |
| Victron Orion-Tr Smart 30A | ~$299 | AGM, Lithium | Yes |
| Enerdrive ePOWER B2B 40A | ~$279 | AGM, Lithium, GEL | Yes |
Size the DC-DC charger to 20–25% of your battery capacity: a 200Ah lithium bank works well with a 40A charger; a 100Ah AGM is well served by a 20–25A unit.
Inverter: 240V On the Road
An inverter converts 12V DC battery power to 230–240V AC — the same power type as your house. You need one only if you want to run:
- A laptop or device with a three-pin mains charger (many now charge via USB-C instead — no inverter needed)
- A coffee machine, electric kettle, or toaster
- CPAP or BiPAP machines without a 12V adapter
- A 240V air conditioner (requires a very large inverter and battery bank)
Always choose pure sine wave over modified sine wave. Modified sine wave (MSW) inverters are cheaper but can damage sensitive electronics and cause audible hum in audio equipment, motor inefficiency, and CPAP machine faults.
Inverter sizing by use case
| Appliance | Running watts | Surge watts | Minimum inverter |
|---|---|---|---|
| Laptop (large) | 90W | 90W | 300W |
| CPAP machine | 30–60W | 60W | 300W |
| Coffee machine (pod) | 900–1,200W | 1,200W | 1,500W |
| Electric kettle | 1,800–2,400W | 2,400W | 3,000W |
| 12V–240V fridge (AC) | 100–150W | 400W | 600W |
For a full wattage table and inverter selection guide, see What Size Inverter Do You Need for a Camper Trailer?.
240V Shore Power: Powered Sites
Plugging into a powered caravan park site is the simplest way to keep a battery bank full between off-grid stretches. Standard Australian campground hookup is 10A / 240V single-phase = 2,400W. Some higher-end parks offer 15A (3,600W).
To use shore power safely:
- Inlet socket — the trailer needs a hard-wired 240V inlet (caravanning-standard blue round plug, or IEC inlet). Never run the cable through a window.
- 240V circuit protection — an RCD (residual current device) and circuit breaker, wired before the distribution board. Under Australian AS/NZS 3001.2 requirements, any 240V installation in a road vehicle must be installed by a licensed electrician or auto-electrician.
- Mains battery charger — if you want shore power to replenish your 12V battery (rather than only run 240V loads directly), you need a 240V-input, 12/24V-output multi-stage charger: e.g. Enerdrive ePOWER 20A AC charger (
$240), REDARC BCDC1225D 240V input ($299), or Victron Blue Smart IP22 (~$280).
Most factory-fitted hard-shell camper trailers at the $25,000+ price point include a shore power inlet and mains charger as standard.
Battery Monitor: Know Your State of Charge
A battery voltage reading is not a reliable indicator of state of charge for lithium batteries — LiFePO4 has a very flat discharge curve that stays near 13.2V until the battery is nearly empty. You need a proper battery monitor (coulomb counter) that tracks amp-hours in and out.
| Monitor | Price (AUD) | Key features |
|---|---|---|
| Victron BMV-712 | ~$180 | Bluetooth, voltage + current, history |
| Enerdrive ePRO BM | ~$160 | Wired display, relay output |
| REDARC Battery Status Indicator | ~$90 | Basic voltage, simple to read |
| KickAss BMS display | Included | Built into KickAss lithium batteries |
The Victron BMV-712 is the most popular choice in the Australian touring community — the Bluetooth app gives you a live SoC percentage and 30-day history on your phone.
Wiring, Fuses, and Cable Sizing
Electrical fires in camper trailers almost always trace back to undersized cables, missing fuses, or corroded connections. The three rules:
Rule 1: Fuse within 150mm of the battery positive terminal. Every circuit must be protected by a fuse or circuit breaker close to the energy source, not close to the load.
Rule 2: Size cable for the continuous current draw, not the fuse. A 40A DC-DC charger needs cable rated for 40A continuous — that is 6B&S (6mm²) for runs under 3m, or 4B&S (4mm²) for longer runs. Main battery cables to a bus bar typically run 35–50mm² (2 AWG to 1/0 AWG).
Rule 3: Keep voltage drop under 3%. Over a long cable run, resistance causes voltage to drop at the load end. For a 12V system, 3% = 0.36V drop maximum. Use online voltage drop calculators to verify your cable sizes.
Common cable sizing guide
| Load | Typical current | Minimum cable (mm²) | Fuse rating |
|---|---|---|---|
| LED lighting circuit | 5–10A | 1.5mm² | 10A |
| Water pump | 8–12A | 2.5mm² | 15A |
| 40L–60L compressor fridge | 4–8A avg, 15A peak | 6mm² | 20A |
| 40A DC-DC charger | 40A | 6mm² (short), 4mm² (long) | 50A |
| 1,000W inverter | 90A peak | 16mm² | 100A |
| Main battery cable | full bank current | 35mm² minimum | 150–300A ANL |
Anderson plugs between tow vehicle and trailer are rated by colour: grey 50A is the Australian standard for most dual-battery connections; red 50A is also common; 120A grey/black plugs handle high-current DC-DC charger runs.
Breath Trailer Power Systems by Model
All four Breath Trailer models include a factory-wired 12V electrical system. Here’s how the power setup scales across the range.
| Model | Battery | Solar | MPPT controller | DC-DC charger | Inverter | 240V shore power |
|---|---|---|---|---|---|---|
| Essential $19,990 | 100Ah AGM | 120W rigid | 20A MPPT | Via Anderson plug | Optional | Optional add-on |
| Plus $25,740 | 100Ah LiFePO4 | 160W rigid | 20A MPPT | 20A DC-DC | Optional | Optional add-on |
| Ultra $30,290 | 200Ah LiFePO4 | 200W rigid | 40A MPPT | 40A DC-DC | Optional | Included |
| Max $39,000 | 200Ah LiFePO4 | 200W rigid | 40A MPPT | 40A DC-DC | 1,000W PSW | Included |
The Breath Max is the only model in the range with a full interior bathroom, which adds a 12V pressure-pump water system and a grey-water holding tank — both drawing from the 200Ah LiFePO4 bank. The Breath Ultra adds an external hot-water shower powered from the same bank. The Breath Plus is the entry point for serious off-grid touring with a compressor fridge included.
For a complete off-grid duration calculation — how many days each model can operate without a powered site — see How Long Can You Stay Off-Grid?.
Complete System Budget by Camping Style
These figures cover the auxiliary power system only — not the trailer purchase price. Many items below are already included in factory-fitted Breath Trailer builds.
| Component | Weekend (basic) | Tourer | Full-timer |
|---|---|---|---|
| Battery (100Ah AGM) | $200 | — | — |
| Battery (100Ah LiFePO4) | — | $450 | — |
| Battery (2× 200Ah LiFePO4) | — | — | $1,800 |
| Solar panels (120W rigid) | $150 | — | — |
| Solar panels (200W rigid) | — | $300 | $300 |
| Solar panels (200W folding, extra) | — | — | $350 |
| MPPT controller 20A | $100 | — | — |
| MPPT controller 40A | — | $180 | $180 |
| DC-DC charger 20A | — | $190 | — |
| DC-DC charger 40A | — | — | $280 |
| 1,000W pure sine inverter | — | $250 | $250 |
| 240V mains charger 20A | — | $240 | $240 |
| Battery monitor (BMV-712) | — | $180 | $180 |
| Wiring, fuses, Anderson plugs | $80 | $150 | $250 |
| Total system cost (approx.) | $530 | $1,940 | $3,830 |
Add $200–$500 for installation labour if you have a licensed auto electrician wire the 240V components.
AS/NZS 3001.2 — The Compliance Standard You Need to Know
AS/NZS 3001.2:2022 covers the electrical installation of road vehicles with mains voltage equipment (240V AC). Key requirements relevant to camper trailers:
- Any 240V circuit must be installed by a licensed electrician or licensed auto electrician in Australia
- Shore power inlets must include an appropriate weatherproof enclosure and RCD protection
- All 240V wiring must be double-insulated or installed in conduit
- The trailer must display a compliance plate for 240V systems in most states
The 12V DC portion of a camper trailer’s electrical system is not covered by this standard — in most Australian states, you can legally DIY your 12V installation. But once you add a hard-wired inverter, 240V inlet, or mains charger, a licensed trade is required. Budget accordingly.
Frequently Asked Questions
Do I need a DC-DC charger if I already have solar?
Yes, in most cases. Solar and a DC-DC charger serve different charging windows: solar works when you are stationary in daylight; the DC-DC charger works when you are driving (often before sunrise or after dusk). Together they provide near-continuous replenishment. If your camping is entirely at sunny powered sites, you can skip the DC-DC charger — but for off-grid touring, both sources working in parallel are the right setup.
What is the difference between an MPPT controller and a DC-DC charger?
An MPPT (Maximum Power Point Tracking) charge controller manages power flowing from solar panels into your battery. A DC-DC charger manages power flowing from your tow vehicle’s alternator into your battery. They are two separate devices serving two separate charging sources — many camper trailers carry both.
Can I run an air conditioner off my 12V system?
A rooftop reverse-cycle air conditioner (e.g. Truma Aventa, Dometic RTX) draws 600–900W running, which means 50–75A from a 12V battery. Running one for eight hours overnight would consume 400–600Ah — far beyond a typical 200Ah bank. In practice, 12V air conditioning only works with very large battery banks (400Ah+), large solar arrays (600W+), or on a powered campsite. Most serious off-grid campers use a diesel air heater for winter warmth (Webasto, Eberspächer) and a 12V fan for summer cooling.
How long does it take to recharge a flat 200Ah lithium battery?
With a 40A DC-DC charger (driving): roughly 5 hours of towing from 10% to 100% SoC. With a 200W solar array (full sun day): approximately 6–8 hours in summer, 10–12 hours in autumn. With a 20A mains charger on shore power: 8–10 hours. Combine all three simultaneously and a very flat battery can recover in 3–4 hours of driving on a sunny day.
Is it safe to leave solar charging unattended?
Yes, provided you have a correctly sized and programmed MPPT charge controller. The controller’s bulk/absorption/float stages prevent overcharging. LiFePO4 batteries with internal BMS add a further layer of overcharge protection. The risk arises when a panel is connected directly to a battery without any controller — never do this.
Do I need a licensed electrician for my camper trailer’s 12V system?
For 12V DC only, no — most Australian states allow DIY 12V installations in vehicles. The moment you add any 240V AC component (mains charger, shore power inlet, hard-wired inverter), the work must be carried out by a licensed electrician or licensed auto electrician under AS/NZS 3001.2. Factory-built trailers like the Breath Trailer models handle this for you.
Conclusion
A well-designed camper trailer power system is not an afterthought — it is what separates a comfortable two-week off-grid trip from a two-night dash back to the caravan park. The system architecture is the same regardless of scale: battery bank in the middle, charged from solar above and the alternator via DC-DC while driving, topped up on powered sites when convenient, and discharged through a properly fused distribution board to your loads.
The numbers that matter most: your daily amp-hour consumption, your battery’s usable capacity at your chosen chemistry’s depth-of-discharge, and whether your solar harvest at your worst camping location exceeds your daily draw. Get those three right, and every other component decision flows naturally.
All four Breath Trailer models are delivered with a factory-wired, compliance-ready 12V electrical system — with 240V shore power and mains charger included in the Ultra and Max. If you want to explore which model suits your specific power needs and camping style, the comparison page walks through every spec side by side, or book a no-obligation consultation with the Breath Trailer team.
Recommended Reading
- Understanding Battery Chargers and DC-DC Chargers for Camper Trailers — how smart alternators work and which DC-DC charger to choose
- How Much Solar Do You Need for a Camper Trailer? — step-by-step sizing formula with city-by-city peak sun hours
- AGM vs Lithium Batteries for Camper Trailers — full cost-per-cycle analysis
- What Size Inverter Do You Need? — pure sine wave selection guide with appliance wattage table
- The Ultimate Off-Grid Camper Trailer Setup — system-by-system setup guide covering water, gas, comms, and toilet alongside power