How Much Solar Do You Need for a Camper Trailer? (Australia 2026)
Step-by-step solar sizing guide for Australian camper trailers: calculate your exact wattage from daily load, city sun hours, and battery ratio. Real numbers, no guesswork.
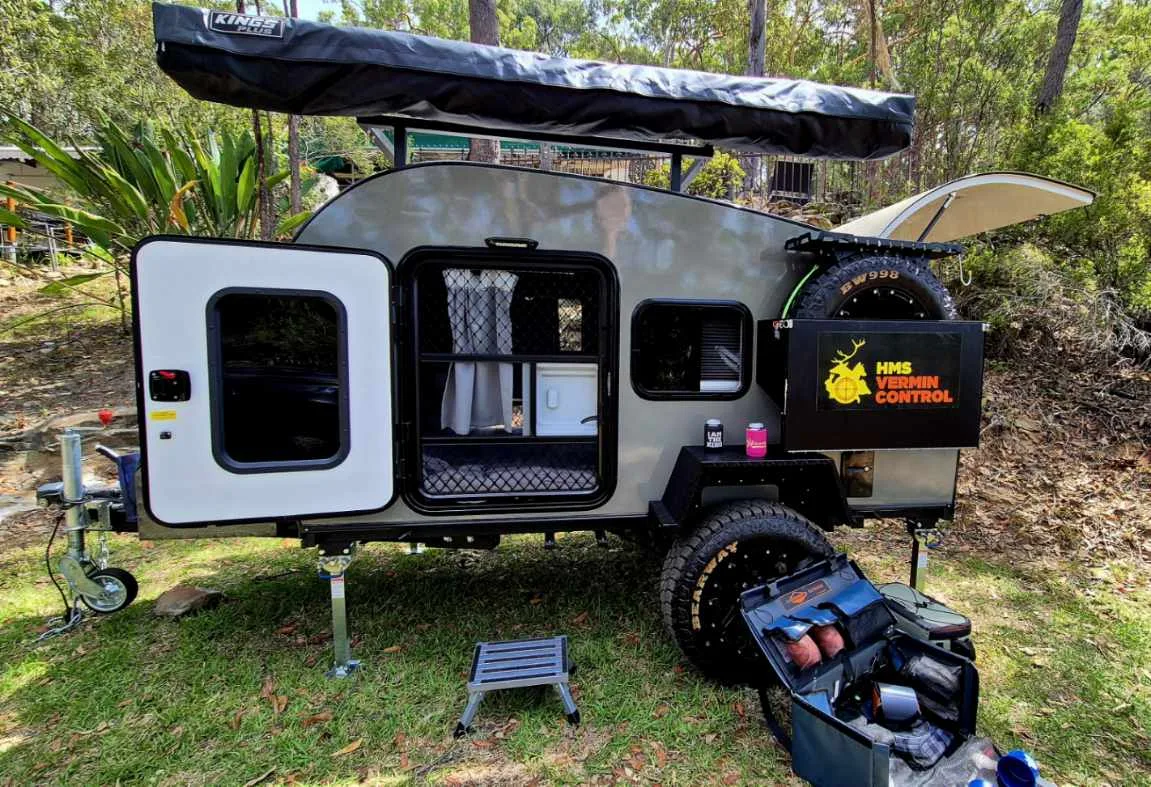
Most Australians buying their first camper trailer solar system make the same mistake twice: they go too small and end up with a flat battery by day two, then they overcorrect and spend $2,000 on panels they’ll never fully use. The answer isn’t guesswork — it’s a three-step calculation that takes about ten minutes and saves you from both mistakes.
This guide is a pure sizing guide. If you want to understand what each solar component does — panels, MPPT controllers, DC-DC chargers — start with our complete camper trailer solar systems guide. Come back here when you’re ready to answer the actual question: how many watts do I need?
Why Getting the Size Right Matters
Too little solar and the consequences are predictable: your fridge starts climbing in temperature on day three, your phone dies, and you’re either cranking a generator (goodbye to the quiet forest camp) or driving to a powered site. In outback Australia, where the next powered site might be 400 km away, an undersized system isn’t just inconvenient — it’s a planning failure.
Too much solar is a subtler problem. A 400W array on a camper that draws 300 Wh per day will charge your 100Ah battery by 9 a.m. and sit idle for the rest of the day. You’ve paid $600–900 extra for panels that spend most of their time doing nothing.
The goal is to size the solar to match your actual daily load, your location’s peak sun hours, and your battery capacity — not to a round number that felt impressive in the shop.
The Three-Step Solar Sizing Method
Step 1: Build Your Daily Power Budget
List every appliance you run, its wattage, and how many hours per day you run it. Multiply watts by hours to get watt-hours (Wh). Add them up for your daily total.
Here’s a realistic table for the most common camping loads:
| Appliance | Typical wattage | Hours/day | Daily Wh |
|---|---|---|---|
| 12V compressor fridge (40–45L) | 45W average | 24h cycling | 430–530 Wh |
| 12V compressor fridge (60–70L) | 60W average | 24h cycling | 570–720 Wh |
| LED interior lights (4 strips) | 20W | 4 h | 80 Wh |
| Phone charging × 2 | 10W | 2 h | 20 Wh |
| Laptop | 45W | 2 h | 90 Wh |
| 12V fan (hot nights) | 18W | 6 h | 108 Wh |
| Starlink Mini (active use) | 25W avg | 4 h | 100 Wh |
| Water pump | 60W | 0.25 h | 15 Wh |
| USB devices, misc | 10W | 3 h | 30 Wh |
Key note on the fridge: a 40L fridge isn’t running flat-out for 24 hours. It cycles — compressor on, compressor off. The “average wattage” above already accounts for typical cycling in 25°C ambient conditions. At 35°C (a common summer afternoon in inland Australia), that same fridge can draw 35–65% more — push the 40L to 650–800 Wh/day and the 60L to 900–1,100 Wh/day on hot days.
Three common daily budgets
| Profile | Loads included | Daily total (Wh) |
|---|---|---|
| Minimal (weekend warrior) | Small fridge + LED lights + phones | 500–650 Wh |
| Standard (touring couple) | Medium fridge + lights + phones + laptop + fan | 850–1,100 Wh |
| Heavy (full-timer / remote work) | Large fridge + all above + Starlink Mini | 1,100–1,500 Wh |
Step 2: Look Up Your Peak Sun Hours
Peak sun hours are not hours of daylight. A “peak sun hour” is the equivalent of one hour of sunlight at exactly 1,000 W/m² — the standard test condition for panel ratings. Sydney gets roughly 13 hours of daylight in summer but only 5–6 peak sun hours, because the sun is weaker in the morning and evening.
Peak sun hours vary enormously by city and season, and this single variable has the biggest impact on your required panel size.
| City | Winter (June–Aug) | Summer (Dec–Feb) | Annual average |
|---|---|---|---|
| Darwin | 5.8 | 5.5 | 6.0 |
| Brisbane | 4.2 | 6.0 | 5.2 |
| Perth | 3.8 | 7.0 | 5.6 |
| Adelaide | 3.5 | 6.8 | 5.4 |
| Sydney | 3.5 | 6.0 | 5.0 |
| Canberra | 3.2 | 7.0 | 5.0 |
| Melbourne | 2.8 | 6.5 | 4.5 |
| Hobart | 2.5 | 6.2 | 4.0 |
Source: Bureau of Meteorology solar exposure data; Renogy AU peak sun hours analysis.
The practical takeaway: size for winter if you camp year-round. A system that’s ample in Brisbane in December may leave you 30–40% short in Melbourne in July.
Step 3: Run the Sizing Formula
Once you have your daily load and your peak sun hours, the formula is:
Panel watts required = (Daily Wh × 1.25) ÷ (Peak sun hours × 0.75)
The 1.25 multiplier adds a 25% safety buffer for cloudy days, shading, and days when you use more than average. The 0.75 system efficiency factor accounts for real-world losses: heat derating (panels lose 0.3–0.5% efficiency per °C above 25°C), cable resistance, charge controller losses, and battery charging inefficiency.
Worked example — standard touring couple, Sydney, year-round camping:
- Daily load: 1,000 Wh
- Peak sun hours (conservative — Sydney winter): 3.5 hours
- Panel watts = (1,000 × 1.25) ÷ (3.5 × 0.75) = 1,250 ÷ 2.625 = 476W
Round up to the next practical size: 500W for year-round touring out of Sydney. This might surprise you — it’s more than most buyers expect. But use the summer figure (6.0 hours) and the same couple only needs 278W. The difference explains why summer-only campers get away with 200W and year-round tourers are on 400W+.
Three Worked Examples: Real-World Sizing
Example 1: Weekend Warrior (Minimal setup, warm-weather camping)
- Profile: Two people, one weekend per month, fridge + lights + phones, summer-only camping from Brisbane
- Daily load: 600 Wh
- Peak sun hours: 6.0 (Brisbane summer)
- Formula: (600 × 1.25) ÷ (6.0 × 0.75) = 750 ÷ 4.5 = 167W → round up to 200W
- Verdict: A 200W rigid panel on the roof is sufficient. Add a 100Ah LiFePO4 battery and you’re set.
Example 2: Regular Tourer (Standard couple, year-round camping, multiple states)
- Profile: Couple on 4–8-week trips, medium fridge, laptop, occasional fan, camping across NSW and Victoria including winter
- Daily load: 1,000 Wh
- Peak sun hours: 3.5 (conservative — Victorian winter)
- Formula: (1,000 × 1.25) ÷ (3.5 × 0.75) = 1,250 ÷ 2.625 = 476W → 300W roof + 120W foldable mat = 420W total
- Verdict: 300W roof panel plus a portable 120W folding mat gives the flexibility to chase the sun when parked under trees. Budget 150Ah LiFePO4 for comfortable two-night autonomy.
Example 3: Full-Timer / Remote Worker (Heavy load, extended remote trips)
- Profile: Solo remote worker, Darwin-to-Hobart lap, large fridge, Starlink Mini 4 hours daily, laptop 6 hours, overnight CPAP machine (60W for 8 hours = 480 Wh)
- Daily load: 1,500 Wh (including CPAP)
- Peak sun hours: 3.5 (worst case — Hobart, Tasmania)
- Formula: (1,500 × 1.25) ÷ (3.5 × 0.75) = 1,875 ÷ 2.625 = 714W → 400W roof + 200W portable mat
- Verdict: 600W total provides comfortable headroom. Pair with 200Ah LiFePO4 (usable 180Ah) and a quality REDARC BCDC unit so the alternator tops up the bank on each driving day.
The Battery-to-Solar Ratio
Solar panels and batteries are a team — sizing one without the other breaks the system. Two rules of thumb used by Australian 12V installers:
Rule 1: Aim for roughly 5–10W of solar per 10Ah of battery.
- 100Ah LiFePO4 → 50–100W minimum solar
- 150Ah LiFePO4 → 75–150W minimum solar
- 200Ah LiFePO4 → 100–200W minimum solar
Too little solar and the battery never fully charges, shortening its cycle life. Too much solar and the bank reaches 100% by mid-morning and your controller simply dumps the excess power.
Rule 2: Your battery should hold at least two nights of consumption without solar.
- 1,000 Wh/day couple → 2,000 Wh storage needed → 167Ah LiFePO4 (2,000 ÷ 12 ÷ 0.99 usable capacity) → round to 200Ah
- This gives you flexibility on overcast days without a flat battery.
For a deep dive on battery chemistry and why lithium changes the calculation, see our AGM vs lithium battery guide and how lithium changed camping in Australia.
Seasonal Sizing: Australia’s Summer-Winter Gap
Australia’s solar diversity is extraordinary. The same 200W panel can generate very different amounts of usable energy depending on where you’re camped and what month it is.
| Scenario | Daily Wh generated (200W panel) |
|---|---|
| Perth, February (7.0 peak hours × 0.75) | 1,050 Wh |
| Brisbane, November (6.0 × 0.75) | 900 Wh |
| Sydney, October (5.5 × 0.75) | 825 Wh |
| Adelaide, July (3.5 × 0.75) | 525 Wh |
| Melbourne, July (2.8 × 0.75) | 420 Wh |
| Hobart, June (2.5 × 0.75) | 375 Wh |
A couple running 800 Wh/day is perfectly covered by 200W in Perth in February (1,050 Wh generated) but short by 425 Wh every day in Hobart in June. That shortfall is roughly two thirds of their fridge’s daily draw — the fridge contents will be warm within 36 hours.
Practical strategies for winter camping:
- Add a portable folding mat (120–160W) as supplementary capacity you deploy only when needed
- Run high-draw appliances (kettle, laptop) during the sunny window (10 a.m.–2 p.m.) when the panels are generating
- A DC-DC charger means every day you drive adds 20–40A back to the battery — a 200km drive day effectively gives you a full charge regardless of solar
To understand exactly how many days off-grid your complete system supports, see our off-grid duration calculator.
6 Common Solar Sizing Mistakes
1. Sizing for summer and camping in winter
The single most common mistake. A 200W system that keeps you comfortable in Queensland in December can leave you flat in Victoria in August. If you camp more than two states, size for the lowest expected sun hours — typically 3.0–3.5 hours.
2. Ignoring heat derating in summer
Solar cells lose roughly 0.3–0.5% of their rated output for every °C above 25°C. On a 40°C summer day in outback NSW, a rigid panel installed flush on a dark-coloured roof can hit 65–75°C — reducing its output by 12–25% below the rated wattage on the sticker. This is why an air gap under rigid panels matters, and why flexible panels (no air gap possible) run hotter and degrade faster.
3. Treating rated watts as real watts
A “300W panel” only produces 300W under Standard Test Conditions (1,000 W/m², 25°C cell temperature). Real-world output at midday in summer Australian conditions is typically 65–80% of the rated figure before controller and cable losses. The 0.75 system efficiency factor in the formula already accounts for this — don’t double-count it, but do understand why your panel never reads “300W” on your Victron app.
4. One shaded cell = 50%+ output loss
Solar cells in a standard panel are wired in series. One cell under shade — a gum branch, a roof rack cross-bar, a camp chair leaning against the trailer — drops the whole string’s output dramatically. MPPT controllers with multiple maximum power point trackers (like the Victron SmartSolar 100/20) partially compensate, but panel placement matters. Position your panel where it gets uninterrupted sun from 9 a.m. to 3 p.m.
5. Using a cheap PWM controller with a 200W+ panel
A PWM (Pulse Width Modulation) controller at a 200W panel can waste 20–30% of the energy your panel generates — particularly in the early morning and late afternoon hours when voltage is highest relative to current. The MPPT vs PWM comparison shows this clearly: a $30 PWM controller costs you more in wasted energy in the first season than the $80–120 price difference of an MPPT unit. Buy MPPT for any panel 100W or larger.
6. Cable undersizing
A 5-metre run from panel to battery on 4mm² cable can lose 8–12% of your panel’s output in resistive voltage drop. Use a minimum of 6mm² cable for runs up to 5m and 10mm² for 5–10m. Voltage drop calculators are freely available — Solar 4 RVs offers a reliable one. The cable is cheap; the energy you lose daily for 10 years is not.
What You Get at Each Price Point
Here’s what a complete solar upgrade (panel + controller + installation hardware, not including battery) realistically costs in Australia in 2026:
| System size | Panel cost (rigid monocrystalline) | MPPT controller | Total installed est. | Best suited to |
|---|---|---|---|---|
| 100W | $130–200 | $80–120 | $300–450 | Trickle charge, short weekend trips, very light load |
| 200W | $250–380 | $100–150 | $500–700 | Weekend warriors, summer camping, single camper, small fridge |
| 300W | $380–550 | $130–200 | $700–1,000 | Regular tourers, couple with medium fridge and laptop |
| 400W | $500–750 | $170–250 | $900–1,300 | Year-round travellers, larger battery, inverter use |
| 400W + 120W mat | As above + $300–450 mat | Same | $1,200–1,750 | Full-timers, remote work, winter camping in southern states |
Prices sourced from KickAss Products, Solar 4 RVs, and Outbax — verified July 2026.
Add $150–400 for professional installation if you’re not doing it yourself. DIY is absolutely achievable with a rooftop rigid panel (the bracket kits are straightforward), but the DC-DC charger wiring is best left to a 12V auto electrician on first install.
How the Breath Trailer Models Handle Solar
The four Breath Trailer models ship with different standard electrical configurations, which directly affects how much supplementary solar you might need.
| Model | Standard solar | Standard battery | DC-DC charger | What’s included |
|---|---|---|---|---|
| Essential $19,990 | None (solar-ready wiring) | 24Ah AGM | Optional | Pre-wired for easy upgrade |
| Plus $25,740 | 120W rooftop rigid | 120Ah LiFePO4 | REDARC BCDC | Fridge and 12V fridge included |
| Ultra $30,290 | 180W rooftop rigid | 120Ah LiFePO4 | REDARC BCDC | External shower; 120W mat optional upgrade |
| Max $39,000 | 200W rooftop rigid | 200Ah LiFePO4 | REDARC BCDC | Interior bathroom; self-contained for free camping |
The Plus and Ultra at 120W and 180W are well-matched for weekend and warm-season touring. For year-round travellers or remote workers, adding a 120W foldable mat to the Ultra (total 300W) brings it into the “regular tourer” bracket from the formula above. The Max at 200W and 200Ah battery is the most capable out of the box — sized for self-contained free camping where you may park for three or four days between towns.
The Essential is the only model without standard solar. It ships with pre-wired cable runs to the roof and a solar blanket connection point on the drawbar, making it the easiest to self-upgrade without any drilling. A 200W panel, 30A MPPT controller, and 100Ah LiFePO4 upgrade costs roughly $700–1,100 installed and transforms an entry-level setup into a capable weekend off-grid rig.
For more on choosing the model that matches your camping style, see our off-grid teardrop camper guide or the full model comparison.
Frequently Asked Questions
Is 200W enough solar for a camper trailer in Australia?
For most weekend warriors camping in summer in Queensland or Western Australia, yes. A couple running a 40L fridge, LED lights, and phone charging (about 550–650 Wh/day) can stay comfortable with 200W and a 100Ah LiFePO4 battery in conditions with 5+ peak sun hours. In winter, south of Brisbane, or with a laptop in the mix, you’ll want 300W minimum.
What is the best solar panel size for off-grid camping?
There’s no single “best” size — it depends on your daily load and where you camp. The three-step formula above gives you an exact number. As a rough guide: 200W suits weekend warriors, 300W suits regular tourers, 400W+ suits full-timers or remote workers. Size to your lowest expected sun hours if you travel multiple states.
Can I run a 12V fridge on 100W solar?
Barely, and only in ideal conditions. A 40L 12V fridge draws roughly 430–530 Wh/day at 25°C ambient. A 100W panel at 75% efficiency in 5 peak sun hours generates about 375 Wh — already short. In any warmth above 30°C (common across most of Australia in summer), your fridge draws more and your panel produces less. 200W is the practical minimum for reliable fridge operation, with 300W recommended for consistent results across seasons.
Do I need MPPT if I only have one 100W panel?
Yes. A quality MPPT controller on a 100W panel costs $80–120 and recovers 20–30% more energy than a $30 PWM unit — that’s an extra 75–100 Wh per day in real conditions. The payback period at $0.30/kWh for the equivalent powered-site electricity is about 18 months. Over the 5–10 year lifespan of your panel, an MPPT controller adds thousands of amp-hours to your usable harvest.
How much does a complete 300W camper trailer solar system cost in Australia in 2026?
Budget $800–1,200 for a 300W monocrystalline panel, a quality MPPT controller (30A Victron or Renogy Rover), mounting hardware, and cabling — before installation labour. Add $200–350 for a 12V auto electrician to connect the controller to your battery and check the cable runs. Total DIY: ~$800. Professionally installed: ~$1,100–1,500. This assumes you already have a suitable battery — add $500–800 for a 120–150Ah LiFePO4 if upgrading from a small AGM.
Conclusion: Size It Once, Get It Right
The most expensive solar system is the one you buy twice. Run the three-step formula with your real daily load, the worst-case peak sun hours for where you actually camp, and the 25% safety buffer. The result will almost certainly be larger than your first instinct — and smaller than whatever a shop tries to sell you if you just ask “what do most people buy?”
For a standard touring couple going year-round across multiple states, 300W is the honest starting point. Weekend warm-season campers genuinely get away with 200W. Full-timers and remote workers should plan for 400W+ plus a portable mat.
Once you know your wattage, choosing the right panel type and controller is straightforward — our solar systems guide covers those decisions in detail. And when you’re ready to see exactly how long your complete setup keeps you off-grid, our off-grid duration guide runs the full water-food-power calculation.
If you’re looking at a Breath Trailer, all four models are solar-ready from the factory, with the Plus, Ultra, and Max including integrated MPPT charging and LiFePO4 batteries as standard. Compare the models or book a viewing to talk through your specific off-grid setup with our team.
Prices and sun-hour data current as of July 2026. Panel specifications and system costs may vary by retailer and installation complexity.