Understanding Camper Trailer Solar Systems: A Complete Guide for Australians (2026)
A practical guide to camper trailer solar systems in Australia — sizing panels, choosing charge controllers, batteries, and DC-DC chargers, explained clearly for 2026.
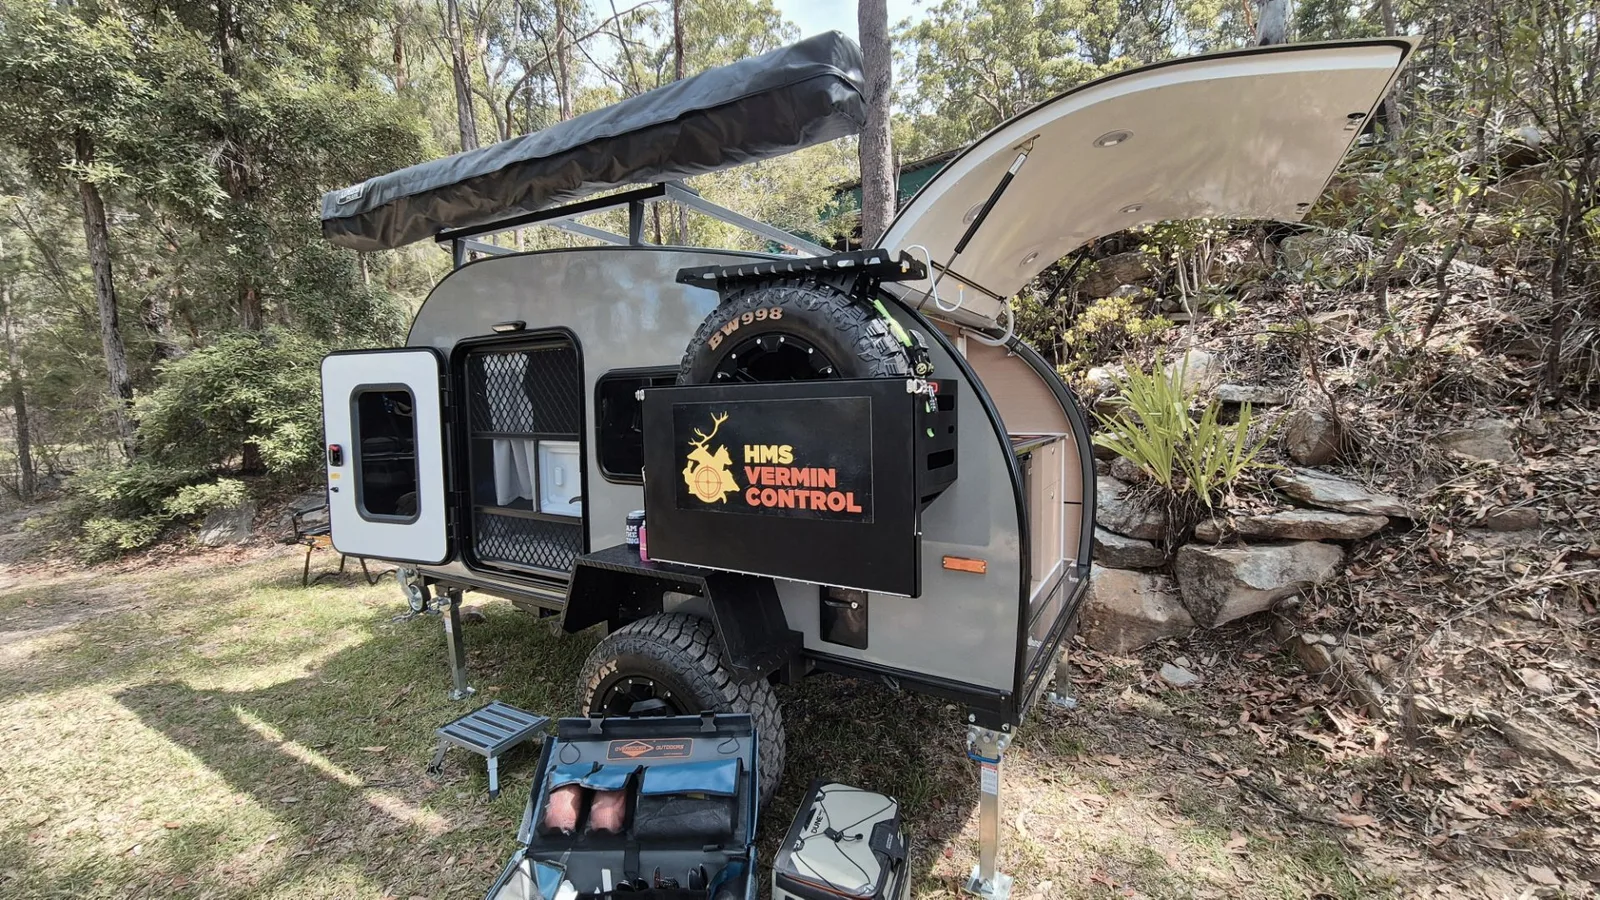
Most of Australia receives between 4 and 6 peak sun hours per day — one of the highest solar resources of any inhabited continent on earth. That number is the reason solar power has quietly become the default choice for Australian campers who want to leave powered sites behind. A properly sized solar system means no generator noise, no site fees, and no hunting for a powered spot on a crowded long weekend.
Yet the question we hear most often from buyers isn’t “should I fit solar?” — it’s “how does it all work, and how much do I actually need?” Inverters, MPPT controllers, DC-DC chargers, and amp-hour calculations can feel like a second trade to learn. This guide cuts through the jargon and explains exactly what each component does, how to size a system for your camping style, and what the Breath Trailer models come with out of the box.
Why Solar Works So Well in Australia
The physics are straightforward. Solar panels produce direct current (DC) electricity when sunlight hits them. That electricity charges a deep-cycle battery, which then powers your 12V appliances — fridge, lights, fan, USB charging — around the clock, day or night, sunny or cloudy.
What makes Australia exceptional is the combination of solar resource and camping culture. The CSIRO estimates that most Australian inland and coastal regions see 4–6 peak sun hours per day across the year, with northern regions hitting 6–7 hours in dry season. A 200W panel in Queensland or outback NSW is genuinely producing in the 130–160W range at midday, even accounting for heat derating and cable losses.
Add to that the fact that free and low-cost dispersed camping is available on crown land and state forests across every state, and the maths become compelling fast. A single weekend on a powered site at $40–70 per night will pay for a basic solar panel in under a season.
The Four Core Components of a Camper Trailer Solar System
Every 12V solar system — from a weekend warrior’s simple setup to a full-timer’s off-grid rig — relies on the same four building blocks:
- Solar panels — convert sunlight into DC electricity
- Charge controller — regulates the current flowing into the battery to prevent overcharging and damage
- Battery bank — stores the energy for use when the sun isn’t shining
- DC-DC charger — charges the trailer battery from your tow vehicle’s alternator while driving
Understanding what each component does (and why sizing matters) is the difference between a system that keeps you comfortable for a week off-grid and one that leaves your fridge warm by day three.
Solar Panel Types: Rigid, Flexible, and Foldable
Three formats dominate the Australian camper trailer market, and each suits a different situation.
| Feature | Rigid (Glass) | Flexible (ETFE) | Foldable/Portable |
|---|---|---|---|
| Efficiency | 20–23% | 15–18% | 18–22% |
| Lifespan | 25+ years | 10–15 years | 5–10 years |
| Weight (200W) | ~14–18 kg | ~4–6 kg | ~6–8 kg (folded) |
| Roof profile | Flat/angled only | Curved surfaces | Deployable anywhere |
| Cost per watt | Lowest | Moderate | Highest |
| Heat dissipation | Excellent (air gap) | Poor (conducts into roof) | Good (angle to sun) |
| Best for | Permanent roof mount | Contoured surfaces | Portable/flexible camping |
Rigid panels are the workhorses of permanent installations. Monocrystalline rigid panels (21–24% efficiency) generate the most power per square metre and last longest. The aluminium frame allows an air gap between the panel and the roof, which keeps the cells cooler and maintains efficiency — solar cells lose roughly 0.3–0.5% efficiency for every degree above 25°C.
Flexible panels are thinner and lighter, and can curve to fit a contoured roof. The trade-off is that they sit flush against the surface with no air gap, which means they run hotter and degrade faster. Expect around 15–18% efficiency and a realistic lifespan of 10–15 years under Australian sun.
Foldable panels are the most portable option — ideal for campers who want to deploy at the perfect angle or move the panel to chase the sun around the site. They’re the most expensive per watt and the most fragile over time (the hinge joints are a common failure point), but for weekend campers or those adding supplementary capacity they’re hard to beat.
For a hard-shell teardrop trailer with a flat or slightly angled roofline, a rigid monocrystalline panel is almost always the best permanent choice. Supplement it with a foldable mat for cloudy days or winter camping if you need extra grunt.
How Much Solar Do You Actually Need?
The single most important step is calculating your daily energy consumption before buying panels. The formula is:
Daily consumption (Wh) ÷ Peak sun hours ÷ system efficiency factor = Panel watts required
Step 1: Estimate your daily consumption
| Appliance | Typical wattage | Hours/day | Daily Wh |
|---|---|---|---|
| 12V compressor fridge (40L) | 45W avg | 12 | 540 Wh |
| 12V compressor fridge (60L) | 55W avg | 14 | 770 Wh |
| LED interior lights (4 strips) | 20W | 4 | 80 Wh |
| Phone charging (2 phones) | 10W | 2 | 20 Wh |
| Laptop | 45W | 2 | 90 Wh |
| 12V fan | 18W | 6 | 108 Wh |
| USB devices, misc | 10W | 3 | 30 Wh |
| Total (fridge + basics) | ~870 Wh |
A couple running a 60L fridge, lights, two phones, and a laptop will burn through roughly 800–950 Wh per day. Add a 12V fan for summer nights and you’re pushing 1,000 Wh.
Step 2: Apply the sizing formula
Using 5 peak sun hours (conservative average for most of Australia) and a real-world system efficiency of 75% (accounting for heat derating, cable losses, and controller efficiency):
950 Wh ÷ 5 hours ÷ 0.75 = 253W of panels required
Round up to the next standard size — a 300W system is the practical minimum for this load. Most experienced campers add 20–30% headroom for cloudy days.
Step 3: Match to camping style
| Camping style | Daily load | Recommended solar | Recommended battery |
|---|---|---|---|
| Weekend warrior (fridge + basics) | 400–600 Wh | 150–200W | 100Ah LiFePO4 |
| Regular tourer (couple, fridge + laptop) | 700–1,000 Wh | 250–350W | 120–150Ah LiFePO4 |
| Extended remote travel (all loads) | 1,000–1,400 Wh | 350–500W | 200Ah+ LiFePO4 |
| Full-timer / inverter AC use | 1,400 Wh+ | 500W+ | 300Ah+ LiFePO4 |
Sizing Your Charge Controller: MPPT vs PWM
The charge controller sits between the solar panels and the battery. Its job is to regulate the incoming current so the battery charges correctly without being damaged. There are two technologies: PWM (Pulse Width Modulation) and MPPT (Maximum Power Point Tracking).
| Feature | PWM | MPPT |
|---|---|---|
| Efficiency | 70–75% | 93–97% |
| Output boost vs PWM | Baseline | 20–30% more usable power |
| Cost (20A unit) | ~$30–70 | ~$80–200 |
| Panel voltage flexibility | Must match battery voltage | Works with higher-voltage panels |
| Best for | Small systems (<100W), budget installs | Any system 100W+ |
| Recommended for Breath Trailer | Essential (24Ah system) only | Plus, Ultra, Max (120Ah systems) |
The verdict for 2026: always choose MPPT for any system 100W or larger. The price difference on a quality 20A unit is $50–100. That gap is recovered in weeks from the extra charging efficiency, particularly in the early morning and late afternoon hours when PWM controllers waste most of their potential.
Sizing the controller amperage
Use the formula: Panel Watts ÷ Battery Voltage × 1.25 (safety margin) = Minimum controller amps
- 200W ÷ 12V × 1.25 = 20.8A → choose a 30A controller
- 300W ÷ 12V × 1.25 = 31.25A → choose a 40A controller
- 400W ÷ 12V × 1.25 = 41.7A → choose a 50A controller
Always round up to the next standard amperage. A controller running at 80–85% of its rated current runs cooler and lasts longer than one running flat out.
Reliable MPPT controllers used by Australian installers include the Victron SmartSolar range, Renogy Rover series, and REDARC’s integrated BCDC units, which combine the MPPT controller with a DC-DC charger in one compact box.
Charging While You Drive: The DC-DC Charger
One component that confuses first-time buyers is the DC-DC charger. Here’s why it matters.
When you tow a camper trailer, the 7-pin flat plug provides a small trickle charge to the trailer battery — typically 5–10A, barely enough to offset parasitic drain, let alone replenish a 120Ah lithium bank. Modern vehicles with smart alternators (most post-2017 Euro and Japanese SUVs) make this worse by actively reducing output voltage when they detect a “charged” state, which confuses AGM and lithium battery chemistry and can leave your trailer battery significantly undercharged at the end of a long drive.
A DC-DC charger (also called a DCDC or B2B charger) solves this by drawing from the tow vehicle’s alternator and stepping the voltage up to the correct charging profile for your trailer battery type — delivering 20–40A of proper bulk charge while you drive.
The REDARC BCDC Trailer S is one of the most popular options in Australia for teardrop and camper trailer applications. It combines a DC-DC charger, MPPT solar regulator, and smart battery isolator in a single compact unit, connected via an Anderson plug on the drawbar. Anderson plugs — the large grey or blue SB50 connectors — are the Australian standard for high-current 12V connections between tow vehicle and trailer.
A typical dual-input setup in a Breath Trailer:
- 50A Anderson plug connects tow vehicle alternator → REDARC BCDC → trailer battery
- Solar panel → REDARC BCDC MPPT input → trailer battery (Green Power Priority: solar charges first, alternator supplements)
- Battery → fridge, lights, USB, inverter
This means the system intelligently prioritises solar while the trailer is stationary and switches to alternator charging while driving — maximising free energy from both sources.
Battery Selection for Solar Storage
Your battery is the system’s fuel tank. The two technologies available in 2026 are AGM (Absorbent Glass Mat lead-acid) and lithium iron phosphate (LiFePO4). We’ve covered this topic in depth in our guide to how lithium batteries changed camping in Australia — below is a summary relevant to solar storage specifically:
| Metric | AGM | LiFePO4 |
|---|---|---|
| Usable capacity | 50% (50Ah from 100Ah) | 95–100% (95Ah from 100Ah) |
| Cycle life | 300–500 cycles | 2,000–4,000+ cycles |
| Weight (100Ah) | ~28–32 kg | ~12–14 kg |
| Charge acceptance (solar) | Tapers above 80% | Accepts full current to 95% |
| 2026 price (100Ah) | ~$150–250 | ~$400–700 |
| Solar compatibility | Good | Excellent |
For solar storage, LiFePO4 has a decisive advantage: it accepts the full current from your solar panels right up to near-full charge, where AGM batteries begin tapering acceptance from about 80% state of charge. This means on a good solar day, a lithium battery finishes bulk charging earlier, allowing more time in absorption — and you start the following morning with a genuinely full battery rather than one stuck at 85%.
The Breath Plus, Ultra, and Max all ship with a 120Ah lithium battery as standard — 114Ah of usable capacity, enough for 2–3 nights off-grid without solar on a typical couple’s load, or indefinitely with adequate solar input.
How Breath Trailer Models Approach Solar
Rather than offering a confusing options list, Breath Trailer keeps the electrical architecture simple across the range:
| Model | Battery | Solar | Charge controller | Inverter | Best for |
|---|---|---|---|---|---|
| Essential ($19,990) | 24Ah lithium | Optional (add-on) | Optional | Optional | Occasional camping, powered sites |
| Plus ($25,740) | 120Ah lithium | Included | Bat Box (solar controller) | Included | Off-grid weekends, couples |
| Ultra ($30,290) | 120Ah lithium | Included | Battery box + controller | 240V included | Extended off-grid, external shower |
| Max ($39,000) | 120Ah lithium | Included | Battery box + controller | 1,000W included | Self-contained, grey nomads, Big Lap |
The Breath Essential is designed for buyers who want to start light and add solar later, once they know their actual needs. The Breath Plus is the most popular choice for couples wanting off-grid capability straight out of the box. The Breath Ultra adds a 60L fridge, awning, and external shower alongside the same 120Ah/solar stack. The Breath Max includes a 1,000W inverter for appliances, interior bathroom, and a standing-height interior — the most power-demanding load profile in the range, and the one that benefits most from supplementary solar panels added by owners over time.
For buyers planning serious off-grid teardrop camping — weeks at a time in outback Queensland or the Kimberley — adding a second 100–200W foldable panel via the Anderson input on the Plus, Ultra, or Max is the single most effective upgrade you can make.
Installation: What You Need to Know
In Australia, 12V solar installations in caravans and camper trailers are governed by AS/NZS 3001.2 (Electrical Installations in Caravans and Motorised Vehicles). Key points:
- Wiring must be sized to handle the expected current without excessive voltage drop (typically ≤3% voltage drop for 12V circuits)
- Connections must be protected against short circuit by fuses or circuit breakers installed as close as practical to the battery
- Minimum cable size for a 50A Anderson plug circuit: 6mm² (B&S 10 AWG equivalent), no longer than 5–6 metres from battery to plug to minimise voltage drop
- A qualified electrician or licensed caravanning electrical installer should sign off on any fixed wiring work
DIY vs professional: wiring a foldable portable panel through an Anderson plug input is a DIY-friendly task. Installing a fixed roof-mounted panel with roof penetrations, DC-DC charger, and new wiring runs is better handled by a licensed auto electrician or caravan solar specialist.
Breath Trailer’s factory electrical systems are installed and tested before delivery. Owners adding supplementary solar capacity after purchase should engage a licensed auto electrician for any modifications to the fixed wiring.
Common Mistakes Australian Campers Make
1. Buying solar without calculating consumption first. A 100W panel sounds like a lot until you realise your 60L fridge alone is drawing 600–770 Wh per day. Always do the consumption maths first.
2. Using PWM controllers with large arrays. A PWM controller wasting 25–30% of your panel output is the equivalent of covering one panel with a tarpaulin. For anything over 100W, always use MPPT.
3. Ignoring the DC-DC charger. Relying on the 7-pin flat plug to charge a 120Ah lithium is like trying to fill a bath with a garden hose — it technically works, but barely. A REDARC BCDC or equivalent pays for itself within a season of touring.
4. Undersizing cable. Thin wire between the solar panel and controller creates voltage drop and heat. This reduces effective charging current and can be a fire risk. Use the correct gauge and keep runs as short as possible.
5. Skipping the battery monitor. Without a shunt-based battery monitor (like the Victron BMV-712 or SmartShunt), you’re flying blind on state of charge. Guessing your battery level by voltage is notoriously inaccurate, especially with lithium.
6. Aiming panels directly upward in summer. In midsummer across most of Australia, a tilted panel tracking the sun can generate 20–30% more daily energy than a flat-mounted panel. If your setup allows it, even a portable foldable supplement at 30–45° makes a real difference.
Frequently Asked Questions
How much solar do I need to run a 12V fridge in my camper trailer? A 40L 12V compressor fridge draws approximately 40–50W on average and runs 8–12 hours per day — roughly 400–600 Wh daily. To power it comfortably, plan for at least 150–200W of solar paired with 100Ah of lithium. In hot summer conditions, size up to 200–250W.
Can I add solar to a Breath Trailer later? Yes. All Breath Trailer models are designed with future solar in mind. The Essential can be ordered with solar as an option or upgraded post-delivery. The Plus, Ultra, and Max include factory-fitted solar and an Anderson input on the drawbar, making it straightforward to add a supplementary foldable panel.
What’s the difference between a solar controller and a DC-DC charger? A solar controller (MPPT or PWM) manages the current flowing from your solar panels into your battery. A DC-DC charger manages the current flowing from your tow vehicle’s alternator into your trailer battery while driving. They’re separate functions — though units like the REDARC BCDC combine both in one box.
Do I need an inverter if I have solar? Solar and your battery bank produce 12V DC power. An inverter converts this to 240V AC — needed for laptops with standard chargers, hair appliances, or any mains-voltage device. For most campers running only 12V appliances (fridge, lights, fans, USB), an inverter is optional. The Breath Plus, Ultra, and Max include inverters as standard.
Can my solar system charge from the tow vehicle while driving? Not directly through the panels — you need a DC-DC charger (or a smart isolator as a basic minimum) for that. With a REDARC BCDC or equivalent installed, your trailer battery charges from the alternator while driving and from solar when stationary, with the system automatically selecting the best source.
How many days can I camp off-grid without driving or extra solar? At a typical couple’s load of ~900 Wh/day and 120Ah lithium (usable 114Ah / ~1,368 Wh), you’ll get roughly 1.5 days on battery alone with no solar input. Add a single 200W panel with 5 peak sun hours generating ~750 Wh/day and you extend that to indefinite — the solar comfortably offsets daily consumption on most Australian days.
The Bottom Line
Australia’s combination of abundant sunshine, free camping on public land, and the practical demands of touring makes a well-designed solar system one of the best investments you can make in your camper trailer. The fundamentals are straightforward: calculate your daily consumption, size your panels with a 25% headroom buffer, choose MPPT over PWM for anything over 100W, and add a DC-DC charger if you’re doing multi-day drives between campsites.
For buyers choosing between Breath Trailer models, the Plus is the natural entry point for off-grid solar capability — lithium battery, solar panel, and inverter included from $25,740. Add a foldable supplement for extended remote trips and you’ll have a system capable of keeping you comfortable for weeks at a stretch, powered entirely by the Australian sun.
To see which model suits your camping style, visit our comparison page or book a tour of the factory to see the electrical setups in person.
Recommended Reading
- The Off-Grid Teardrop Camper Guide for Australia — power systems, self-containment, and free camping rules
- How Lithium Batteries Have Changed Camping in Australia — deep dive on LiFePO4 vs AGM chemistry
- The Ultimate Off-Grid Camper Trailer Setup — water, power, fridge, gas, and comms as a complete system
- Teardrop Camper Accessories Australia — solar panels, DC-DC chargers, fridges, and more with real AU prices
- Self-Contained Camper Australia — what self-containment means, CMCA rules, and free camping access