Why Wheel Bearings Matter on a Camper Trailer (Australia 2026)
How they fail, the warning signs, the service interval, and what a roadside failure actually costs.
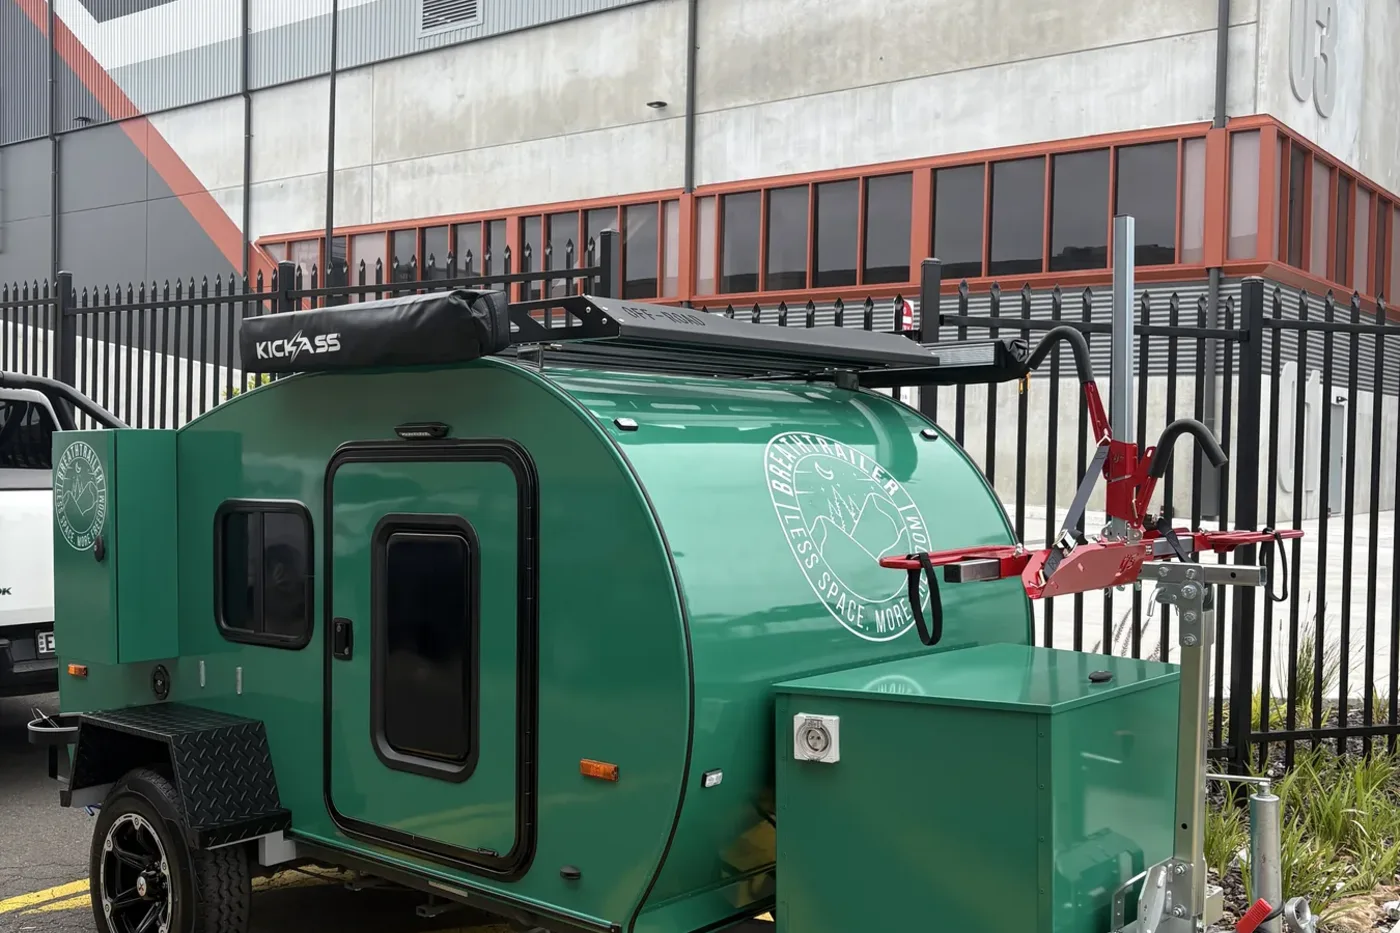
Every year, hundreds of Australians pull over on the side of the highway — or worse, on a remote outback track — to discover a wheel that’s impossibly hot, a hub that’s seized, or a trailer that’s sitting at a 10-degree tilt because the wheel has worked itself off the axle. In almost every case, the root cause is the same: a failed wheel bearing that was either never serviced or serviced at the wrong interval for Australian conditions.
Wheel bearings are the small, steel roller assemblies that sit between your trailer’s wheel hub and axle spindle. They allow the wheel to spin freely while supporting the entire weight of the loaded trailer. When they’re working properly, you never notice them. When they fail, the consequences range from a frustrating roadside repair to a fire, a jackknife, or a wheel separation at highway speed.
This guide covers everything an Australian camper trailer owner needs to know: how bearings work, which types are in your trailer, how to read the warning signs of failure, correct service intervals for Australian conditions, grease selection, DIY repack steps, and whether to handle it yourself or pay a specialist.
What Are Wheel Bearings and What Do They Do?
A wheel bearing sits inside your trailer’s wheel hub — the metal drum that mounts to the wheel — and rides on a hardened steel spindle that is part of the axle. The bearing allows the hub and wheel to rotate freely on the stationary spindle while carrying the full radial load (the weight of the trailer pressing down) and a degree of axial load (side forces from cornering).
Most Australian camper trailers use tapered roller bearings — a cone-shaped assembly of steel rollers arranged between an inner race (cone) and an outer race (cup). Each wheel hub carries two bearings:
- Inner bearing: The larger bearing, positioned toward the centre of the axle. It carries most of the radial (vertical) load.
- Outer bearing: The smaller bearing, closest to the outside of the hub. It mainly resists axial (lateral) forces.
Between the bearings and the atmosphere sits a rubber hub seal (also called a grease seal or lip seal) on the inner side. This seal keeps grease in and water, dirt and road grit out. On the outer side, a dust cap or bearing protector covers the outer bearing and castle nut that locks the bearing assembly in place.
The entire system is only as good as the grease between the rollers and races. Remove the grease — through heat breakdown, water contamination or simply running past the service interval — and metal-to-metal contact generates friction, heat, and ultimately failure.
Why Australia Is Hard on Trailer Bearings
Australian conditions are particularly punishing on wheel bearings. Understanding why makes it easier to calibrate your service intervals correctly.
Corrugated outback tracks create constant, high-frequency vibration. This causes “vibrational fretting” — a phenomenon where micro-bouncing repeatedly displaces grease from the contact zone between rollers and races. The grease doesn’t have time to flow back before the next impact. In these conditions, bearings can run dry far sooner than the kilometre figure on your service schedule suggests.
Coastal and marine environments are the other major hazard. Salt water is extraordinarily aggressive at corroding bare steel. Boat ramp launches are the highest-risk scenario: driving a hot hub into cold water creates a partial vacuum that can suck water past the hub seal — even a seal in good condition. Once salt water mixes with bearing grease, the grease turns milky, loses its lubricating properties, and accelerates corrosion on the bearing races.
Long highway distances in the Australian summer heat also matter. A fully-loaded camper trailer cruising at 100 km/h on a 40°C day generates significant bearing heat. Standard NLGI 2 grease starts to lose effectiveness at sustained temperatures above 120°C — a threshold that can be approached sooner than you think with heavy loads and high ambient temperatures.
| Environment | Primary risk | Recommended interval |
|---|---|---|
| Sealed roads, inland | Grease breakdown over time | Every 12 months or 20,000 km |
| Mixed sealed/gravel | Contamination + fretting | Every 6 months or 10,000 km |
| Corrugated outback tracks | Vibrational fretting | Every 2,500 km or after each trip |
| Coastal / boat ramp use | Salt-water contamination | Every 6 months (marine grease essential) |
| Overseas standard (default) | General wear | Every 12 months or 12,000 miles (~20,000 km) |
The short version: if you’re doing a Big Lap or spending weeks on unsealed outback roads, the “annual service” rule that works in the UK or USA is dangerously inadequate. Australian off-road travellers should inspect their bearings every 2,500 km and do a full repack every 5,000–6,000 km in those conditions.
For general trailer maintenance schedules covering brakes, water tanks, chassis and corrosion, see our teardrop camper maintenance guide for Australia.
Bearing Types: Holden vs Ford (and Why It Matters)
Most Australian camper trailers, caravans and box trailers are built on one of two axle standards — commonly called “Holden” and “Ford” after the vehicle platforms they were originally matched to. The bearings differ in size and bore diameter.
| Type | Inner bearing | Outer bearing | Hub stud pattern |
|---|---|---|---|
| Holden (LM series) | LM67048 (cone) / LM67010 (cup) | LM11949 (cone) / LM11910 (cup) | 5 × 114.3 mm |
| Ford (25xxx series) | 25580 (cone) / 25520 (cup) | LM12749 (cone) / LM12710 (cup) | 5 × 114.3 mm |
Holden-pattern axles are by far the most common in Australian-built camper trailers, caravans and light-duty trailers. The spindle bore is 31.75 mm (1.25 inches) for the inner and 19 mm (0.75 inches) for the outer. If you’re buying a replacement kit without knowing your trailer, Holden LM-series is the correct starting point for most Australian-market campers including Breath Trailer models.
Ford-pattern bearings (the 25580/25520 series) are found on some import trailers, older caravans, and trailers specced to 2,000 kg+ ATM where a larger bore is needed.
Composite kits combining LM67048 and LM12749 exist for trailers whose axles fall between the two standards. When in doubt, pull the dust cap, remove the outer bearing and measure the bore of the race.
Complete Holden bearing kits — inner cone, outer cone, cups and seal — are available from Australian retailers (BC Trailers, Bearings Express, Huntsman Products, Trailers R Us) for between $25 and $60 per wheel. Buying kits rather than individual bearings is cost-effective and ensures the cone/cup taper angles match. Never mix bearing components from different manufacturers within the same hub.
Warning Signs of a Failing Wheel Bearing
Bearing failure is rarely instantaneous. There is almost always a warning period — if you know what to look for.
The hub temperature test
After driving 30–40 km, stop and carefully rest your palm near (not on) each wheel hub. A correctly serviced bearing hub should be warm but comfortable — roughly body temperature or slightly above. A hub that’s too hot to hold your hand near for three seconds is running with insufficient or contaminated grease. A hub with a faint burning smell is likely approaching failure.
This test costs nothing and takes two minutes. Make it a habit every time you stop for fuel.
Noise and vibration
A low-frequency rumbling or grinding noise that varies with road speed (rather than engine speed) is the classic bearing warning. It may change in pitch when you change direction or road surface, or disappear then return — making it easy to dismiss. Don’t dismiss it.
A rhythmic humming that increases in frequency with speed can also indicate early bearing wear. More advanced failure produces a growling or roaring sound audible from inside the tow vehicle with the windows up.
Wheel play
With the trailer hitched to your tow vehicle and the handbrake on, jack one wheel off the ground and grasp it at the 9 o’clock and 3 o’clock positions. Push and pull along the horizontal axis — any perceptible movement indicates worn or incorrectly adjusted bearings. Repeat at 12 and 6 o’clock; vertical play suggests a very loose or badly worn assembly.
Visible grease leakage
Brown, dark or milky grease smeared on the inside of the wheel, brake drum or hub face is a clear indicator of a failed hub seal. Once the seal is gone, grit and water will have been entering the bearing assembly, and contaminated grease will have been purging outward. This is a service-now situation.
Summary of warning signs
| Warning sign | Severity | Action |
|---|---|---|
| Hub warm but comfortable | Normal | Continue; re-check after next trip |
| Hub too hot to hold | Early failure | Service within days; reduce distance |
| Rumbling/grinding noise | Early–moderate | Service immediately |
| Burning smell from hubs | Moderate–severe | Stop; do not continue towing |
| Grease visible on wheel/drum | Seal failure | Stop; call for assistance if remote |
| Wheel wobble or lateral play | Severe | Stop immediately; bearing failure imminent |
| Smoke from hub | Critical | Stop immediately; risk of wheel loss or fire |
A seized bearing can reach temperatures exceeding 200°C within minutes of grease failure. At those temperatures, the residual grease ignites, the seal melts, and the lubricant on the brake shoes is compromised. On a remote track, this is a trip-ending event; on a highway, it becomes a serious safety incident.
Bearing Grease: What to Use (and What to Avoid)
Grease selection is the most underrated variable in wheel bearing maintenance. The wrong grease — or incompatible greases mixed together — can cause premature failure even with correct service intervals.
The Australian standard
Use a quality NLGI No. 2 lithium-complex, high-temperature wheel-bearing grease with EP (extreme-pressure) additives and corrosion inhibitors. Look for these specifications on the product label:
- NLGI Grade 2 (consistency — not too soft, not too hard)
- Lithium complex or lithium soap base
- High-temperature rating: dropping point >260°C
- GC-LB rating (the NLGI’s highest certification for wheel-bearing and chassis grease)
- EP (extreme pressure) additives
Popular AU-available options include Castrol LM Grease, Shell Retinax LX2, Penrite Wheel Bearing Grease EP2, and IPLEX Lubricants Auto Wheel Bearing Grease.
For coastal and marine environments
If you tow to boat ramps, camp regularly at the beach, or have done water crossings, marine-grade bearing grease offers a step up in water resistance. Marine greases are formulated with water-insoluble bases that resist washout and provide superior corrosion protection against salt. Options include Lucas Oil Marine Grease, Star Brite Marine Wheel Bearing Grease, and Shell Gadus S2 V100 2.
Never mix grease types — e.g., lithium-based and calcium-soap-based greases — in the same hub without completely cleaning out the old grease first. Incompatible greases can degrade each other and produce a consistency that provides little lubrication at all.
| Grease type | Best for | Not suitable for |
|---|---|---|
| NLGI 2 lithium complex | Standard road use, inland travel | Marine/salt environments |
| NLGI 2 lithium complex EP | Off-road, heavy loads | Marine/salt environments |
| Marine-grade NLGI 2 | Coastal, boat ramps, water crossings | Extended use above 150°C continuous |
| Calcium-soap grease (old style) | Nothing modern | Do not use with lithium-based |
Bearing Protectors vs Standard Dust Caps
Most camper trailers leave the factory with a simple pressed-steel or plastic dust cap over the outer bearing. Dust caps work fine for sealed-road inland travel but have one significant weakness: when a hot hub is submerged in cold water — at a boat ramp, creek crossing or heavy rain — the rapid temperature drop creates a partial vacuum inside the hub that can draw water past the hub seal and under the dust cap.
Bearing protectors (the best-known brand in Australia is Bearing Buddy, but similar spring-loaded protectors are made by Trailer Buddy and other manufacturers) solve this by maintaining a constant +3 psi internal pressure inside the hub using a spring-loaded plate and a Zerk grease fitting. The positive pressure prevents water ingress by reversing the vacuum effect.
| Feature | Standard dust cap | Bearing protector |
|---|---|---|
| Cost | $3–$8 per wheel | $25–$65 per wheel |
| Grease top-up | Hub must be removed | Via Zerk fitting, no disassembly |
| Water ingress risk | Moderate–high (crossings) | Low (positive pressure) |
| Visual grease level check | Not possible | Yes (via sight window on some models) |
| Recommended for | Sealed-road inland trailers | Off-road, coastal, boat trailers |
Bearing protectors are worth the modest investment for any camper trailer used off sealed roads. They allow a quick grease top-up between full services — but note that adding grease via the Zerk is not a substitute for a full repack. You cannot see the condition of the grease inside or assess bearing wear without dismantling the hub.
Service Intervals: The Australian Rules
The global default recommendation is a full bearing repack every 12 months or 20,000 km, whichever comes first. This applies to trailers on sealed roads in benign conditions.
For Australian camper trailer use, apply the following:
Sealed-road, inland touring: 12 months or 20,000 km — standard interval applies.
Mixed touring (sealed + gravel tracks): 6–12 months or 10,000 km — halve the standard interval.
Serious off-road (corrugated outback, 4WD tracks): Inspect bearings every 2,500 km; full repack every 5,000–6,000 km or every trip, whichever is sooner. Check hubs after each day on corrugated roads.
Coastal and boat-ramp use: Full repack every 6 months regardless of kilometres, using marine-grade grease. Inspect hubs after every boat-ramp submersion.
Before any remote trip: Always inspect bearings before departing for remote areas where roadside assistance is unavailable or days away. A few minutes under the trailer at home beats being stranded on the Gibb River Road.
After any incident: Always inspect after a blowout (the sudden load redistribution and heat are hard on bearings), deep water crossing, or any event where the bearing ran hot.
Step-by-Step: DIY Bearing Repack
A full wheel bearing repack takes approximately 60–90 minutes per wheel for a first-timer. You need basic mechanical confidence — no special skills, but some patience and attention to cleanliness.
Tools and materials
- Jack and axle stands (never work under a trailer supported only by a jack)
- Socket set and torque wrench
- Large flat-head screwdriver and hammer
- Needle-nose pliers
- Wire brush, clean rags and a small container
- Kerosene (for cleaning) and brake cleaner spray
- Fresh bearing grease
- New hub seal and new cotter pin (always replace these; reusing is a false economy)
- Optional: bearing packer tool (speeds up the grease-packing step; ~$15 from Supercheap Auto)
Steps
- Loosen the wheel nuts before raising the trailer. Jack up one side and place axle stands.
- Remove the wheel, then pry off the dust cap (or bearing protector) with a large flat-head screwdriver.
- Remove the cotter pin (always use a new one on reassembly) and unscrew the castle nut.
- Slide off the outer bearing — keep it clean and aside.
- Pull the wheel hub assembly off the spindle. The inner bearing and hub seal will come with it.
- Tap out the hub seal from the inside and remove the inner bearing.
- Clean all components with a small brush dipped in kerosene: inside the hub, both bearings, races and spindle. Spray with brake cleaner and allow to dry completely.
- Inspect the bearings: Look for pitting, spalling (metal flaking), rust, discolouration or irregular wear on the rollers and races. If in doubt, replace the entire kit — bearing kits are $25–$60 and far cheaper than a failure.
- Pack the bearings: Force fresh grease into the bearing from the wide end, working around the cage until grease oozes out the narrow end. Coat the inside of the hub lightly with grease.
- Install the new hub seal: Tap it in squarely with a block of wood.
- Reassemble: Slide the inner bearing into the hub, push the hub onto the spindle, fit the outer bearing, and thread on the castle nut by hand.
- Adjust the preload: Tighten the castle nut firmly while rotating the hub, then back it off by one-eighth of a turn until the first hole in the spindle aligns with a notch in the nut. The hub should spin freely with no lateral play.
- Insert a new cotter pin and bend the ends back.
- Replace the dust cap or bearing protector.
- Refit the wheel, torque the nuts to the axle manufacturer’s spec.
- Drive 5–10 km and check hub temperature. Warm is normal; too hot to touch is not.
DIY vs Professional: What Does It Cost?
| Service option | Cost per axle (1 hub) | Cost per axle (2 hubs) | Time |
|---|---|---|---|
| DIY (grease + new seal + cotter pin) | $10–$25 | $20–$50 | 1–2 hours |
| DIY (full kit replacement) | $25–$60 | $50–$120 | 1–2 hours |
| Trailer specialist workshop | $150–$200 | $150–$300 | Workshop drop-off |
| Emergency roadside failure | $400+ (towing) + repair | $800+ | Stranded, possibly days |
DIY is cost-effective and appropriate for owners who are mechanically comfortable. The main arguments for using a workshop:
- A professional will check the bearing races for wear and pick up issues you might miss.
- Some warranties specify professional servicing.
- For tandem-axle trailers with electric brakes, the brake shoe inspection at the same time is worth the combined service.
If using a workshop, look for a trailer specialist rather than a general automotive workshop. Caravan and camper trailer centres will be familiar with Holden and Ford bearing kits and the Australian-specific service intervals.
What Breath Trailer Does
All Breath Trailer models — Essential, Plus, Ultra and Max — use Holden LM-series tapered roller bearings on galvanised axles. The bearing specifications are documented in the owner’s manual, and the same off-the-shelf bearing kits available from Bearings Express, BC Trailers and other Australian retailers fit directly.
| Model | ATM | Axles | Bearing standard | Bearing protector standard |
|---|---|---|---|---|
| Essential | 1,150 kg | Single | Holden LM series | Dust cap (upgrade recommended) |
| Plus | 1,250 kg | Single | Holden LM series | Dust cap (upgrade recommended) |
| Ultra | 1,400 kg | Single | Holden LM series | Bearing protector fitted |
| Max | 1,700 kg | Single | Holden LM series | Bearing protector fitted |
Breath Trailer recommends a full bearing repack every 12 months or 20,000 km for sealed-road use, reduced to every 6 months for coastal or regular off-road use. Bearing kits and workshop instructions are available from Breath Trailer’s Sydney workshop.
Because Breath Trailer uses standard Australian bearing specifications, owners can carry a spare Holden LM bearing kit (inner + outer + seal) in their toolkit and perform a trackside bearing change if needed — a useful capability on remote Australian tracks where roadside assistance can be a long wait away.
What to Carry on a Remote Trip
A $50 emergency bearing kit can turn a trip-ending failure into a two-hour roadside repair. For any serious off-road or remote Australian trip, carry:
| Item | Purpose | Approx cost |
|---|---|---|
| 1 × Holden LM bearing kit (inner + outer + seal) | Emergency replacement | $25–$40 |
| 1 × Cotter pin (2-pack) | Essential for reassembly | $2 |
| 1 × Small container of bearing grease | Repack or emergency top-up | $8–$15 |
| Socket set including appropriate hub nut size | Disassembly | Already in kit |
| Hammer and large screwdriver | Cap removal | Already in kit |
| Clean rags | Cleaning | Already in kit |
Many experienced outback travellers add a cheap bearing packer tool (forces grease into the bearing without manual hand-packing — much faster and cleaner in field conditions) and a spare hub seal to this kit.
For a full pre-departure checklist covering tyres, coupling, lights and water, see our camper trailer towing guide for Australia.
Frequently Asked Questions
How do I know if my trailer wheel bearings need repacking? The simplest test: after 30–40 km of driving, place your hand near (not on) each wheel hub. If it’s uncomfortably hot or you can smell burning, the bearings need immediate attention. Grinding or rumbling noises that change with speed, visible grease leakage on wheels, or any lateral play when the wheel is rocked are also clear indicators.
Can I just add grease via the Zerk fitting instead of a full repack? If you have a bearing protector with a Zerk fitting, you can top up grease between services. But this is not a substitute for a full repack. Adding new grease on top of old, contaminated or oxidised grease doesn’t restore the bearing — you need to dismantle, clean and inspect to know the true condition.
What happens if a wheel bearing fails completely? In the best case, the wheel will wobble and make a loud grinding noise, giving you time to stop safely. In a worst case, the bearing seizes, the grease ignites, and the hub can separate from the axle — causing wheel loss or trailer fire. At highway speed, this is a catastrophic safety event. Prevention is cheap; failure is expensive and potentially life-threatening.
Do teardrop camper trailers have the same bearing issues as large caravans? Yes — all trailers with wheel bearings require the same maintenance. Lighter teardrop campers have an advantage in that the reduced ATM (700–1,200 kg for Breath Trailer models vs 2,500–3,500 kg for large caravans) means lower radial loads on the bearings, which reduces heat generation. But the service intervals and failure modes are identical; light trailers are not exempt from bearing maintenance.
Should I use marine grease on my inland camper trailer? Marine grease is a solid choice even for inland use — it provides excellent water resistance and corrosion protection at no disadvantage. The only consideration is cost (marine grease is slightly more expensive). If you camp anywhere near the coast or do water crossings even occasionally, marine-grade grease is worth using as your standard product.
How much does a wheel bearing failure cost if ignored? Emergency towing in remote Australia typically starts at $400 and can exceed $1,500 for very remote locations. Add the bearing kit and workshop labour ($150–$300) and possible brake shoe damage from grease contamination, and the total cost of an ignored bearing easily exceeds $1,000–$2,000. A $30 annual DIY repack eliminates most of that risk.
The Bottom Line
Wheel bearings are the most neglected maintenance item on Australian camper trailers — and the most consequential when they fail. They’re not complex, they’re not expensive to service, and the warning signs are clear once you know what to look for. The problem is that most owners don’t think about them until something goes wrong.
For Australian conditions, ignore the overseas default of “annual” and think in terms of environment and kilometres. Coastal, off-road and remote travellers need more frequent inspections and the right grease for the conditions. A $30–$60 annual DIY repack — or a $150–$300 workshop service — is the cheapest insurance available for your trailer.
The Breath Trailer models use standard Australian LM-series bearings that are stocked at every trailer parts supplier in the country. If you’re heading bush, a spare kit costs less than a tank of fuel and can save a trip.
Explore the Breath Trailer range at our model comparison page, or book an inspection at our Sydney workshop.
Recommended Reading
- Teardrop Camper Maintenance: The Complete Australian Guide — full service schedule covering bearings, brakes, seals, battery and water systems
- Why Suspension Matters on an Off-Road Camper Trailer — independent coil vs leaf spring for Australian corrugations
- Understanding Electric Brakes on Camper Trailers — ADR38 requirements, brake controller types, breakaway batteries
- Teardrop Camper Towing Tips Australia — pre-trip hitching checklist, load distribution, reversing
- Things to Check Before Buying a Camper Trailer — 10-point pre-purchase inspection including running gear checks