10 Things to Check Before Buying a Teardrop Camper in Australia (2026)
A 10-point pre-purchase inspection checklist for teardrop campers in Australia — chassis, weights, brakes, 12V, seals and the red flags that cost buyers thousands.
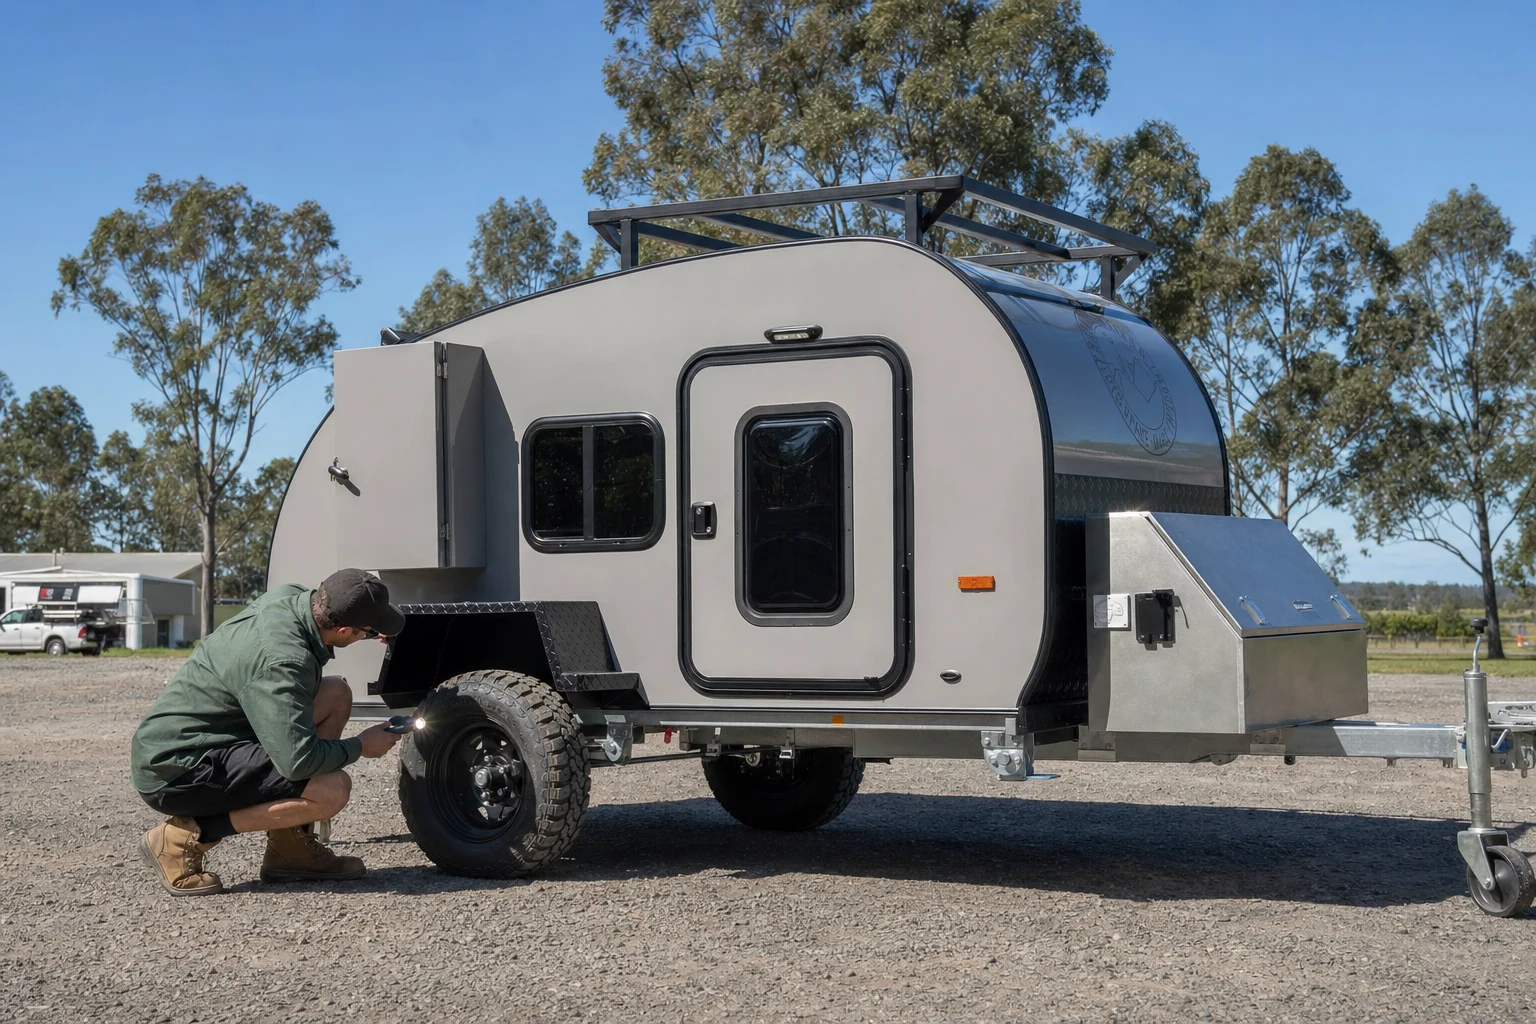
Most teardrop camper regret is not about the model someone chose. It is about the ten minutes they did not spend on their knees, torch in hand, looking under the chassis. A teardrop is a deceptively simple thing — a bed, a galley, a box on a trailer — and that simplicity makes it easy to skip the boring checks. Then a wheel bearing fails on the Oodnadatta, a “tare weight” turns out to be 90 kg optimistic, or a fresh-looking compliance plate stops you registering the trailer at all.
This is a pre-purchase inspection checklist, not a “which model should I buy” guide (for that, see our guide to choosing the right off-road camper trailer). It works for a brand-new build off a dealer floor and for a five-year-old camper in a stranger’s driveway. Ten things, in the order an experienced buyer actually checks them, with the Australian-specific traps — ADR compliance, ATM versus tare, the 750 kg brake line — that the generic overseas checklists miss.
Before you inspect: the two-minute prep
Two things to confirm before you so much as touch the trailer.
1. What your tow vehicle can legally pull. Find your vehicle’s braked towing capacity and its maximum towball download (both on the placard or in the handbook). A camper that exceeds either number is the wrong camper, no matter how good the deal is. We cover the full sums in our teardrop camper weight guide.
2. The model’s reputation. Spend twenty minutes in the WikiCamps forums, the brand’s Facebook owners group, and ProductReview.com.au before you drive anywhere. Known failure points — a particular suspension, a leak-prone hatch, a galley that warps — turn an inspection from guesswork into a targeted hunt.
With that done, here is the list.
1. The chassis and drawbar
The chassis is the one thing you cannot economically replace, so it is check number one. Get underneath with a torch.
- Finish. The chassis should be hot-dip galvanised, not just painted. As Club 4X4 puts it, the better the metal finish, the less likely you are to fight rust and chipping later. Hot-dip galv (the trailer dunked in molten zinc) gives a dull silver-grey, slightly textured surface that resists corrosion far better than a painted or zinc-sprayed finish — which matters enormously on Australia’s coastal and dusty inland tracks.
- Welds and corners. Inspect every weld, especially at the drawbar-to-chassis junction and the suspension mounts. Cracked or re-welded joints are a structural red flag. Surface rust at a scratch is normal; bubbling rust spreading from a weld is not.
- Drawbar straightness. Sight down the drawbar. A bend or ripple means a past heavy impact — walk away.
A hard-shell teardrop has a real advantage here over canvas folding campers: there is no fabric to rot, and the chassis is usually the entire structural story. On our own builds the chassis is hot-dip galvanised across the Essential, Plus, Ultra and Max range for exactly this reason.
2. Weights — tare, ATM and the payload you actually get
This is where most buyers get quietly burned. Three numbers, one stamped plate.
| Term | What it means |
|---|---|
| Tare | Weight of the empty trailer, no water, no gear |
| ATM | Aggregate Trailer Mass — the maximum legal loaded weight |
| Payload | ATM minus Tare — everything you can legally carry |
| Towball download | Static weight on the towball, ~10% of loaded weight |
The trap: a salesperson quotes a low tare to make towing sound easy, but that tare often excludes the spare wheel, gas bottle, water and battery. As Red Dirt’s weights guide notes, payload is simply ATM minus tare — and if the real-world tare is 90 kg heavier than advertised, that 90 kg comes straight out of your payload. A teardrop with a 200 kg payload that loses 90 kg to “extras not in the tare” leaves barely enough for water and a fridge.
What to do: if you have any doubt, get the trailer weighed at a public weighbridge before you buy. A believable payload for a touring teardrop is 150–300 kg. Anything under 120 kg and you will be over ATM the moment you fill the tank. Our full weight and towing breakdown has model-by-model figures.
3. The compliance plate and VIN
A small aluminium plate, riveted to the chassis, that decides whether you can register the trailer at all.
Look at it carefully. As several Australian buyers’ guides warn, if the rivets look fresh or the plate looks “too new” compared with the rest of the camper, you may be looking at a rebirthed trailer — and you will hit a wall at the registry. The plate should carry the ATM, the VIN/chassis number, the build date and the manufacturer. Cross-check the VIN against the registration papers. Mismatched or missing numbers is a deal-ender, not a negotiating point.
For a new build, confirm the chassis is built to Australian Design Rules (ADR) and Australian Standards as an absolute minimum — a manufacturer who advertises this is giving you a tick in the box.
4. Suspension, brakes and the 750 kg rule
Under the trailer again. Two systems that keep you alive at 100 km/h.
Suspension. Identify whether it is road or genuine off-road (independent trailing arm vs simple leaf or beam). Push down hard on each corner — it should rebound once and settle, not bounce or stay compressed (dead shocks). Look for cracked bushes, leaking shocks and play in the trailing arms.
Brakes — and the law. In Australia, any trailer with an ATM over 750 kg must have brakes. Most teardrops sit right around this line, which makes it a critical check:
| Loaded weight (ATM) | Brake requirement |
|---|---|
| Up to 750 kg | No brakes legally required |
| 751 kg – 2,000 kg | Brakes on at least one axle (electric is standard) |
| Over 2,000 kg | Brakes on all wheels + breakaway system |
A sub-750 kg teardrop without brakes is legal but means your tow vehicle does all the stopping — fine for a light camper behind a big 4WD, marginal behind a small SUV. If the camper has electric brakes, plug it in and confirm they actually activate from the brake controller. Many private-sale “bargains” have a dead brake magnet nobody mentioned.
5. Wheels, tyres and bearings
Cheap to overlook, expensive to ignore on a remote track.
- Tyre age, not just tread. Read the DOT date code on the sidewall. Tyre experts and RV Daily both advise against tyres more than five to six years old regardless of how they look — old rubber fails catastrophically at touring speed, even with full tread. A teardrop that sits in a shed for months between trips often has plenty of tread and dangerously aged tyres.
- Load rating. The tyres and rims must be rated for the trailer’s ATM. Undersized passenger tyres on a loaded camper are a common cost-cutting shortcut.
- Bearings. Jack each wheel and spin it — listen for grinding, feel for rock or play. Worn bearings are cheap to repack but a sign of neglected servicing elsewhere.
- Spare. Confirm there is a matching, road-worthy spare, and that its weight is included in the tare (see check #2).
6. The 12V electrical and solar system
The teardrop’s nervous system, and the area where DIY builds vary the most.
Turn everything on — lights, water pump, fridge, USB points, the battery monitor. If it has a switch, test it. Then look closer:
- Battery type and health. A modern touring teardrop should run lithium (LiFePO₄), which is lighter, charges faster and can be discharged far deeper than AGM. Note the capacity (100Ah is a sensible minimum) and ask its age. AGM is acceptable but heavier and shorter-lived.
- Charging. Look for a DC-DC charger (so the tow vehicle tops the battery up as you drive) and an MPPT solar controller. A camper with solar on the roof but no DC-DC charger only really charges in sunshine.
- Wiring quality. Open the battery box. Tidy, fused, labelled wiring with an Anderson plug is the mark of a quality build; a rat’s nest of crimps and electrical tape is a warning about everything else you cannot see.
Our off-grid teardrop guide has the full lithium-versus-AGM and solar-sizing maths if you want to judge a system properly.
7. Water, plumbing and the kitchen
Water systems are where leaks and bodgy repairs hide.
- Tank. As one buyer’s guide bluntly puts it, make sure there are no splits or patch-up jobs on the tank, and aim for 45–60 L that is easy to fill and access with the camper packed. Fill it, run the pump, and check every joint for drips.
- Pump and taps. The pump should prime quickly and shut off cleanly, not cycle constantly (a sign of an air leak or failing pressure switch).
- Galley. Slide the kitchen out fully. Check the slide rails for binding and corrosion, the bench for water swelling, and that the drawers latch for travel. A galley that does not lock shut will destroy itself on corrugations.
If you are weighing up an external camp kitchen versus an interior wet bath, our article on the teardrop camper with a shower and toilet is worth a read — the Breath Max remains the only teardrop on the Australian market under $50k with a full interior bathroom.
8. Seals, hatches and water ingress
The single most common expensive fault in any camper is water getting in where it should not.
Inspect every seal — around the cabin door, the galley hatch, every window and every external hatch. Inspection guides agree this is the most likely place to find water damage. Look for:
- Perished, cracked or lifting rubber seals.
- Staining, swelling or soft spots in the timber around hatches (press with a thumb).
- A musty smell inside the cabin — the giveaway for past or present leaks.
A hard-shell teardrop is inherently better sealed than a canvas camper here — there is no fabric to re-proof and far fewer entry points. But a poorly built composite or ply-bodied teardrop can still soak up water at a bad hatch seal, and that rot is effectively unrepairable. Check it properly.
9. Documentation, warranty and service history
The paperwork is part of the camper.
| Document | New build | Used camper |
|---|---|---|
| Registration papers | N/A (you register) | Must match VIN exactly |
| Compliance / ADR plate | Confirm present | Confirm not rebirthed (#3) |
| Warranty | 12 mo minimum (ACL); good brands 2–5 yr | Often not transferable |
| Service records | N/A | Bearings, brakes, gas — ask for them |
| Build/options sheet | Get it in writing | Helps verify what is fitted |
Under Australian Consumer Law a new trailer carries a 12-month minimum warranty, but reputable manufacturers offer two to five years, with some giving five years on the chassis. As Mars Campers points out, a used camper’s warranty usually does not transfer — so factor future repairs into the price. Just as important: ask who handles warranty claims, how spare parts are supplied, and where it can be serviced. A well-built trailer with poor back-up gets frustrating fast.
This also feeds directly into resale. A camper with a complete paper trail and transferable structural warranty holds its value — see our teardrop resale value analysis — and a documented camper is cheaper to insure, which our teardrop insurance guide breaks down.
10. The test tow and the gut check
Finally, hitch it up if you possibly can. Even a 10-minute tow tells you:
- Whether it tracks straight or wanders/sways (sway is a load-distribution or suspension problem).
- Whether the brakes (if fitted) bite smoothly.
- Whether anything rattles, bangs or shifts — the galley, the drawers, the spare.
- How it actually feels behind your car at your towball weight.
Then the gut check. Walk the whole camper once more and ask: does the build quality match the price? A premium teardrop should feel solid, with consistent finish, quality hardware and no obvious corner-cutting. If the seller is evasive about weights, history or a weighbridge visit, that evasiveness is itself a finding.
Red flags that should stop a sale
- Fresh-looking compliance plate on an old camper (rebirth risk).
- Tare weight the seller will not let you verify on a weighbridge.
- Cracked or re-welded chassis/drawbar.
- Tyres over six years old, or rims under-rated for the ATM.
- Dead electric brakes on a 750 kg+ camper.
- Musty smell or soft timber around any hatch.
- “It’s never given any trouble” with zero service records.
Quick reference: the 10-point checklist
| # | Check | The dealbreaker |
|---|---|---|
| 1 | Chassis & drawbar | Cracked welds, painted (not galvanised) chassis |
| 2 | Weights (tare/ATM/payload) | Optimistic tare hiding low real payload |
| 3 | Compliance plate & VIN | Rebirthed plate, mismatched numbers |
| 4 | Suspension & brakes | Dead shocks; no brakes over 750 kg ATM |
| 5 | Wheels, tyres, bearings | Tyres 6+ years old; under-rated rims |
| 6 | 12V & solar | No DC-DC charger; messy unfused wiring |
| 7 | Water & kitchen | Patched tank; galley that won’t lock shut |
| 8 | Seals & hatches | Soft timber, musty smell, lifting rubber |
| 9 | Documentation & warranty | Non-transferable warranty, no service history |
| 10 | Test tow & gut check | Sway, rattles, an evasive seller |
Frequently asked questions
Do I really need a professional inspection for a teardrop? For a private used sale where you are not confident, yes — or bring an experienced caravanner. A few hundred dollars is cheap against a cracked chassis or a rebirthed trailer. For a new build from an established Australian manufacturer with an ADR-compliant chassis and a proper warranty, a careful self-inspection using this checklist is usually enough.
What’s a fair payload for a teardrop camper? Aim for 150–300 kg of usable payload (ATM minus real tare). Under about 120 kg and you will be over your legal ATM as soon as you fill the water tank and load gear. Always verify the tare on a weighbridge if the number looks too good.
Does my teardrop need brakes? Legally, only if its ATM is over 750 kg. Many teardrops sit right on this line, so check the plate. Even where brakes are not required, they make stopping far safer behind a smaller tow vehicle — worth having.
New or used teardrop — which is the smarter buy? A new camper gives you a full warranty, current safety standards and no hidden history, but depreciates in year one. A good used camper saves money up front if — and only if — it passes this checklist; the warranty usually won’t transfer, so price in future repairs. Our hire-vs-buy and buying guide pages go deeper.
What’s the single most overlooked check? The compliance plate. Buyers obsess over the canvas or the kitchen and never look at the one plate that decides whether they can register the trailer. Check it first, not last.
The takeaway
A teardrop camper is one of the most reliable things you can tow precisely because it is simple — but that only holds if the simple things are done right. Walk through these ten checks in order, insist on a weighbridge if a tare looks optimistic, and treat an evasive seller as a finding rather than a hurdle. Do that and you will either buy with confidence or walk away having spent nothing but an afternoon.
If you would rather start from a known quantity, every Breath Trailer model ships with a hot-dip galvanised ADR chassis, honest published weights and an Australian warranty — and you are welcome to bring this checklist to a viewing and use it on us.
Recommended reading
- How to Choose the Right Off-Road Camper Trailer — the decision framework before you start inspecting.
- Teardrop Camper Weight in Australia — tare, ATM and payload explained with model figures.
- Teardrop Camper Maintenance & Care — keeping the chassis, bearings and seals right after you buy.
- Off-Grid Teardrop Camper Guide — how to judge a 12V, lithium and solar setup.
- Teardrop Camper Resale Value in Australia — why documentation and build quality protect your money.