Best Awning Setup for Camping in Australia (2026 Guide)
Freestanding, wall-mount or 270-degree: what each handles in wind, how long it takes alone, and what you actually pay in Australia.
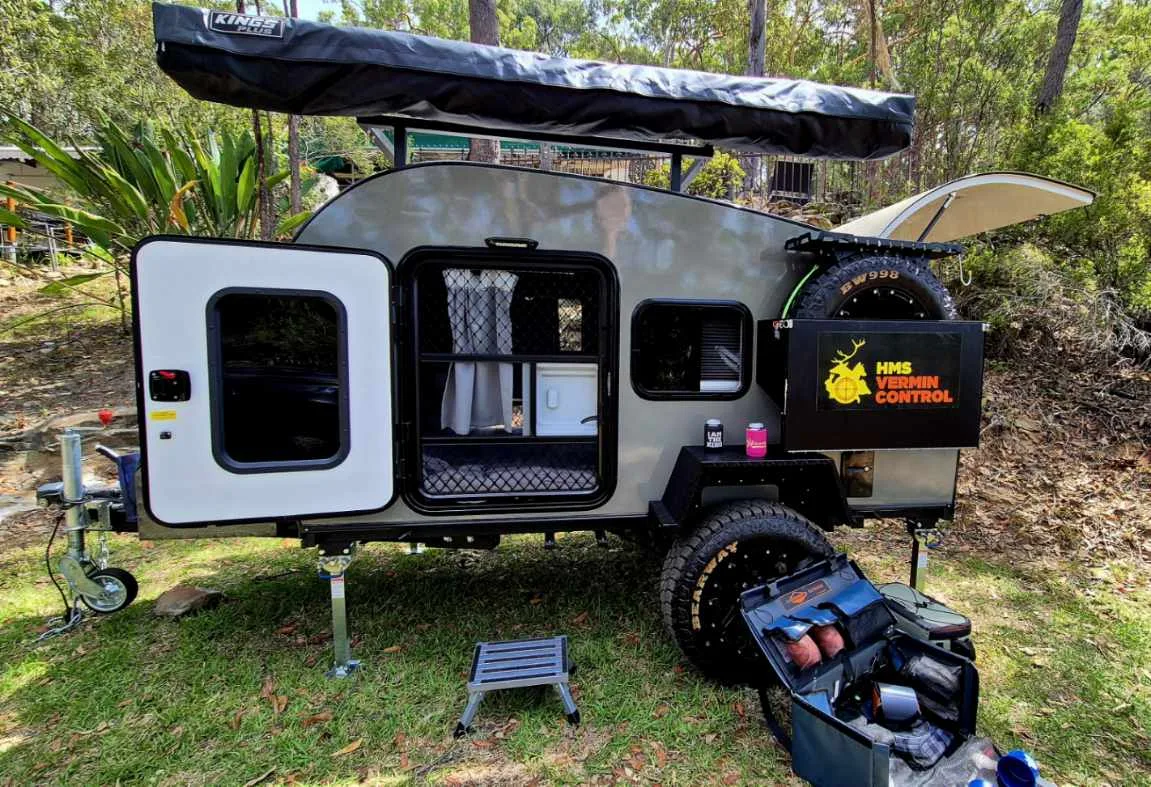
Your shelter arrives at camp before your tent does. The moment you unclip an awning and pull it open, a patch of raw dirt becomes a kitchen, a lounge room, and a place to watch the sun go down without getting sunburnt. Australians spend an average of 7–14 nights per year camping outdoors — and for most of those nights, a good awning is the difference between a comfortable campsite and sitting inside the trailer watching rain through the hatch.
This guide walks through everything you need to get the awning setup right: which type to choose, how to mount it on a teardrop camper, how to keep it standing in wind, how to light it, and what accessories are actually worth carrying. Real Australian prices throughout. No hypothetical products that don’t exist in the AU market.
The 3 Main Awning Types Explained
Not all camping awnings are the same. Before comparing brands, understand the three distinct categories — because choosing the wrong type means a compromised campsite no matter what brand badge is on the housing.
1. Side (180°) Roll-Out Awning
The most common type. Mounts lengthways along the side of the vehicle or trailer and opens to provide shade on one side. Coverage is roughly 2.5 m × 2.5 m for a standard-size model — enough for two camp chairs, a folding table, and an outdoor kitchen setup.
Who it suits: Couples, solo travellers, and anyone who camps primarily in established sites with good tree cover. The 180° is lighter (typically 12–18 kg), packs smaller, and deploys in under 60 seconds.
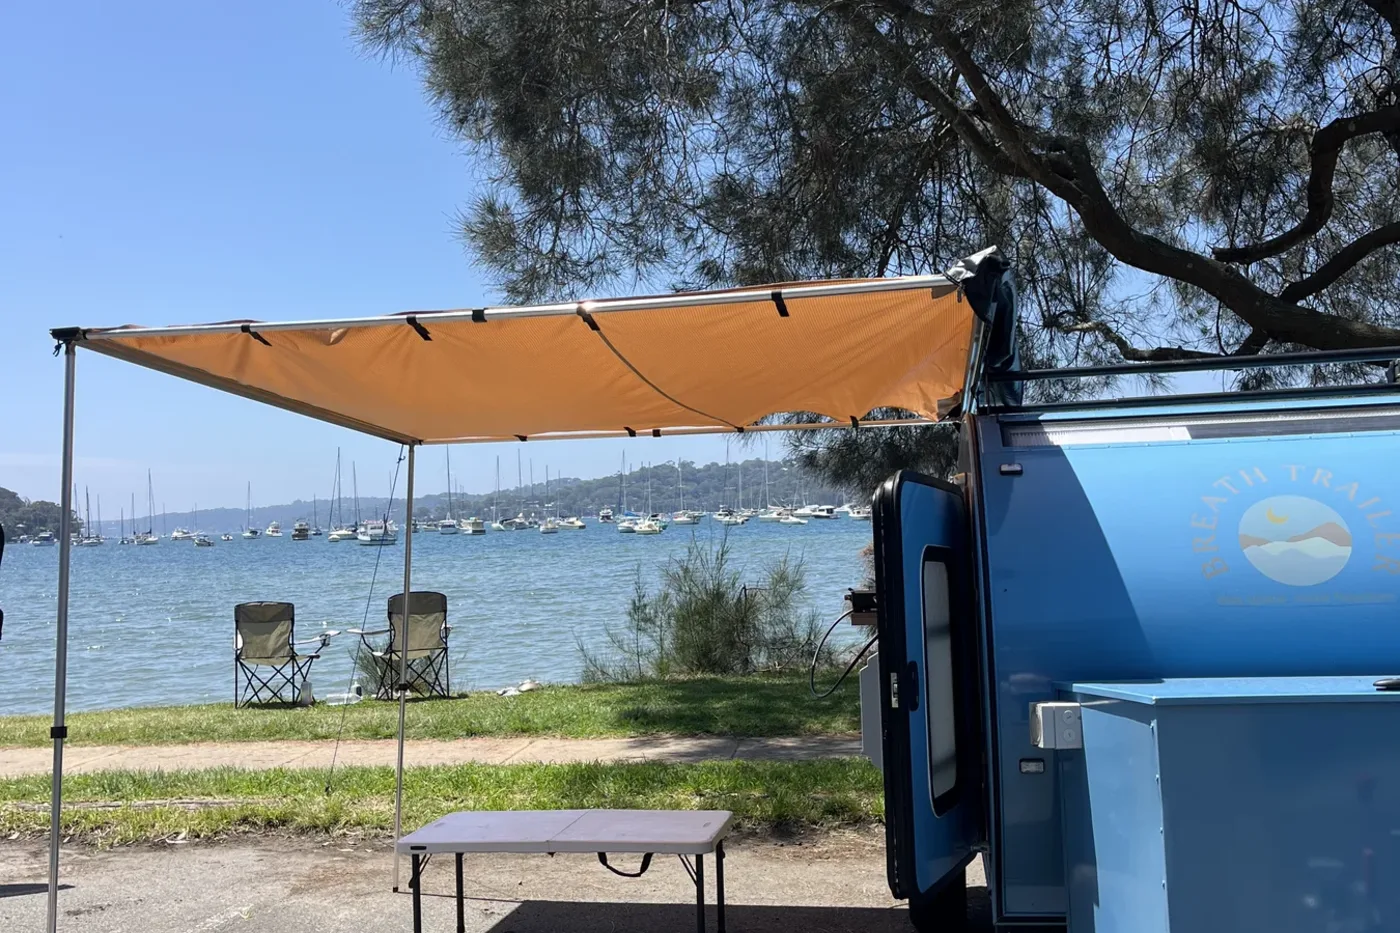
A side roll-out awning on two legs is enough to shade a table and a pair of camp chairs.
2. Batwing (270°) Awning
Wraps around one side and the rear of your vehicle or trailer, delivering roughly 37% more shade than a 180° model. The critical advantage is rear coverage: your tailgate kitchen is sheltered without moving the rig, and the transition from trailer to outdoor kitchen is seamless and dry.
Who it suits: Families, anyone who free-camps in exposed locations, and serious overlanders running a full tailgate kitchen. The trade-off is weight (20–28 kg) and price.
3. Freestanding / Gazebo Awning
Completely detaches from the trailer and can be pitched anywhere at camp. Offers maximum flexibility — shade the firepit 10 metres from the trailer, or set up a shaded lounge area under trees while the trailer stays on solid ground. Setup takes 5–10 minutes and usually requires two people.
Who it suits: Extended-stay campers, families with children who need a large play area, grey nomads doing multi-day stops. The downside: another item to pack, carry, and unpack.
180° vs 270°: Which Coverage Is Right for Your Rig?
| Factor | 180° Side Awning | 270° Batwing Awning |
|---|---|---|
| Coverage area (typical) | ~6–8 m² | ~9–13 m² |
| Rear tailgate coverage | ✗ No | ✓ Yes |
| Weight (typical) | 12–18 kg | 20–28 kg |
| Setup time | 30–60 seconds | 1–3 minutes |
| Typical AU price range | $300–$900 | $900–$1,700 |
| Best for | Couples, solo, fast camp | Families, overlanders, kitchens |
| Wind vulnerability | Moderate | Higher (larger sail area) |
| Mounting complexity | Simple bracket | Requires rear-corner positioning |
The honest verdict: a 180° awning meets 80% of needs at 60% of the cost and weight. Unless you’re consistently camping in exposed paddock sites, running a full tailgate kitchen, or travelling as a family of four, the 270° batwing adds cost, weight, and wind risk for benefits most campers rarely use.
If you do run a 270°, position the rig so the awning sits on the lee (sheltered) side of the camp, and always deploy full guy ropes.
Mounting an Awning on a Teardrop Camper
Teardrop campers present a specific mounting challenge that full-size caravans don’t: the roof profile is curved or sloped, the trailer sits lower than most 4WDs, and there’s often no existing roof rack.
Option 1: Trailer-Mounted Side Rail (Most Common)
Most teardrop manufacturers fit a C-channel or T-track rail along one or both sides of the roof — the awning housing slides in and bolts directly to the rail. This is the cleanest setup: no extra brackets, no roof penetration, and the awning is always at the right height.
If your trailer has a flat roof section or a roof rack option, many owners add a Rhino-Rack or Yakima load bar across the trailer to mount a conventional roll-out awning. Standard roof rack saddles grip the bar; the awning bracket clamps to it.
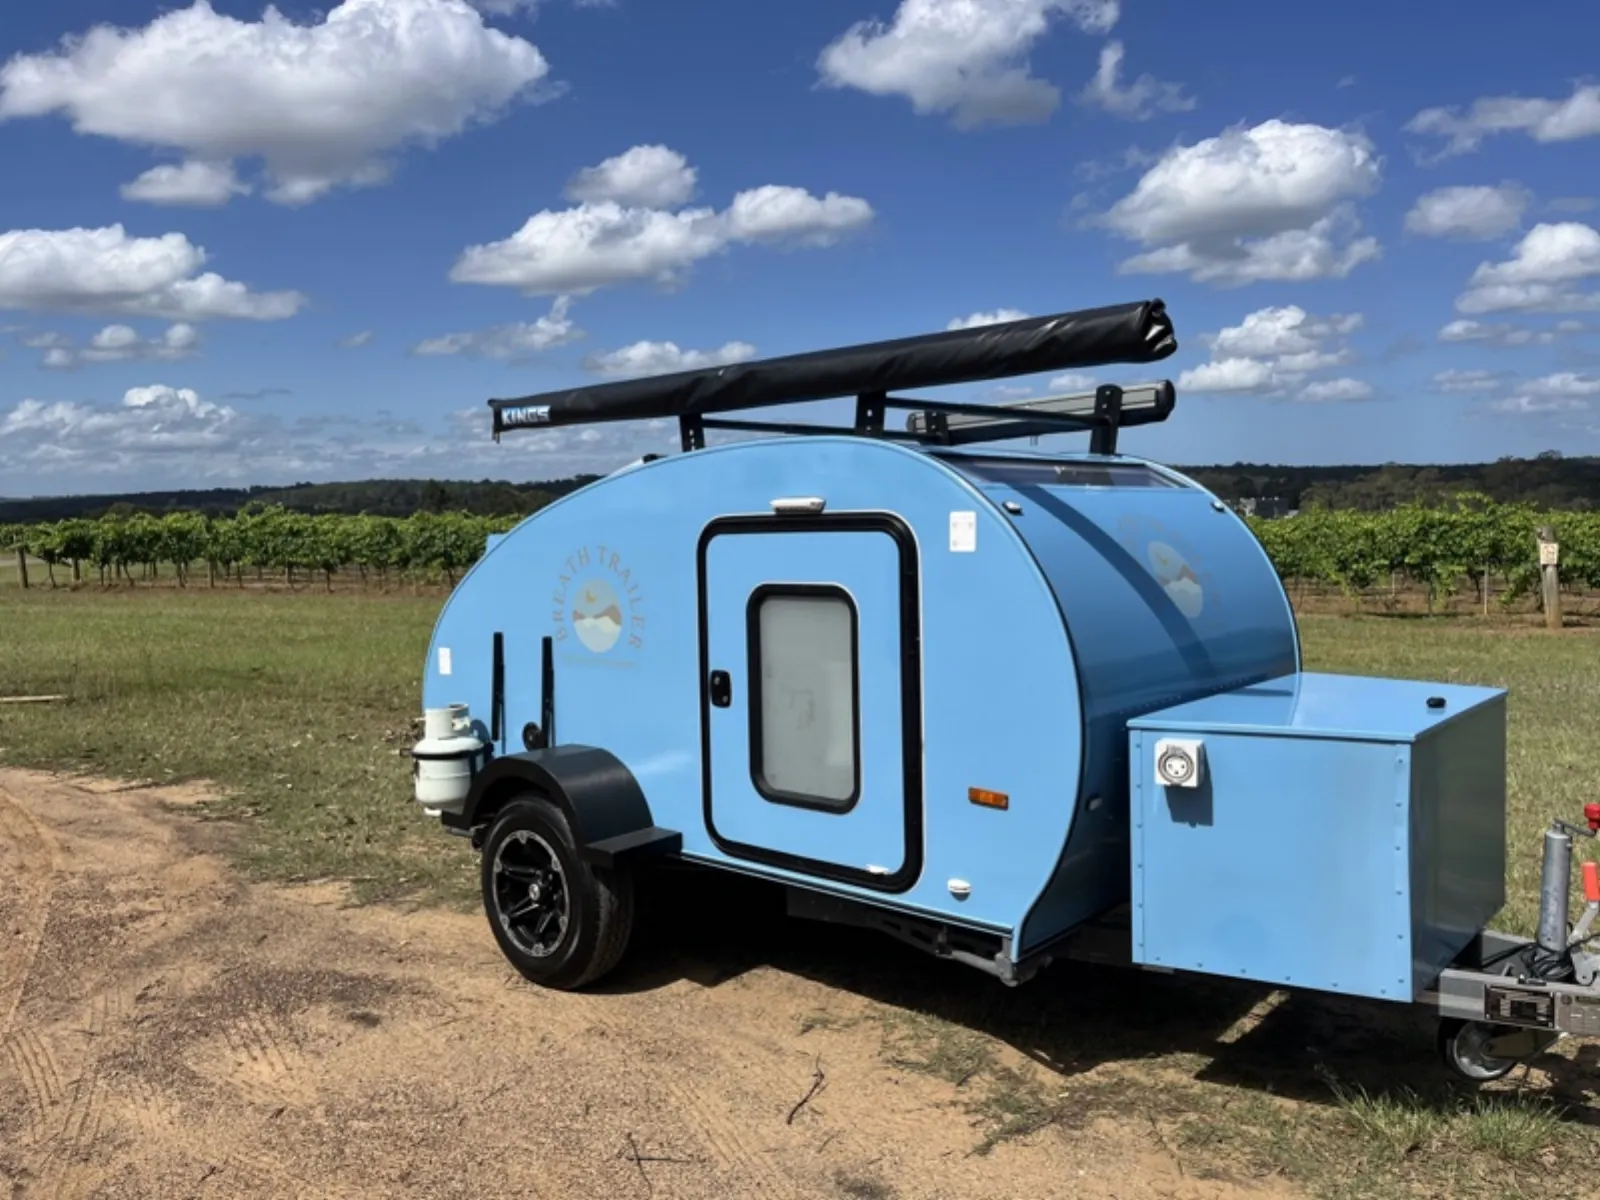
Mounted on the roof rack, the rolled awning sits above the cabin, ready to pull out on arrival.
Option 2: Side-Wall Bracket Mounting
L-brackets can be bolted directly to the teardrop’s side wall into the structural framing (not just the skin). Use butyl tape or self-adhesive foam between bracket and wall to seal any potential water entry. Ensure brackets anchor into at least two frame joists — the leverage from a deployed awning in 20+ km/h winds is substantial.
Option 3: Tow-Vehicle Roof Rack
Some teardrop owners mount the awning on their tow vehicle rather than the trailer. This works well for 180° side awnings when the car and trailer are parked side-by-side, but means detaching the awning every time you move the car without the trailer.
Mounting Height Considerations
A teardrop sits lower than a full-size 4WD — typically 1.4–1.8 m to the roof rail vs 1.8–2.2 m for a Landcruiser. This means awning legs may need to be shorter, or the awning may open at a slight angle. Most roll-out awnings allow 30–45° of pitch adjustment; use this to level the awning even if the mounting point is lower than ideal.
Australian Awning Brand Comparison (2026)
| Brand & Model | Type | Size | Canvas Weight | Price (AUD) |
|---|---|---|---|---|
| Ironman 4×4 Touring Awning | 180° roll-out | 2.0 × 2.5 m | 200gsm poly | ~$299–$399 |
| ARB Touring Awning (with LED) | 180° roll-out | 2.5 × 2.5 m | 230gsm poly | ~$620–$800 |
| Darche Eclipse Slimline | 180° roll-out | 2.0 × 2.5 m | 320gsm polycotton | ~$399–$499 |
| OzTent Foxwing 180° | 180° batwing | 2.5 × 2.5 m | 210D ripstop poly | ~$699–$799 |
| OzTent Foxwing 270° | 270° batwing | 2.5 m × 2.5 m | 210D ripstop poly | ~$899–$999 |
| Darche Eclipse 270 G2 | 270° batwing | 2.5 × 2.5 m | 320gsm polycotton | $1,499 |
| RigDup 270° Awning | 270° batwing | — | 280gsm ripstop polycotton | $1,700 |
UPF 50+ is the minimum acceptable rating for any awning used in Australia. Anything below that passes through dangerous UV levels — particularly in summer between 10 am and 3 pm when ambient UV is highest. All mid-range and premium awnings in the table above meet UPF 50+ as standard; always verify before buying a budget import.
Canvas weight matters more than price tag. A 320gsm polycotton (like the Darche Eclipse) is heavier but handles the brutal UV cycle of repeated outback summers far better than a 200gsm poly fabric. Budget awnings in the sub-$300 range typically use thin polyester that UV-degrades, sags, and leaks within 2–3 seasons of hard use.
Awning Walls and Annexes: Turning Shade into a Room
A bare awning is a roof. Add walls and it becomes a room — a proper outdoor living space that keeps insects out, wind off the cook, and children contained at night.
Wall Material Options
PVC (solid) walls: the heaviest and most weatherproof option. Excellent for rain and cold; blocks all airflow, so unsuitable in warm weather. Best for winter trips or high-rainfall camps. Weight: ~3–5 kg per wall panel.
Ripstop canvas walls: the traditional choice. Breathes, handles Australian conditions well, and is the easiest to repair in the field. Slightly heavier than PVC at equivalent coverage. Best all-rounder.
Mesh walls: allows full airflow while keeping insects out. Invaluable on warm nights — a mesh front wall on a Queensland beach campsite is a game-changer. Usually paired with a solid rear wall. Weight: ~1–2 kg per panel.
Modular systems (the current best practice): buy front, side, privacy, and sun walls separately from the same range. Run mesh in summer, swap to canvas in winter. Interchangeable walls from brands like Darche and ARB are the best long-term investment — you’re not locked into one configuration.
Annexe Setup Steps
- Deploy and level the awning fully before attaching any walls.
- Attach the top edge of each wall to the awning’s rafters or bead rail — most use a keder bead or zip system.
- Peg out the bottom edge of each wall with pegs at 45° to the wall line.
- Guy rope corners at 45° from the awning corner in both directions (away from van + parallel to van).
- Check all zips are closed before any wind picks up.
Wind Management: The Make-or-Break Skill
More awning damage happens from wind than from all other causes combined. Australia’s coastal and outback sites can generate sudden gusts that exceed manufacturer ratings — and a collapsed awning at 2 am is a bad start to any adventure.
Wind Ratings to Know
| Wind Speed | Awning Status |
|---|---|
| Under 20 km/h | Safe, no action needed |
| 20–35 km/h | Deploy all guy ropes and peg wall bases |
| 35–50 km/h | Consider partially closing; definitely peg and guy rope |
| Above 50 km/h | Roll up and stow. No awning should be left deployed. |
Guy Rope Geometry
Run two ropes from each awning corner: one pegged at 90° away from the trailer (pulling the corner outward), and one pegged parallel to the trailer (pulling toward the front or rear). This triangle of tension resists both side-on and end-on gusts. Use steel pegs on hard ground; sand screws or sand anchors on beach sites; rock stakes on outback gravel.
Anti-Flap Kits
The constant snapping and billowing of awning fabric in light-to-moderate wind is exhausting at camp and accelerates fabric wear. Anti-flap kits (from brands like Aussie Traveller and Supa-Peg, ~$30–$60 a pair) attach tension lines from the roller tube to the ground, eliminating flutter without needing to partially retract the awning. One of the highest-value accessories you can add.
The “Rule of Three”
Before leaving camp without stowing the awning: if in doubt about wind, always pack it away. The repair cost of a damaged awning (typically $200–$600 for fabric replacement, $80–$200 for pole repair) far exceeds the five minutes it takes to roll it up.
Awning Lighting: Creating a Campsite After Dark
The awning is your outdoor living room after sunset. Lighting it well transforms the experience — and doesn’t have to draw more than 5–8 Ah per night from your 12V system.
Three-Layer Awning Lighting Setup
Layer 1 — Task lighting (brightest): a 1,000–1,600 lm work light or lantern hung centrally from the awning rafter for cooking and camp tasks. Hard Korr, Goal Zero, or ARB 10” spotlights work well. Draw: ~20–40W, use only when needed.
Layer 2 — Ambient perimeter lighting: 5-metre LED strip along the awning’s front and side edges, or USB-powered string lights looped along the rafter. Warm white (2700–3000K) creates a relaxed atmosphere. Draw: ~10–15W continuous, ~1–2 Ah/hour.
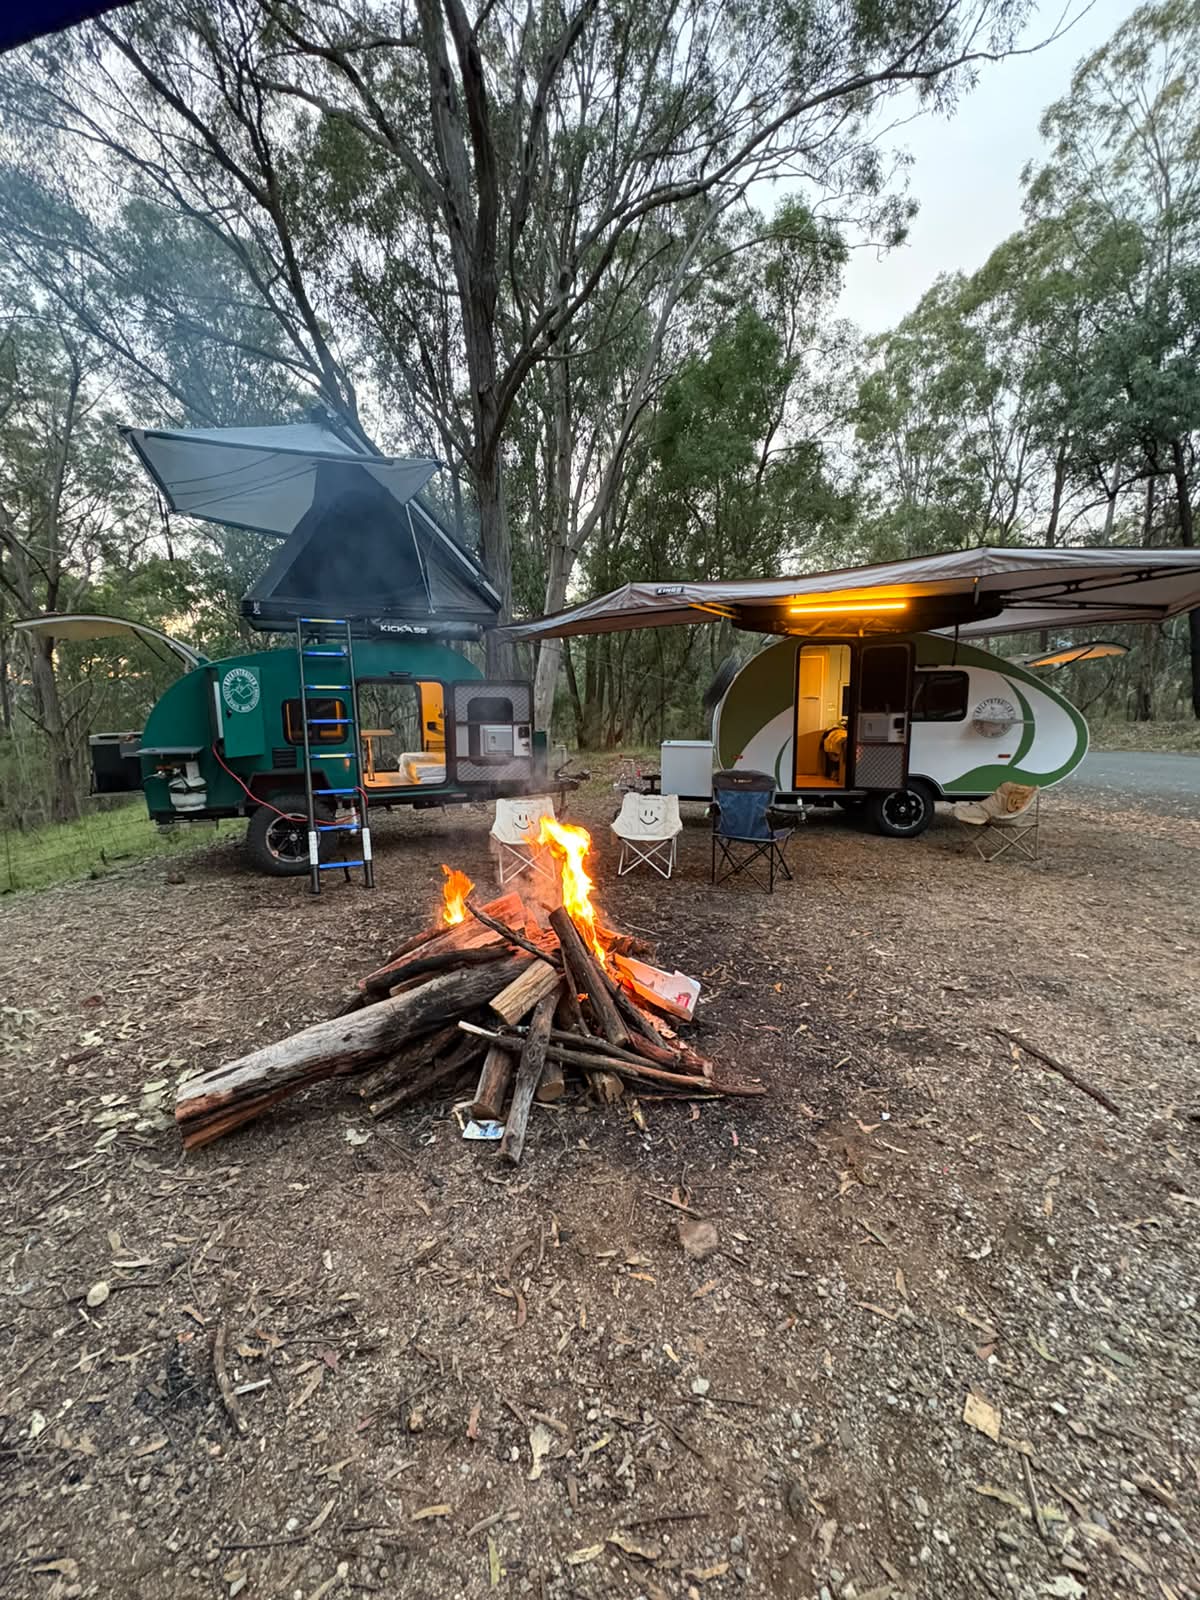
A warm-white LED strip under the awning edge lights the outdoor area without flooding the whole camp.
Layer 3 — Accent/boundary lighting: battery-powered solar stake lights around the tent peg lines. Zero draw from your 12V system. Doubles as trip-hazard markers.
For detailed guidance on lumens, Kelvin, IP ratings, and ADR road-legal lamp compliance, see our complete camper trailer lighting guide.
Amber vs white after dark: amber lighting at 590–600 nm wavelength attracts approximately 60% fewer insects than white lighting of equivalent brightness — a meaningful difference on Queensland summer nights. If you’re camping near turtle nesting beaches or Warrumbungle-zone dark sky areas, amber is also the respectful choice.
The Outdoor Kitchen Under the Awning
An awning and an outdoor kitchen are natural partners — the awning provides the shelter, the kitchen fills the space. Getting the layout right matters.
Positioning the kitchen: ideally, the camp kitchen sits at the entry end of the awning, not the back. This allows cook traffic to flow without crossing the dining area, and keeps cooking smells drifting away from the sleeping zone.
Bench height: a folding camp table at 70–75 cm suits most adults standing. For longer cooking sessions, a proper foldout kitchen or a trailer-mounted slide-out galley (like those on the Breath Ultra and Breath Max) at 80–90 cm is easier on the back than a table at typical outdoor-furniture height (60–65 cm).
Gas compliance under an awning: AS/NZS 5601.2 requires adequate ventilation around any gas cooking appliance — an open awning with no solid walls satisfies this. If you enclose the awning with full PVC walls and cook inside, ensure at least one large wall panel is open to provide airflow. Never cook with gas in a fully enclosed tent annexe.
Shade over the stove: a 270° awning’s rear coverage is particularly valuable for kitchen work — the stove stays shaded through afternoon hours (11 am–3 pm) when reflected heat from a stainless stovetop can exceed 60°C in direct summer sun.
For a full guide to camp kitchen setup, bench area, stove types, and grey water management, see our camper trailer kitchen features guide.
Awning Accessories That Actually Earn Their Place
Not everything sold as an “awning accessory” is worth the space in your storage. These are the items that genuinely improve the campsite:
| Accessory | What it Does | Approx. Price |
|---|---|---|
| Anti-flap kit (pair) | Eliminates awning flutter in breeze | $30–$60 |
| Sand/beach peg set | Proper holding in loose soil or sand | $25–$40 |
| Awning mat / shade cloth floor | Defines the space, reduces dust indoors | $60–$200 |
| Mesh side wall | Insect barrier with full airflow | $80–$200 |
| LED strip light (5 m, 12V) | Ambient perimeter lighting, warm white | $30–$80 |
| Awning guy rope set (6-pack) | Essential for wind safety | $15–$30 |
| Awning peg bag | Keeps pegs, ropes, and anti-flap kit together | $20–$40 |
| Camp shower enclosure | Privacy wall that hooks to awning rafter | $60–$120 |
For a comprehensive breakdown of all teardrop camper accessories — solar, fridges, water systems, towing gear — see the complete accessories guide.
Breath Trailer Model Awning Guide
None of the four Breath Trailer models include an awning as standard — Breath Trailer’s philosophy is “build in what most people use every day, let customers spec the adventure gear they actually want.” But all four models support awning mounting, and the choice of awning size differs meaningfully by model.
| Model | Roof Rail | Recommended Awning Type | Max Awning Size | Notes |
|---|---|---|---|---|
| Essential ($23,320) | Yes — side rail | 180° roll-out | 2.0 × 2.5 m | Lightweight rig: 180° keeps tow weight down |
| Plus ($29,766) | Yes — side rail | 180° or 270° | 2.5 × 2.5 m | Most buyers add a 180°; 270° suits families |
| Ultra ($34,749) | Yes — side + rear option | 180° or 270° | 2.5 × 2.5 m | Built-in external shower on the rear wall pairs well with a privacy annexe |
| Max ($42,900) | Yes — reinforced rail | 270° recommended | 2.5 × 2.5 m | Heavier chassis handles 270° sail loads; families maximise outdoor space |
All Breath Trailer models use a standard C-channel roof rail system. An ARB, Darche, or OzTent roll-out awning fits without modification. For 270° batwing installation, position the awning bracket toward the rear of the side rail so the batwing wraps across the trailer’s rear without covering the door or external shower (Ultra, Max).
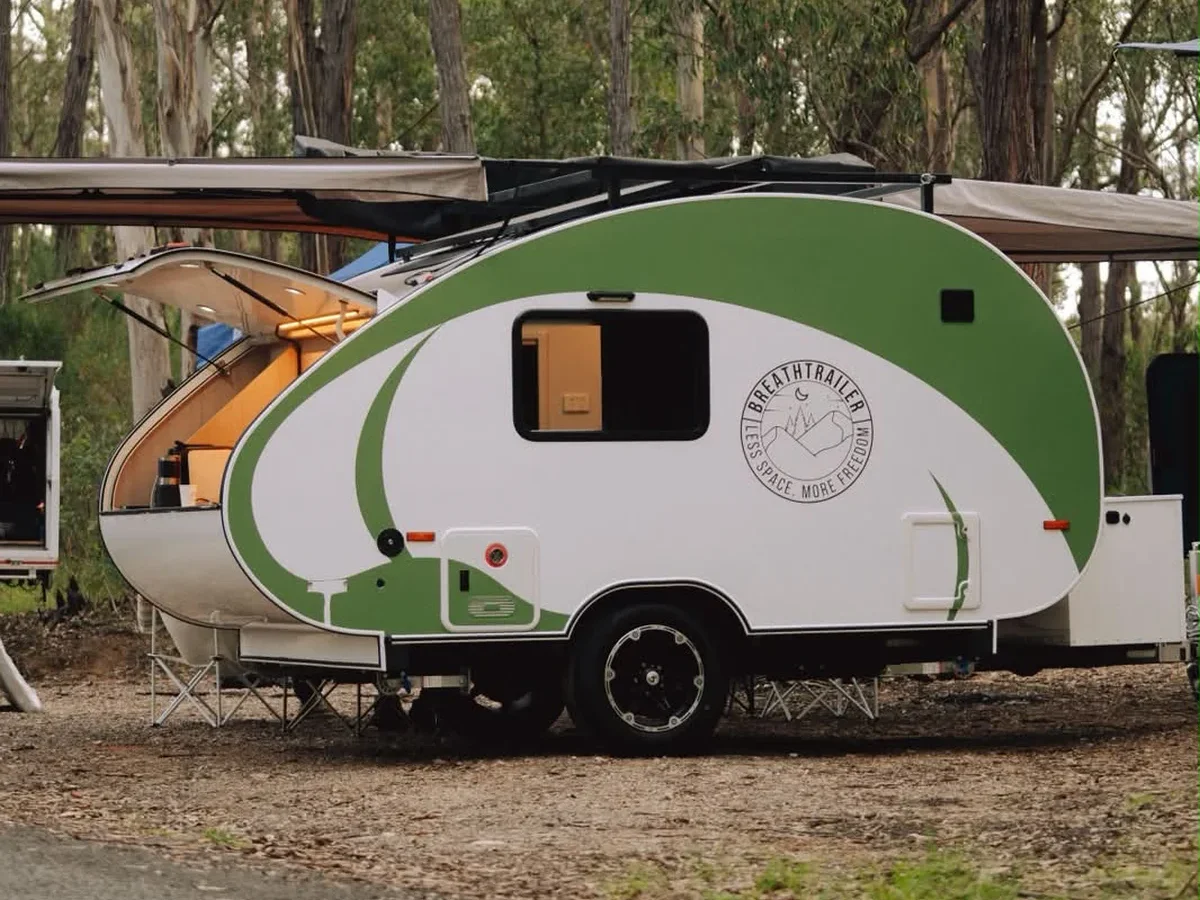
A Breath Max set up with its awning out and the rear galley open at a bush camp.
5 Awning Mistakes to Avoid
| Mistake | Why It Happens | Fix |
|---|---|---|
| Leaving awning deployed in rising wind | ”It’ll be fine” | Stow above 35 km/h. No exceptions. |
| Buying for vehicle not trailer | AWD-oriented products can be poorly shaped for teardrop profiles | Measure your rail height; check awning leg length range |
| No guy ropes or pegs in the kit | ”Just testing the setup” | Always carry pegs and guys. Always deploy on windy days. |
| Full PVC walls with gas cooking inside | Enclosed space feels snug | Keep at least one wall open when cooking gas indoors |
| Cheap UPF-unrated awning | Price-focused shopping | Check UPF 50+ on the spec sheet before buying |
FAQ
Do teardrop camper trailers come with awnings? Most Australian teardrop campers, including all four Breath Trailer models, do not include an awning as standard. They are typically sold as aftermarket accessories fitted before or after delivery. Budget $300–$1,700 AUD depending on whether you choose a 180° or 270° model.
How big an awning do I need for a teardrop camper? A 2.0 × 2.5 m roll-out awning (standard 180° size) comfortably shelters two camp chairs, a table, and a kitchen station. If you camp as a family of three or four, or frequently cook in rain or heat, step up to a 2.5 × 2.5 m model or a 270° batwing. Match awning width to trailer length — a 2.5 m awning on a short teardrop looks and performs better than a 3.0 m model.
Can I leave my awning out all day unattended? Only in calm, stable conditions (under 20 km/h forecast). Check the weather before leaving camp. Australian afternoon thunderstorms, particularly in Queensland and the NT, can arrive with 50–70 km/h gusts in under 10 minutes. If there’s any uncertainty, roll it up.
What’s the best way to attach an awning to a teardrop trailer without a roof rack? The cleanest option is a side-rail C-channel already fitted to the trailer. If your trailer doesn’t have one, L-brackets bolted into the structural frame (not just the skin) with butyl tape sealing are a solid second option. Avoid adhesive-only attachment — awning loads in wind are substantial.
Does a 270° awning need extra support poles? Yes. All 270° batwings should be deployed with their support legs and, in any wind above 15–20 km/h, guy ropes from each corner. The larger sail area creates proportionally more load than a 180° model. Deploy the guy ropes every time, not only when it’s already windy.
How do I stop insects getting under the awning at dusk? Amber-coloured lighting (590–600 nm) attracts around 60% fewer insects than white light. Add a mesh side wall facing the direction that insects approach from (usually windward), and consider a mesh front wall on warm Queensland or Northern Territory nights. This is the fastest way to improve the awning experience on summer trips.
The Bottom Line
The right awning setup turns a teardrop camper into a proper base camp. For most Australian couples and solo travellers, a quality 180° roll-out awning (Darche Eclipse Slimline or ARB Touring, $400–$800) with an anti-flap kit, a set of sand pegs, and a mesh side wall covers every scenario. Families and serious overlanders who free-camp in open paddocks should budget for a 270° batwing (Darche Eclipse 270 G2 at $1,499 being the benchmark for build quality) and allow an extra 45 minutes at first camp to get the guy rope geometry right.
Whichever you choose: peg it every time, stow it in wind, and keep the UPF 50+ rating between you and the sun.
Ready to see how Breath Trailer models set up for a full outdoor camp? Compare all four models or book a viewing at one of our ambassador locations across New South Wales.