Camper Trailer Kitchen Features That Make Camping Easier
Slide-out, fridge size, sink and bench space rated by how often they actually get used on a trip.
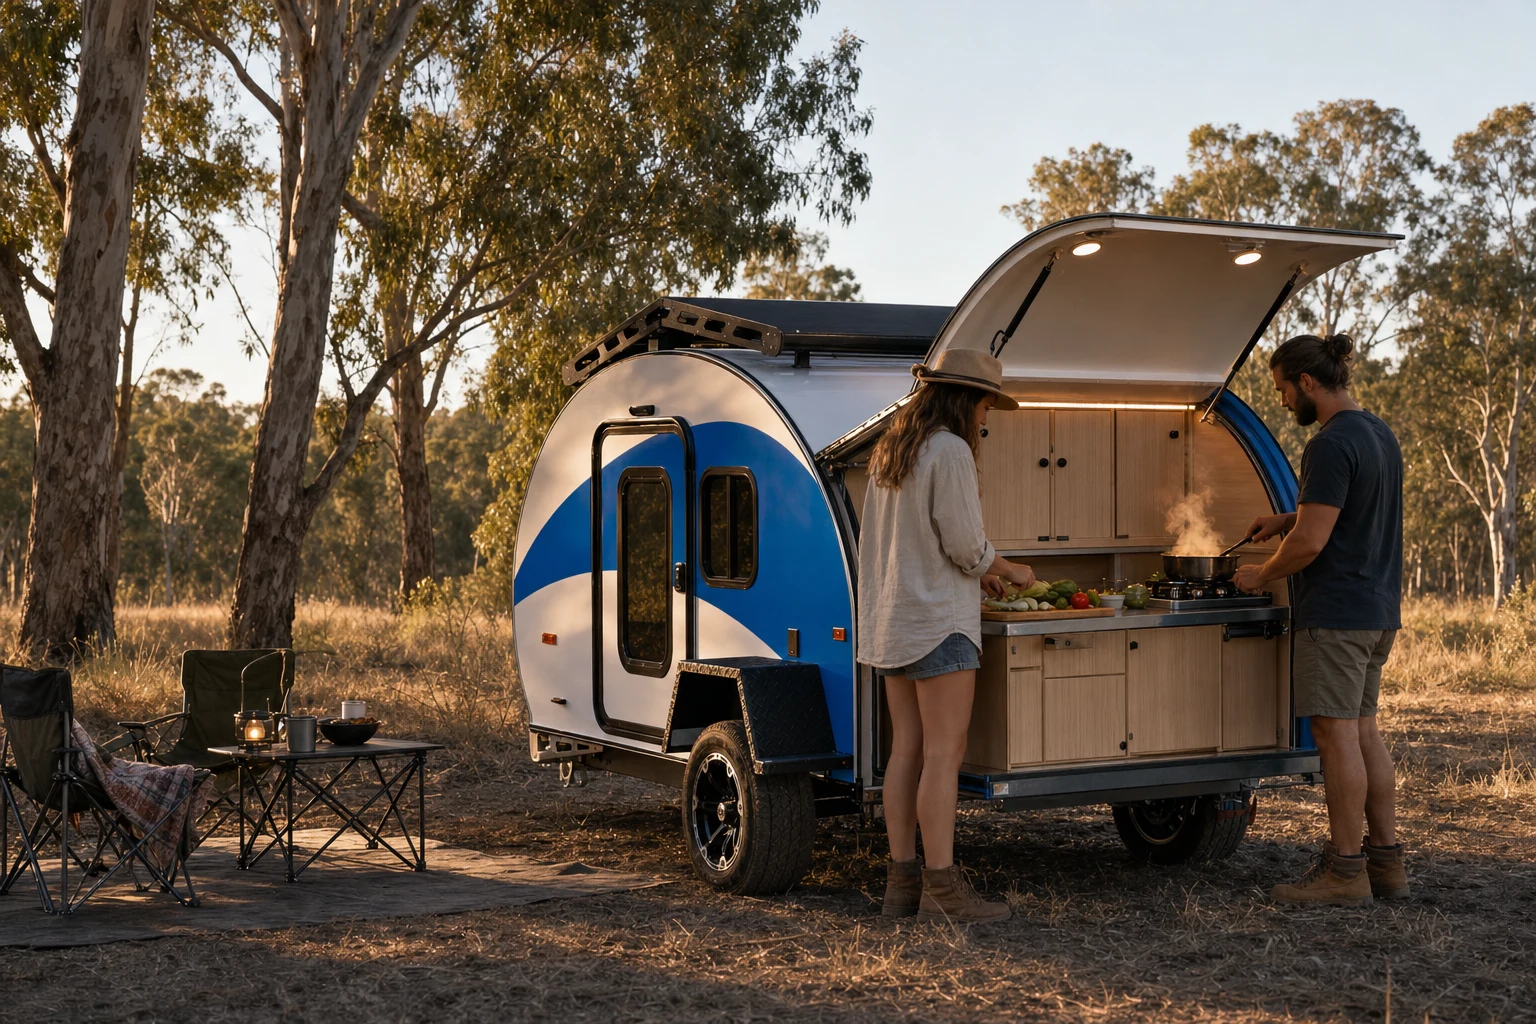
There is a moment on every trip that tells you whether your camper trailer kitchen was designed by someone who camps, or by someone who draws. It is about 6:30 pm, you have been driving since lunch, the light is going, and someone asks what’s for dinner. In a well-designed galley you lift a hatch, click on a burner and you are cooking in ninety seconds. In a badly designed one you are unpacking three tubs onto a camp chair, hunting for the gas bottle spanner and eating at nine.
The gap between those two experiences is not money. It is a short list of specific camper trailer kitchen features — where the bench sits, how the drawers run, whether the sink drains somewhere legal, and whether the fridge is at hip height or buried under the bedding. Most of them cost the manufacturer very little and save you twenty minutes a day, every day, for the life of the trailer.
This guide breaks down every kitchen feature worth caring about in 2026, with real Australian prices, the gas and grey water rules that actually apply here, and an honest assessment of which features you can skip. We design and finish hard-shell teardrop campers in Sydney, so we have a view — but the checklist below applies whether you are looking at a canvas soft-floor, a forward-fold or a teardrop.
Why the camp kitchen is the feature people underestimate most
Buyers spend hours comparing suspension, tare weight and battery capacity, then choose a kitchen by looking at one photo. That is backwards. You interact with the suspension for six hours of driving; you interact with the kitchen three times a day, every day, usually in bad light and often in wind.
Three numbers worth holding onto:
- A galley you can use without setting up camp saves roughly 15–20 minutes per meal stop. On a two-week trip with one roadside lunch a day, that is three to four hours of your holiday back.
- Most “we stopped using the camper” stories start with food. Not the bed, not the tow. The friction of cooking is what turns a weekend away into a motel booking.
- Kitchen retrofits are the most expensive kind. Adding a compliant sink, pump, plumbing and drainage after the fact typically costs $900–$2,500 installed, versus a few hundred dollars of parts if it was engineered in from the start.
If you are still deciding between camper types altogether, our small camper trailer vs large caravan comparison covers the trade-offs at a category level. This article assumes you have narrowed it down and now want to judge the kitchen itself.
The two kitchen architectures: slide-out drawer vs rear galley
Almost every Australian camper trailer kitchen is one of two designs, and they behave very differently at camp.
The slide-out kitchen lives in a tunnel boot or external compartment and rolls out on heavy-duty runners. It is the standard on hybrid caravans and many forward-fold campers. Because it pulls clear of the body, you get long bench runs and you can usually reach it without unhitching or setting up.
The rear galley is the teardrop signature: lift the rear hatch and the whole kitchen is there, weather-protected under the hatch itself, at standing height. Everything is fixed in place, so nothing rattles loose on corrugations and nothing needs deploying.
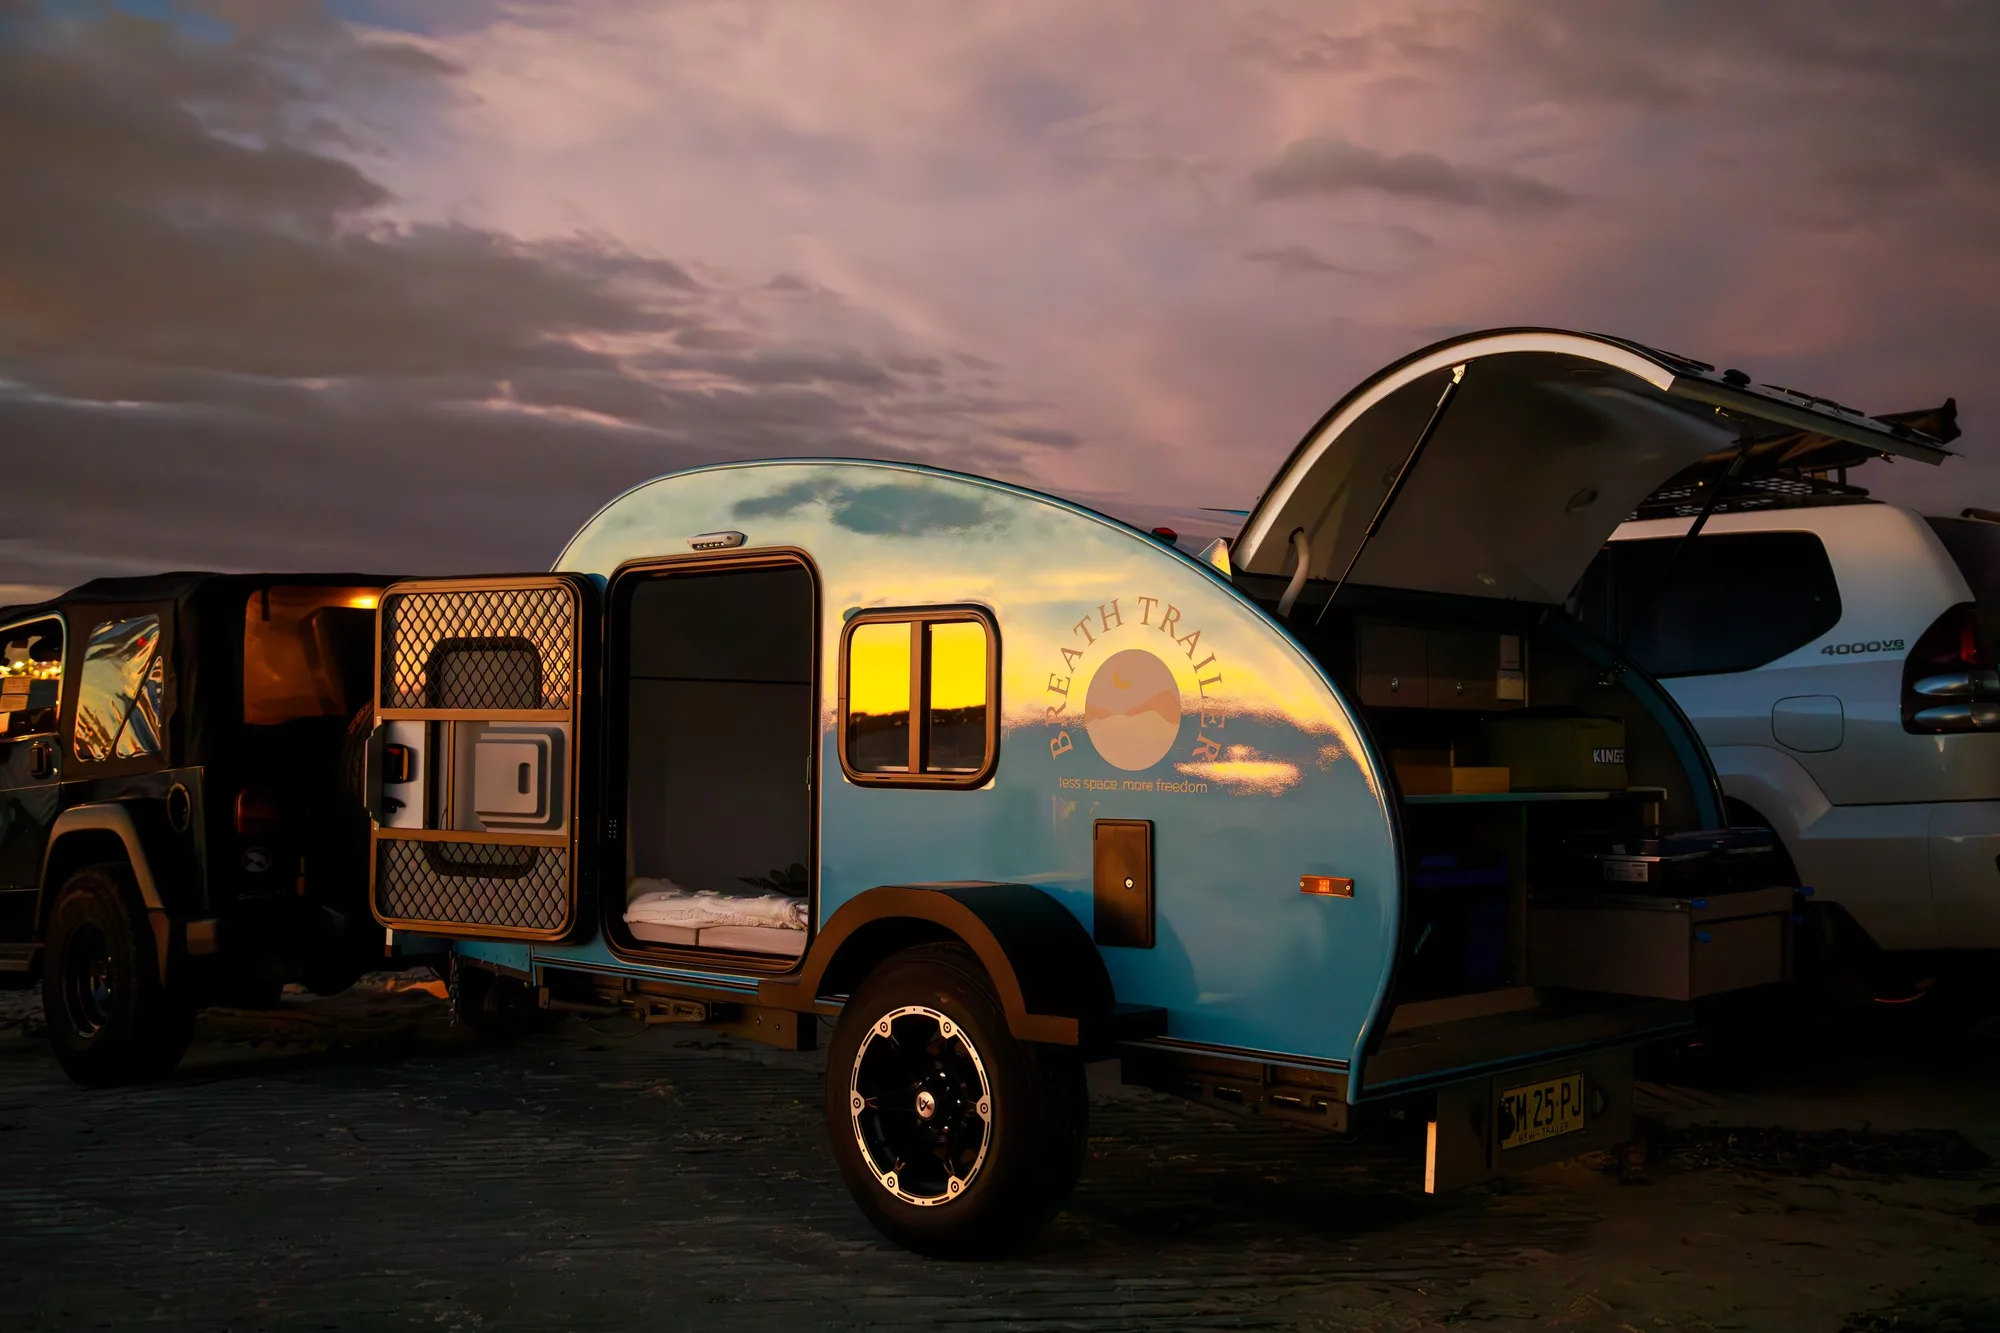
Lift the hatch and the whole galley is there, sheltered under the hatch itself.
| Slide-out kitchen | Rear galley (teardrop) | |
|---|---|---|
| Setup time | 30–60 seconds (pull out, level legs) | 5–10 seconds (lift hatch) |
| Weather protection | Open — needs an awning in rain | Hatch acts as a roof over the bench |
| Bench length | Longer (up to ~1.6 m on long slides) | Shorter (~1.0–1.2 m) but deeper storage above |
| Rattle/wear points | Runners, latches, support legs | Gas struts, hatch seal |
| Access when hitched | Yes | Yes |
| Typical retrofit cost | $1,200–$3,000 for a quality slide unit | Not retrofittable — it is structural |
| Best for | Big-group cooking, long stays in one spot | Fast touring, frequent moves, wet weather |
Neither is objectively better. If you camp in one spot for a week and cook for five, the extra bench of a long slide-out wins. If you move every day or two and cook for two, the hatch-over-your-head galley wins — and it wins hardest in rain, which is when camp kitchens usually get abandoned.
Bench and preparation space: the number nobody publishes
Bench area is the single most-used feature and the least-advertised spec. As a working rule:
| Party size | Minimum usable bench | What it actually fits |
|---|---|---|
| Solo | 0.25 m² (~500 × 500 mm) | One board, one pan landing spot |
| Couple | 0.4 m² (~800 × 500 mm) | Board + two plates + kettle |
| Family of four | 0.6 m²+ (~1,200 × 500 mm) | Board + staging + serving |
Two details matter more than raw area:
- Stainless steel over laminate or timber-look board. Stainless takes a hot pan, takes bleach, and does not swell when water gets into an edge. Laminate benches in camp kitchens fail at the edges within a few years of wet use.
- A lip or fiddle rail. Camp sites are never level. A 10–15 mm raised edge is the difference between a spilled cutting board and a clean one.
Beware the marketing photo that counts the open hatch, the drop-down table and the fridge lid as “bench space”. Measure the flat, permanent, usable stainless — that is the number you live with.
Cooking: gas, induction, or both
Gas is still the default, and here is why
LPG remains the standard for Australian camp cooking because it is fast, it does not care about your battery state of charge, and a 4 kg bottle runs a couple for two to three weeks of normal cooking. A twin burner is the meaningful upgrade over a single: it lets you run a pot and a pan at once, which is the entire difference between “camp food” and “dinner”.
Real 2026 Australian pricing for the portable option, if your camper does not include a cooktop:
| Stove | Burners | Weight | Typical AU price |
|---|---|---|---|
| Gasmate Travelmate II | 1 | 1.65 kg | ~$45–60 |
| Gasmate Compact 2 Burner | 2 | 3.25 kg | ~$79–99 |
| Gasmate Turbo 2 Burner | 2 | ~5 kg | ~$139 |
| Coleman 2-burner (wind-shielded) | 2 | 6.12 kg | ~$150–190 |
| Weber Baby Q (Q1200N) | 1 (grill) | 12 kg | ~$330–400 |
A built-in cooktop is better than any of these in daily use — it is plumbed, it does not need setting up, and it does not eat storage space — but only if it was installed to standard (see the compliance section below).

A built-in two-burner cooktop on a slide-out drawer: nothing to set up, nothing taking up storage.
Induction: excellent, but do the maths first
Induction cooking is genuinely appealing — no gas bottle, no flame, no fumes, instant control. The problem is Australian off-grid reality. Portable induction units for RV use draw 1,000–2,400 W, and most caravan-oriented models sit at 1,800–2,400 W on high.
To run that off-grid you need, per multiple Australian auto-electricians, a 200 Ah lithium bank minimum (400 Ah recommended) and a 2,000 W pure sine wave inverter minimum (3,000 W recommended), because the battery has to sustain roughly a 160 A discharge. That is a $4,000–$7,000 electrical system before you have bought the cooktop.
The honest summary:
| Cooking method | Off-grid friendly | Upfront cost | Best use |
|---|---|---|---|
| Twin gas burner | Yes — independent of battery | $100–$400 | Everyone, everywhere |
| Induction on 200 Ah+ lithium + 2,000 W inverter | Only with a serious system | $4,000–$7,000 | Powered sites, big solar setups, gas-free households |
| Diesel cooktop | Yes | $1,500–$2,500 | Snow/alpine, long remote trips |
| Weber/BBQ | Yes | $330–$400 | Roasts, groups, social cooking |
If you are sizing an electrical system with cooking in mind, start with our inverter sizing guide and the complete guide to camper trailer power systems before you commit to induction.
The gas compliance section nobody wants to read (but should)
This is where a lot of cheap kitchens quietly fail, and where a DIY build can void your insurance.
Gas installations in Australian recreational vehicles must comply with AS/NZS 5601.2, updated in 2020. Under the NSW Government’s guidance for gas services in recreational vehicles and the equivalent Queensland guidance for gas systems in caravans and RVs, the key rules are consistent nationally:
| Requirement | The rule |
|---|---|
| Cylinder size | Maximum 25 L capacity (nominal 9 kg) per cylinder |
| Cylinder count | Maximum 2 cylinders connected to the installation |
| Storage compartment | Must contain only cylinders and their fittings — no batteries, no electrical equipment, no ignition sources |
| Compartment sealing | Must be sealed from the interior and vented to outside atmosphere |
| Interior access | Compartment must not be accessible from inside the camper |
| Who can install | Licensed gasfitter only — for appliances, regulators, pipework, testing |
| Paperwork | Installer must issue a compliance certificate on completion |
Two practical consequences:
- A gas bottle strapped next to your battery box is not compliant. It is one of the most common faults we see on second-hand campers, and it is an easy thing to check with your own eyes on an inspection.
- Ask for the gas compliance certificate before you hand over money. If the seller cannot produce one for a built-in cooktop, budget for a licensed gasfitter to inspect and certify. This sits alongside the electrical rules covered in why professional installation matters.
Sink, water and the grey water trap
A sink sounds trivial until you have washed up in a plastic tub in the dark for four nights.
The pump. Most Australian campers run a 12 V diaphragm pump moving 10–12 L/min at 35–45 psi. That is enough to run a kitchen tap and an outdoor shower without pressure collapse. Lower-flow pumps feel weak; higher-flow pumps just empty your tank faster.
The drain — this is the part that matters. Grey water is wastewater from the kitchen sink, basin and shower. A growing list of Australian national parks, councils and free camps now require vehicles to be fully self-contained, meaning grey water must be captured rather than tipped onto the ground. A sink that drains straight onto the dirt is a sink that gets you moved on.
| Grey water solution | Capacity | Typical AU cost | Notes |
|---|---|---|---|
| Bucket under the outlet | 10–15 L | $10 | Legal-ish, but overflows constantly |
| Portable bladder tank | 20–40 L | $80–$180 | Cheap, packs flat, needs manual emptying |
| Wheeled tote tank | 40–60 L | $250–$450 | Easiest to empty at a dump point |
| Built-in under-chassis tank | 40–80 L | Factory-fitted | The only genuinely hands-off answer |
Rule of thumb: a couple washing up and rinsing produces roughly 8–15 L of grey water a day from the kitchen alone. A 40 L tank is about three to four days. Empty it every few days regardless — grey water goes sour fast and starts to smell. And never repurpose your drinking water tank as a temporary grey tank; the contamination risk is real and permanent.
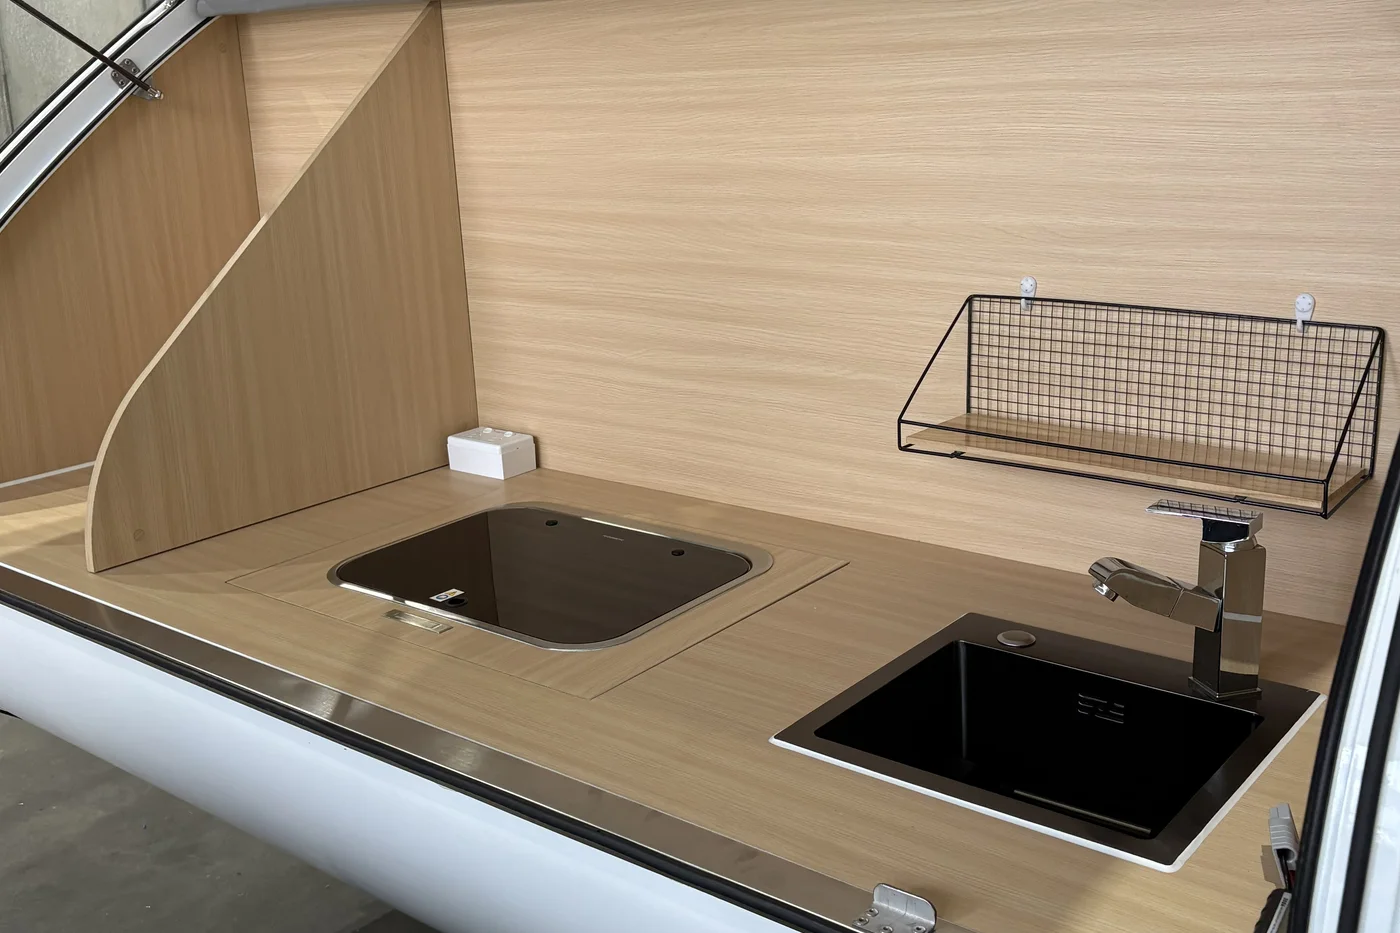
A fitted sink is only half the job; the other half is where its grey water goes.
If free camping is the goal, read our self-contained camper guide for Australia — it covers the CMCA self-containment expectations and how the rules differ state to state.
Refrigeration: where it sits matters as much as how big it is
Fridge capacity gets all the attention. Fridge position is what determines whether you use it.
- Chest fridge under a bench — you have to clear the bench every time you open it. Fine for a slide-out kitchen with a dedicated fridge slide; painful anywhere else.
- Fridge on a drop slide — the standard fix. Lets the lid clear the opening. Adds weight and cost.
- Upright fridge at hip height in the galley — best in daily use by a wide margin. You open a door, you see everything, you take one thing out. No unpacking, no bending, no bench-clearing.
Sizing, roughly: 40 L suits a solo traveller or a weekend, 60 L is the sweet spot for a couple touring, and 80 L+ starts to make sense for a family of four or trips longer than a week between resupplies. The power cost matters too — a 60 L compressor fridge in Australian summer conditions can pull 45–60 Ah a day, which is usually the single biggest load in the trailer.
We wrote a full breakdown of the numbers, brand pricing and packing technique in how to keep food cold while camping off-grid.
Storage: drawers beat shelves, and lids beat neither
The kitchen features that quietly save the most time are all storage details:
- Full-extension drawers on ball-bearing runners. You can reach the back. Cheap runners bind under load and jam once dust gets into them. Look for stainless or coated runners, not raw steel.
- Positive latching on everything. Corrugations open any drawer that relies on friction. A drawer that opens at 80 km/h on the Oodnadatta empties itself.
- Overhead shelves above the bench. Vertical space is free space. Overhead bays for plates, mugs and dry goods keep the bench clear for actual cooking.
- A dedicated pantry that stays packed. The single biggest time saver in camp cooking is not repacking food between trips. If oil, salt, sauces and dry goods live in the trailer permanently, departure becomes a fifteen-minute job.
- Cutlery and utensil separation. Sounds precious. Isn’t. Rummaging through one deep tub for a spatula, in the dark, is the daily friction that grinds people down.
Lighting the galley: the cheap upgrade with the biggest payoff
Cooking happens after dark for most of the year. Two things fix a dark galley:
- A warm-white LED strip under the hatch or bench overhang (2700–4000 K), aimed down at the bench, not out at your eyes. Lighting costs almost nothing in power terms — a full night of LED strip lighting is around 7.5 Ah, versus 45–60 Ah for the fridge.
- Amber lighting for the outer area. Amber (590–600 nm) attracts roughly 60% fewer insects than cool white. On a summer evening in northern Australia that is the difference between eating outside and eating inside.
Our camper trailer lighting guide has the full lumen-by-zone and Kelvin breakdown if you are specifying or retrofitting.
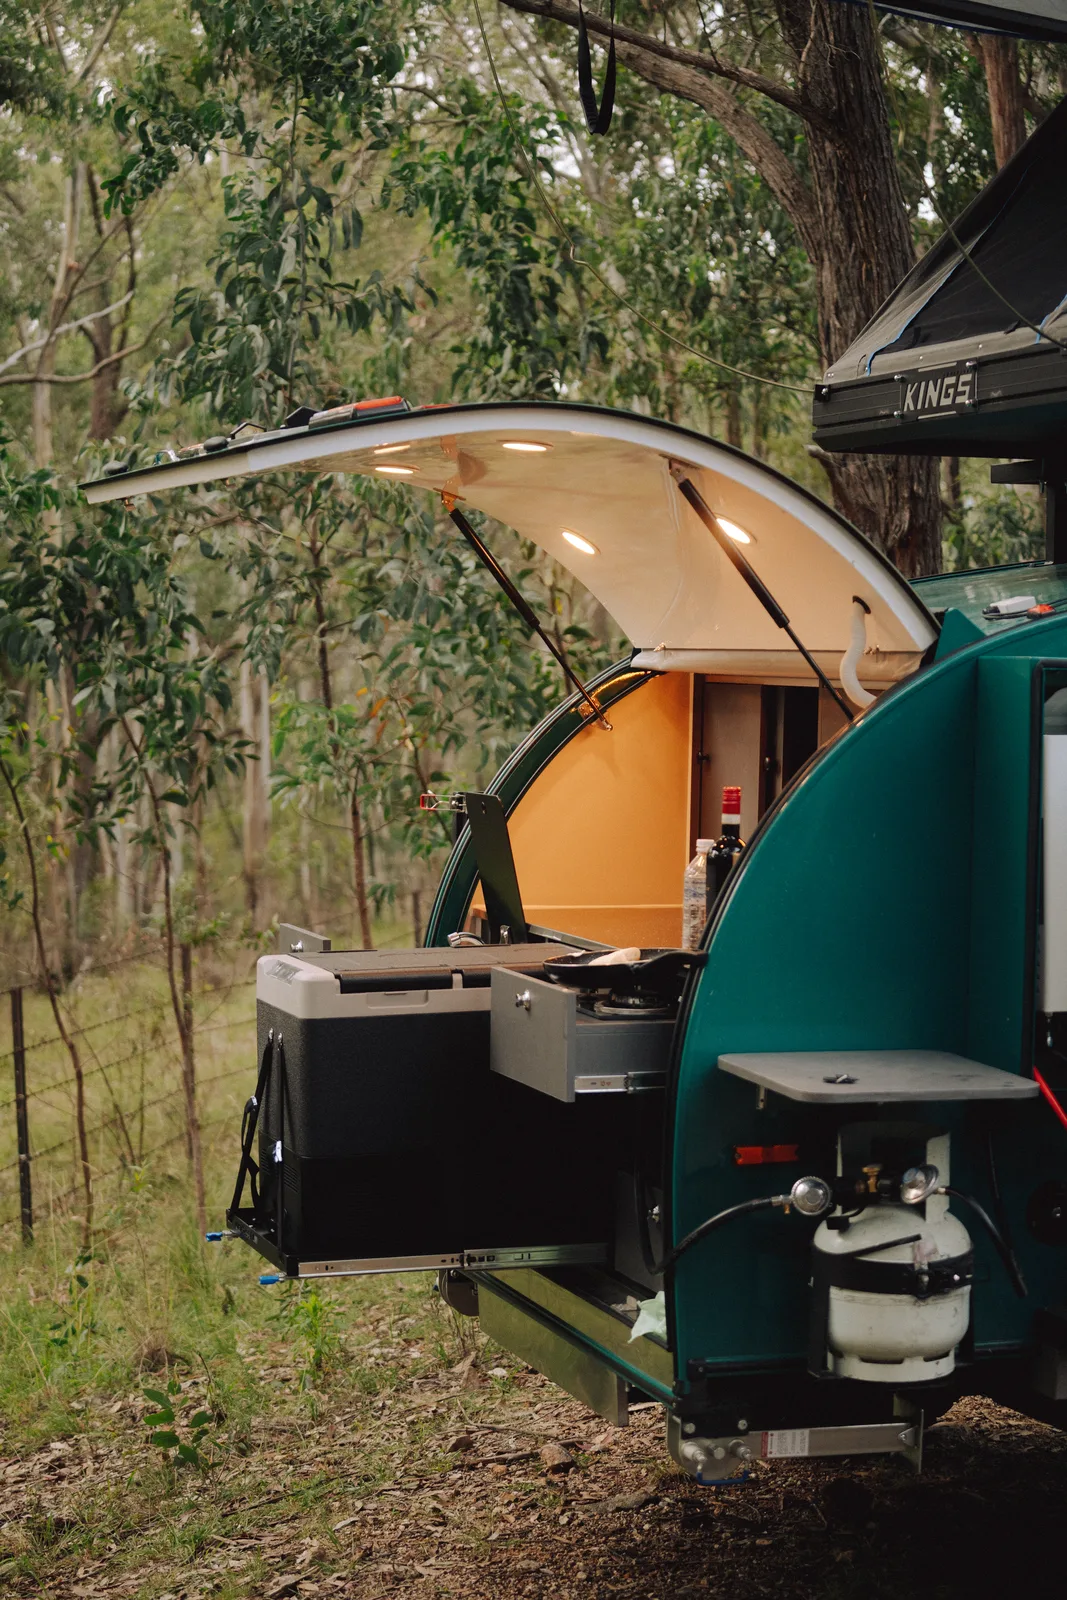
Downlights in the hatch put the light where you cook, which matters most after dark.
Hot water at the sink: nice-to-have or need-to-have?
Washing up in cold water works. Washing up in cold water in Tasmania in July does not. Options range from a $299–$450 Duoetto 12 V/240 V compact unit to a $499 portable gas Joolca through to $2,399 for a Truma AquaGo built-in. For a kitchen-only application, a compact storage unit is usually the right answer — instantaneous gas units are designed for shower flow rates you will never use at a sink.
The trade-off is power and plumbing: heating water electrically is expensive in amp-hours, and gas units bring you back into AS/NZS 5601.2 territory. Full comparison in our camper trailer hot water system guide.
How the four Breath Trailer galleys compare
We specify every model with a rear galley under the hatch, so the differences are about what is fitted, not about the architecture.
| Feature | Essential ($23,320) | Plus ($29,766) | Ultra ($34,749) | Max ($42,900) |
|---|---|---|---|---|
| Bench | Stainless with custom drawer | Stainless | Stainless | Stainless |
| Sink with tap | Yes | Yes | Built-in sink | Built-in sink |
| Cooktop | Slide-out stove compartment | Double stove | Double stove | Double gas stove |
| Fridge | Optional (upgrade later) | Included | 60 L | Upright fridge |
| Overhead storage | — | Overhead shelf | Double overhead shelves + multiple bays | Overhead storage shelf |
| Galley lighting | LED | LED | LED colour-changing kitchen lights | LED |
| Tare weight | 700 kg | 800 kg | 900 kg | 1,200 kg |
Two things worth being straight about. The Essential is deliberately lean — it has the bench, sink and stove compartment, and you add the fridge when you are ready, which is why it starts at $23,320. And the Max is the only one of the four where the galley sits alongside a full interior bathroom; it remains, as far as we are aware, the only teardrop camper on the Australian market under $50,000 with a full interior bathroom, 2.1 m standing headroom and a queen bed.
If you want them side by side on every spec rather than just the kitchen, the full model comparison has the complete table, and the individual pages for the Breath Plus, Breath Ultra and Breath Max go deeper on each.
The kitchen inspection checklist: 12 things to check before you buy
Take this list to any viewing, ours or anyone else’s.
| # | Check | What good looks like |
|---|---|---|
| 1 | Usable bench area | Measure the flat stainless only — 0.4 m² for a couple |
| 2 | Bench material | Stainless steel, welded or sealed edges, raised lip |
| 3 | Gas compliance certificate | Produced on request, references AS/NZS 5601.2 |
| 4 | Gas bottle compartment | Sealed, vented outside, no battery or wiring inside |
| 5 | Cylinder size and count | ≤25 L each, maximum 2 |
| 6 | Drawer runners | Full extension, ball bearing, positive latch |
| 7 | Latch test | Open and shut every drawer and door 5 times |
| 8 | Water pump | 10–12 L/min, 35–45 psi, runs quietly |
| 9 | Sink drain | Goes to a grey tank or a fitting for one — not straight to ground |
| 10 | Fridge access | Openable without clearing the bench |
| 11 | Galley lighting | Warm LED aimed at the bench, switch reachable from outside |
| 12 | 12 V outlets in the galley | At least one USB and one 12 V socket at bench height |
For the broader pre-purchase inspection beyond the kitchen, pair this with our things to check before buying a teardrop camper.
What you can safely skip
Being honest about what does not earn its keep:
- Three-burner cooktops. The third burner is used approximately never in a two-person setup, and it eats bench space permanently.
- Built-in ovens. Heavy, power-hungry or gas-hungry, and a camp oven or Weber does the same job better outdoors.
- Instantaneous gas hot water for a sink-only application. Overkill and overpriced for what it does at a tap.
- Fancy pull-out spice racks. Every one we have seen rattles itself apart within a season. A latched drawer with a tub in it does the same job.
- Slide-out kitchens on a trailer you move every day. If you rarely stay two nights, deployment time matters more than bench length.
Frequently asked questions
What is the most useful camper trailer kitchen feature in Australia? A twin gas burner combined with a sink that drains into a grey water tank. The twin burner turns camp food into real cooking, and the grey tank is what makes free camping legal in a growing number of Australian parks and council areas.
Do I need a licensed gasfitter for a camper trailer kitchen? Yes, for anything fixed. Under AS/NZS 5601.2, appliance installation, regulators, pipework, testing and certification must be carried out by a licensed gasfitter, who then issues a compliance certificate. A portable stove connected to a POL-fitted bottle outside the camper is a different matter and does not require certification.
How big should a camper trailer fridge be? 40 L for solo or weekends, 60 L for a couple touring, 80 L or more for a family or trips longer than a week between resupplies. Position matters as much as capacity — an upright fridge you can open without clearing the bench gets used far more than a chest fridge buried under one.
Can you run an induction cooktop in a camper trailer off-grid in Australia? Yes, but only with a serious electrical system: a 200 Ah lithium bank at absolute minimum (400 Ah recommended) and a 2,000–3,000 W pure sine wave inverter, because portable induction units draw 1,000–2,400 W. For most Australian travellers, gas is still the practical choice off-grid.
How much grey water does a camp kitchen produce? Roughly 8–15 L a day for a couple washing up and rinsing. A 40 L tank gives you three to four days. Empty it every few days regardless of level, because grey water starts to smell quickly in warm conditions.
Is a slide-out kitchen better than a teardrop rear galley? It depends on how you travel. Slide-outs give you longer bench runs and suit long stays in one spot; a rear galley under a hatch is faster to open, better protected from rain and wind, and has fewer moving parts to fail on corrugated roads. Frequent movers are usually better served by the galley.
What does it cost to retrofit a kitchen into a camper trailer? A compliant sink, 12 V pump, plumbing and drainage typically runs $900–$2,500 installed. A quality slide-out kitchen unit is $1,200–$3,000. This is why kitchen design is worth weighting heavily at purchase — it is one of the least economical things to add later.
The bottom line
A good camper trailer kitchen is not a long list of features. It is a short list of the right ones: enough stainless bench to work on, a twin burner, a sink that drains somewhere legal, a fridge you can open without unpacking, drawers that stay shut on corrugations, and a light pointed at the bench instead of your face. Get those six right and cooking stops being the part of the trip you dread.
Get them wrong and you will do what thousands of Australians do every year — buy a camper, use it four times, and quietly list it.
If you want to see how a rear galley actually works before committing, the honest test is to stand at one and open everything. Book a viewing at one of our locations, lift the hatch, and time yourself making a cup of tea.
Recommended reading
- How to Keep Food Cold While Camping Off Grid — fridge sizing, power draw and Australian brand pricing.
- The Ultimate Off-Grid Camper Trailer Setup — how the kitchen fits into water, power and waste as one system.
- Best Camping Setup for Couples in Australia — awnings, outdoor kitchen kit and the full gear checklist.
- Camper Trailer Hot Water Systems — five system types with real 2026 Australian prices.
- Teardrop Camper Interior Layout Ideas — how galley design interacts with the rest of the floor plan.
Sources: NSW Government — Installation of gas service to recreational vehicles · Business Queensland — Gas systems in caravans and recreational vehicles · Snowys — Best Camping Stoves 2026 · 4WDing Australia — Running an induction cooktop from 12V