Essential Checklist Before Leaving for a Camping Adventure (2026)
The complete pre-departure checklist for Australian camper trailer adventures: tow vehicle, hitch, 12V systems, safety gear, campsite booking and the shakedown drive explained.
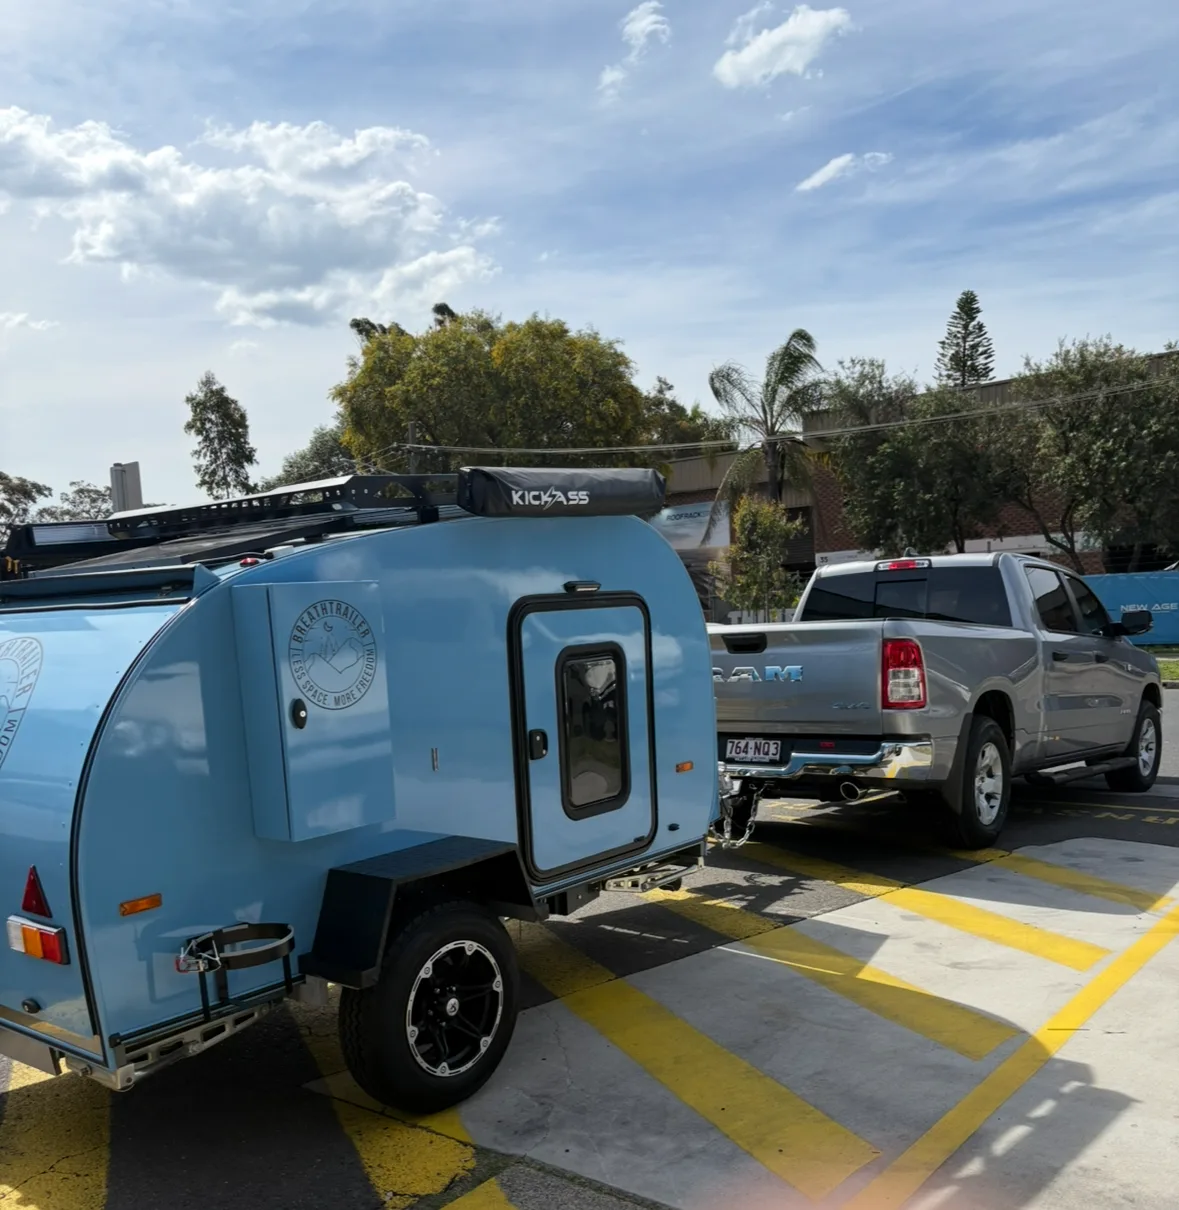
Every year, thousands of Australian camper trailer trips start the same way: a frantic morning, one forgotten item discovered three hours down the highway, and a tow vehicle that hadn’t been checked since the last trip. The consequences range from mildly annoying (no camp chairs) to genuinely dangerous (loose coupling, flat spare tyre, dead battery).
Australia is not a forgiving place to discover a mechanical problem. The nearest town can be 200 km away. Mobile coverage disappears without warning. Roadside assistance takes hours, not minutes. A structured pre-departure checklist — worked through methodically in the days before you leave, not in the driveway as you’re hitching up — is what separates a smooth adventure from a trip that turns expensive before you’ve even set up camp.
This guide gives you the complete checklist, broken into the time horizons that actually work: one month out, one week out, 48 hours out, the night before, the morning of departure, and the 20-minute shakedown drive that catches everything else. We’ve also included a per-model readiness table for all four Breath Trailer models.
One Month Out: Service the Rig Before You Book Anything
Booking campsites before your rig is road-worthy is backwards. If a mechanical problem forces a date change you lose your fees at most NPWS and QPWS sites. Do the service first.
Tow Vehicle
Have your tow vehicle serviced by a mechanic who understands towing. The demands of towing — sustained low-gear stress, higher brake temperatures, constant cooling load — accelerate wear that standard service intervals don’t fully account for.
| Service item | Check / action |
|---|---|
| Engine oil & filter | Change if within 2,000 km of service interval |
| Coolant level & condition | Top up; flush if overdue (typically every 2 years) |
| Brake fluid | Test moisture content; replace if >3% water |
| Transmission fluid | Check level; change if overdue — towing stresses transmissions hard |
| Brake pads & rotors | Measure pad thickness; replace if <3 mm |
| Power steering fluid | Check level and condition |
| Air filter | Replace if visibly dirty |
| Tyre tread & pressure | ≥3 mm tread all round; check cold tyre pressure to manufacturer spec |
| Spare tyre | Full-size spare preferred; check tyre age (>5 years = replace regardless of tread) |
| Tow bar & coupling | Check bolts for torque; inspect ball for wear; verify ball weight rating vs trailer ATM |
| Brake controller calibration | Adjust pendulum or accelerometer setting; test with loaded trailer |
Camper Trailer
A camper trailer that sat for months has unique failure points. Work through these before the trip, not at the campsite.
| Service item | Interval / action |
|---|---|
| Wheel bearings | Repack every 10,000 km sealed road / 5,000 km corrugated; replace if any roughness felt |
| Brake shoes & magnets (if GTM >750 kg) | Inspect for wear and contamination |
| Suspension check | Inspect pivot points, u-bolts, and shackles for cracks or play |
| Tyre tread & pressure | Match cold pressure to trailer manufacturer spec (often different from tow vehicle) |
| Spare tyre | Age check — most trailer tyres should be replaced at 5–7 years regardless of appearance |
| Coupling & hitch head | Clean, grease, and check for wear or cracks |
| Safety chains / cables | Inspect for wear, kinking, or stretched links; check hooks and pins |
| Jockey wheel | Retract and lock fully; check handle and pin condition |
| 12V wiring & connectors | Inspect plugs for corrosion; check all running lights, indicators, brake lights |
| Seals and weather strips | Inspect all doors, hatches, windows — reseal any gaps before wet weather |
| Water tank | Sanitise (125 mL bleach per 1,000 L, soak 2 hours, flush ×3) if unused for more than 6 weeks |
| Gas system | Annual inspection by licensed gasfitter; check regulator, hose age (replace every 5 years), and test for leaks with soapy water |
For a detailed wheel bearing service schedule by terrain, see our guide to why wheel bearings matter on a camper trailer.
One Week Out: Campsite Booking and Offline Navigation
Book Sites That Require Reservations
The free-first-in approach works at many bush camps, but it fails at popular spots in high season. NPWS sites in NSW, Parks Victoria, and QPWS sites in Queensland all require advance booking and payment — most are non-refundable within 48 hours.
Booking systems by state (2026):
| State | System | Lead time needed |
|---|---|---|
| NSW | NSW National Parks app / parks.dpie.nsw.gov.au | 6–12 months for popular sites |
| VIC | Parks Victoria app / parkstay.vic.gov.au | 3–9 months peak season |
| QLD | QPWS online / qld.gov.au/camping | 6 months for Fraser Island/Whitsundays |
| WA | dbca.wa.gov.au / online booking | 3–6 months Karijini/Cape Range |
| SA | parks.sa.gov.au | 2–4 months Flinders |
| TAS | parks.tas.gov.au | 3–6 months Freycinet/Cradle Mtn |
| NT | nt.gov.au/leisure/parks | 3–6 months Litchfield/Nitmiluk |
For free camps, download WikiCamps (65,000+ sites, ~$10 one-time, works offline) and CamperMate (free, similar coverage). Both apps allow you to filter by self-containment requirements, which matters when planning remote routes.
Download Offline Maps
Mobile data coverage is patchy across most of the regions Australians actually want to camp in. Download your maps before you lose signal, not after.
- Hema Explorer — the gold standard for 4WD Australia; track-level detail
- WikiCamps — offline camping data once downloaded
- Gaia GPS — detailed topo with satellite imagery overlay
- Google Maps — download the region for basic road navigation
Carry a printed paper map of any route beyond sealed roads. Phone batteries die; paper doesn’t.
48 Hours Before: Pack, Weigh, and Do a Full Electrical Test
Weight Is the Most Commonly Skipped Check
Exceeding your tow vehicle’s GVM (Gross Vehicle Mass) or your trailer’s ATM (Aggregate Trailer Mass) voids insurance, creates liability in an accident, and can cause the vehicle to handle unpredictably. Many rigs are overweight by 50–150 kg once food, water, clothes, and accessories are loaded.
How to check your rig weight:
- Pack the rig exactly as you would travel — water tank full, food loaded, passengers counted
- Visit a public weighbridge (free or ~$15 at most state weighbridge stations) or use a portable axle scale set
- Check: tow vehicle fully loaded ≤ manufacturer GVM; trailer loaded ≤ ATM; combined ≤ GCM; tow ball weight 8–15% of trailer ATM and below tow bar rating (typically 350 kg maximum)
For an explanation of tare, ATM, GTM, and payload and what each one means on your compliance plate, read our camper trailer weight guide.
12V and Electrical System Test
Run the full electrical system under load for 30 minutes before the trip, not when you arrive at camp and need the fridge cold.
| Check | What you’re confirming |
|---|---|
| Battery resting voltage | LiFePO4 ≥12.8V fully charged; AGM ≥12.7V |
| DC-DC charger | Plug in to tow vehicle 12V — confirm MPPT/bulk charging activates |
| Solar panels | Confirm MPPT controller is showing charge amps in sunlight |
| Fridge | Set temperature, confirm compressor starts, reach target temp within 2 hours |
| Interior lights | All circuits on and off correctly |
| USB charging | All sockets functional |
| 12V water pump | Confirm flow pressure and check for leaks at all fittings |
| Inverter (if fitted) | Run a 240V appliance under load for 5 minutes |
For battery and DC-DC charger background, see our complete guide to camper trailer power systems.
Pack With Weight Distribution in Mind
Pack the heaviest items — water, fridge, tools — directly over or just forward of the trailer axle. The goal is 60% of the payload on the axle side and roughly 40% at the rear. A nose-heavy load increases ball weight (good for stability up to 15%, bad beyond that); a tail-heavy load causes sway, which is the number one cause of jackknife accidents.
The Night Before: Lock the Locks and Charge the Devices
The night-before check is about systems, not packing. Everything should already be in the trailer.
| System | Action |
|---|---|
| Fridge | Running, at correct temperature (≤5°C); food loaded |
| Water tank | Full (or filled to planned capacity) |
| Gas bottles | Turned OFF at the bottle; regulator and hose inspected |
| All drawers and cupboards | Locked or secured with travel latches |
| Shower door / toilet door (if fitted) | Travel-latched closed |
| All windows and roof hatches | Closed and latched |
| TV antenna / satellite dish (if fitted) | Down and secured |
| PLB | Registered with AMSA; battery check light green |
| Phone and GPS | Offline maps downloaded; fully charged |
| UHF CB radio (if fitted) | Tested and functional |
| Headlights and brake lights | Quick walk-around test with a partner |
| Tyre pressure | Check trailer cold tyre pressure (pressures drop overnight in cold weather) |
| Medications | Packed with extra supply; prescription medications in carry-on bag, not checked gear |
| First aid kit | Stocked and accessible |
Morning of Departure: Hitch, Hook Up, and Roll
This is the checklist most people have in their head — but most people skip steps when they’re in a hurry. Print it and physically tick each item.
Hitching Sequence (7 steps)
- Lower the jockey wheel — position the coupling over the tow ball precisely
- Drop the coupling — lower it fully onto the ball; you should hear the latch click
- Check the coupling lock — insert the hitch pin or padlock; pull up on the A-frame to confirm the ball is captured (trailer should lift the vehicle’s rear, not pull off the ball)
- Attach safety chains / cables — cross under the coupling in an X pattern; short enough not to drag, long enough to allow full turns
- Plug in the 7-pin trailer connector — confirm brake controller activates (a number should appear if it’s a digital controller)
- Test all lights — brake lights, indicators left/right, running lights, reversing lights — have a passenger walk around the trailer or use a reflective surface
- Raise and lock the jockey wheel — secure the handle and pin
Mirrors
Towing mirrors are legally required in most Australian states when the trailer is wider than the tow vehicle. Fit them before driving, not when you remember at the petrol station. Adjust for a clear view of the trailer sides and rear.
Brake Controller (if fitted)
Test the manual override before reaching highway speed. At 20 km/h in a quiet street, press the manual test button — you should feel the trailer brakes applying with moderate resistance. If there’s no resistance, do not continue onto the highway until the brakes are diagnosed.
For the full legal requirements around electric brakes in Australia — including the ADR 38 GTM thresholds of 750 kg and 2,000 kg — read our guide to understanding electric brakes on a camper trailer.
Gas — Turn Off at the Bottle
Gas regulators must be turned off at the bottle before moving. This is not optional. A cracked hose under a moving trailer, with gas flowing, is a fire and explosion risk. Turn the valve clockwise until firmly closed, then check that no appliance pilots are lit.
The 20-Minute Shakedown Drive: Your Last Safety Net
Before joining the highway, take the loaded rig for a 20-minute drive on local roads. This catches:
- Brake controller setting — trailer should stop with the vehicle, not fight it or lag behind. Adjust gain if you feel either effect.
- Sway at 60–80 km/h — if the trailer sways, pull over and check tow ball weight (add weight at the front of the trailer) and tyre pressure
- Rattle or banging — something is not secured; stop and investigate before it causes damage or works loose at highway speed
- Brake light function — do a final rolling brake test and have a passenger confirm the trailer brake lights are activating
- Bearing heat — after 20 minutes, carefully touch the hubs (not the brake drums). Warm is normal; hot enough to be uncomfortable is a warning; too hot to hold is an emergency. Stop and investigate.
After the shakedown, do one final visual: all doors and hatches closed, jockey wheel retracted, stabiliser legs up, any camp chairs or rugs secured or packed.
Safety and Communications Gear: Never Leave Without These
Remote Australian travel requires a different safety mindset. The following items are non-negotiable if your route includes areas with no mobile coverage — and most routes worth doing eventually do.
| Item | Recommended spec / model | Cost approx. |
|---|---|---|
| Personal Locator Beacon (PLB) | GME MT610G GPIRB (registered with AMSA) | $389 |
| Satellite communicator | Garmin inReach Mini 2 (two-way messaging) | $599 + subscription |
| UHF CB radio | 80-channel UHF; Ch 40 = road channel | $80–$280 |
| First aid kit | Remote-area spec: include × 4 compression bandages (snake bite), trauma dressings, SAM splint, medications | $80–$200 |
| Fire extinguisher | 1 kg ABE minimum per vehicle + 1 per trailer | $40–$80 |
| Recovery gear | MaxTrax recovery boards × 2 + snatch strap + shackles + tree saver | ~$600–$900 |
| Portable 12V compressor | For tyre deflation recovery; ARB CKMTP12 or equivalent | $140–$280 |
A PLB registered with AMSA is required for any trip to genuinely remote areas and strongly recommended for all off-sealed travel. If you activate it, the Australian Maritime Safety Authority coordinates a rescue response — no subscription required.
For a full breakdown of recovery gear, comms, and tyre management, see our must-have accessories for off-road adventures.
Don’t Forget: Tell Someone Your Plan
This costs nothing and is the most important safety habit for remote Australian travel. Before you leave, send a trusted contact:
- Your planned route (day by day if it’s a long trip)
- Your planned campsites (with names and GPS coordinates if possible)
- Your expected return or check-in dates
- What action to take if they don’t hear from you by a certain time (typically: call emergency services and provide your planned route)
If you have a Garmin inReach or SPOT device, share your tracking link with the same contact so they can see your position in real time.
Self-Containment: Check Before You Assume
A growing number of free camps, council rest areas, and remote sites require vehicles to be fully self-contained — meaning you hold all grey water on board, carry your own toilet solution, and do not discharge any water onto the ground.
The Motorhome and Caravan Council of Australia (MCCA) accreditation is the most widely recognised self-containment standard. Not every site checks, but the fines where they do ($500–$2,500 depending on the state) are considerably larger than the cost of being prepared.
| Model | Grey water capacity | Toilet option | MCCA self-containment |
|---|---|---|---|
| Breath Essential | External grey water drain | No built-in toilet | Not MCCA self-contained |
| Breath Plus | External grey water drain | Optional porta-potti | Partially self-contained |
| Breath Ultra | 35 L grey water tank + external shower | Cassette toilet option | Near self-contained |
| Breath Max | 60 L grey water tank + full internal wet bath | Cassette toilet standard | Fully self-contained |
The Breath Max is the only teardrop on the Australian market under $50,000 with a full interior wet bath and a capacity that meets MCCA self-containment requirements — the feature that lets you free camp anywhere without asking permission.
For the state-by-state rules on grey water and self-containment, our self-contained camper guide covers the requirements in detail.
Pre-Departure Readiness by Breath Trailer Model
The four Breath Trailer models ship with different standard inclusions, which changes what you need to verify and what you need to bring yourself.
| Checklist area | Essential $23,320 | Plus $29,766 | Ultra $34,749 | Max $47,190 |
|---|---|---|---|---|
| Fridge included | No (12V power only) | Yes — 50 L compressor fridge | Yes — 60 L compressor fridge | Yes — 60 L compressor fridge |
| Solar standard | 120 W panel + MPPT | 160 W panel + MPPT | 200 W panel + MPPT | 300 W panel + MPPT |
| Battery | 100 Ah LiFePO4 | 120 Ah LiFePO4 | 150 Ah LiFePO4 | 200 Ah LiFePO4 |
| Tare weight | 700 kg | 800 kg | 900 kg | 1,200 kg |
| Brake requirement | GTM typically <750 kg — confirm with dealer | Electric brakes standard | Electric brakes standard | Electric brakes standard |
| Water tank | 60 L + pump | 80 L + pump | 80 L + pump + external shower | 100 L + pump + internal shower |
| Self-containment | Carry porta-potti + grey water bladder if needed | As above | Cassette toilet + 35 L grey water tank | Cassette toilet + 60 L grey water tank |
| What to bring | Fridge, portable stove if not packed | Portable stove if not packed | Check cassette toilet is empty and rinsed | Check cassette toilet + confirm grey water tank empty |
Frequently Asked Questions
How far in advance should I start preparing for a camping trip?
For a weekend trip with a rig you use regularly, 48 hours is sufficient. For a trip of 2–4 weeks, allow 2–4 weeks of preparation. For a big lap or remote expedition (Cape York, Simpson Desert), allow 2–3 months: service schedules, site bookings, and gear procurement all take time you cannot compress.
Do I need a brake controller if my trailer is under 750 kg GTM?
ADR 38 does not legally require brakes on trailers with GTM below 750 kg, but it does not prohibit them, and many trailers designed for off-road use fit brakes regardless. If your trailer has electric brakes (check the compliance plate and wiring), you must have a brake controller fitted and calibrated. Driving with brakes that are not connected is illegal.
What tyre pressure should I use for the trailer?
Cold tyre pressure for the trailer is different from your tow vehicle and is specified by the trailer manufacturer on the compliance plate or in the owner’s manual — not on the tyre sidewall (that figure is the maximum, not the recommended). For off-road tracks, you will typically reduce pressure to 25–35 PSI. Carry a quality gauge and a portable compressor so you can re-inflate before returning to sealed roads.
Can I do my own pre-trip camper trailer service?
Most pre-trip checks are owner-serviceable: lights, tyre pressure, coupling, chains, water tank sanitisation, and 12V function tests. Wheel bearing repacking, brake adjustment, and gas system inspection should be done by a qualified technician unless you have specific training. Getting these wrong creates real risk.
What should I do if my brake controller reads an error code at departure?
Do not drive onto the highway with a brake controller fault. Common causes include a disconnected or shorted trailer brake wiring, a faulty brake magnet, or a controller that has lost power. Diagnose the fault before you leave — or if you cannot, disconnect the brake wiring and tow only if your rig is legally within the no-brake threshold and the route permits it.
Is it safe to run the fridge while the trailer is being towed?
Yes, and it’s the correct approach for food safety. A compressor fridge draws power from the trailer’s battery, which is being recharged via your DC-DC charger from the tow vehicle’s alternator. Running the fridge throughout the drive means it is at temperature when you arrive, rather than spending the first 2–4 hours of camp chilling down.
The 30-Second Version
If you remember nothing else: service your rig at least a month out, weigh it loaded before you leave, do the 7-step hitching sequence in order every single time, and do a 20-minute shakedown drive before joining the highway. Everything else on this page is detail that supports those four habits.
For the full adventure trip planning picture, pair this checklist with our long-term travel preparation guide and our camper trailer towing guide. If you’re heading somewhere genuinely remote, the Simpson Desert preparation guide covers the specific demands of expedition-level travel.
Recommended Reading
- Camper Trailer Towing Guide Australia — towing capacity, ball weight, and the legal speed limits state by state
- Common Camper Trailer Problems and How to Avoid Them — the 10 failures that end trips, and the pre-departure checks that prevent them
- Teardrop Camper Maintenance and Care Australia — the full annual service schedule that keeps a camper reliable for 20,000 km
- Must-Have Accessories for Off-Road Adventures Australia — recovery gear, comms and tyre management in full
- Teardrop Camper Weight Australia — ATM, GVM, tow ball weight explained with a payload calculator
Ready to see which Breath Trailer model fits your adventure style? Compare all four models or book a viewing session at our Sydney showroom.