Camper Trailer Storage Ideas Australia: 30 Tips to Maximise Space (2026)
30 practical camper trailer storage ideas for Australian conditions — organised by zone, with payload maths, per-model tables and environment-specific tips for outback, coastal and alpine trips.
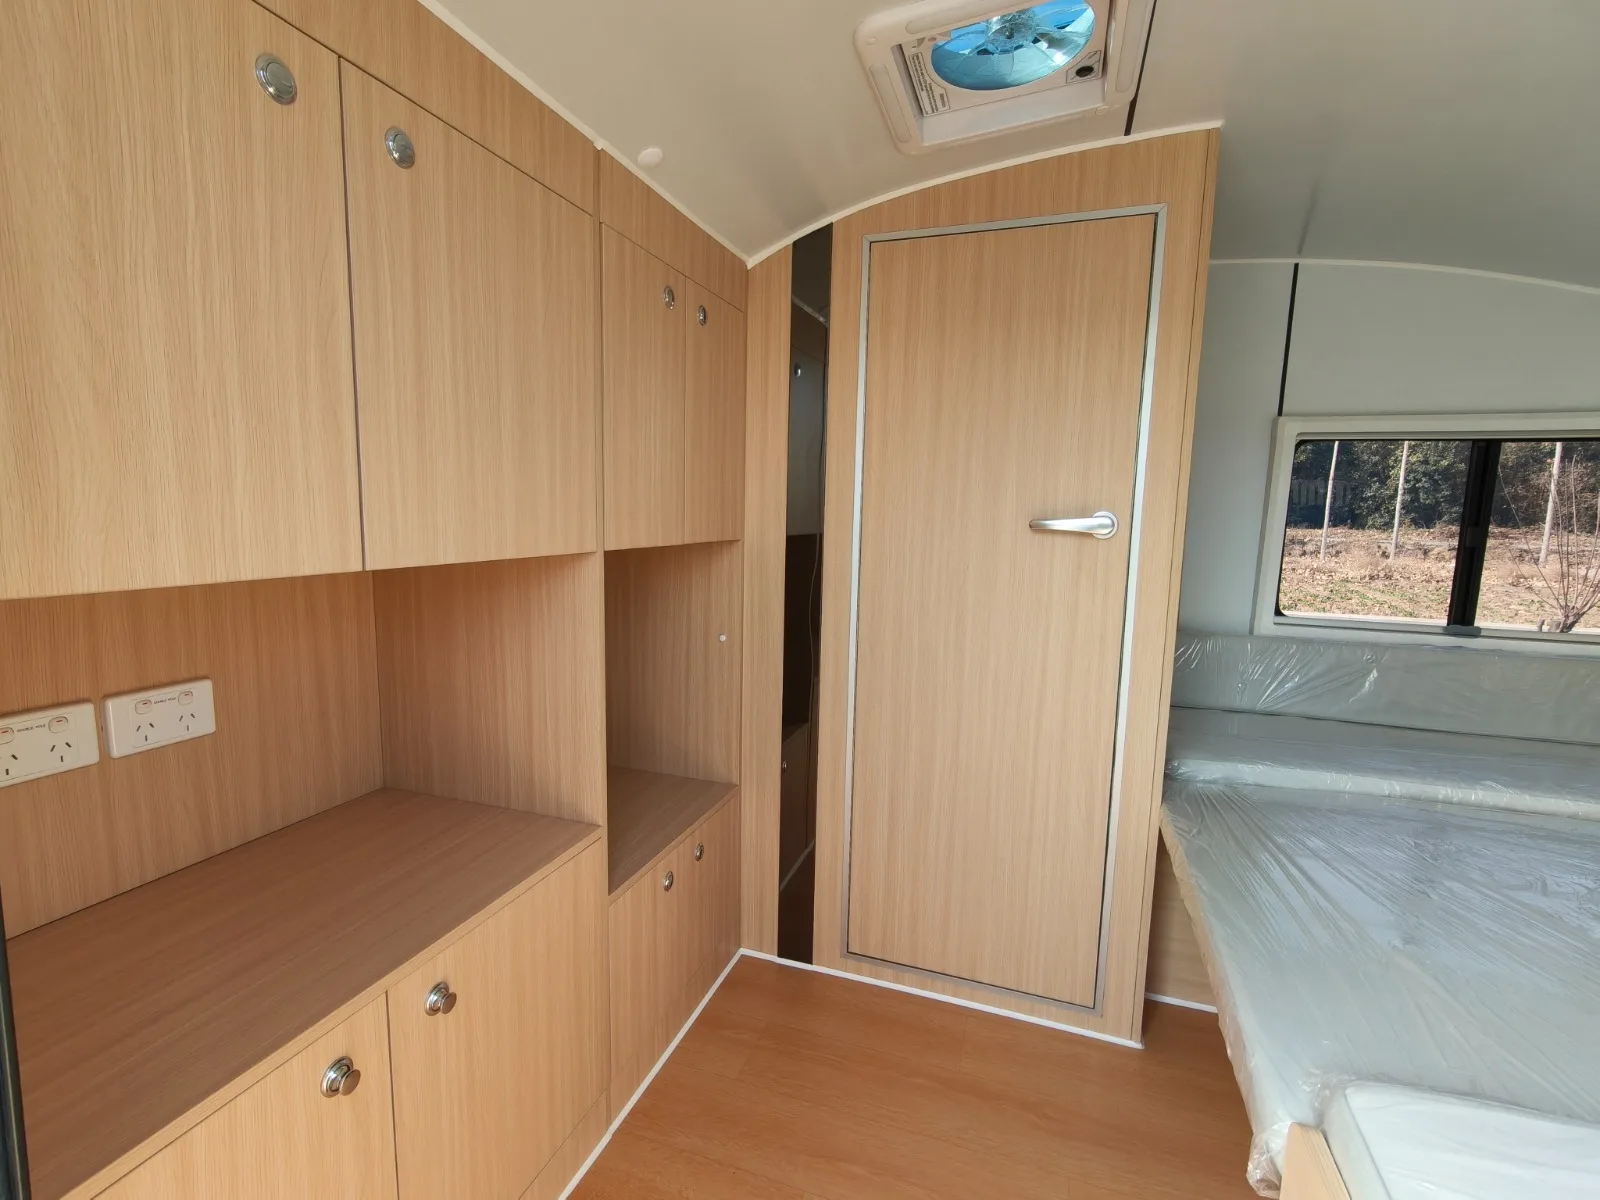
Australian camping is hard on gear and harder on organisation. You might be in the red dirt of the Flinders Ranges one weekend, at a coastal site on the NSW South Coast the next, then heading to the Victorian High Country in October. Each environment punishes different storage mistakes — the dust that gets into unsecured drawers in the outback is not the same problem as the salt spray that corrodes metal latches on the coast.
This guide covers 30 practical storage ideas for camper trailers, organised by zone (kitchen, bedroom, outdoor gear, tow vehicle) and environment. More importantly, it covers the one angle most storage guides skip entirely: payload-aware packing. The best-organised trailer in Australia still has a problem if it crosses its Aggregate Trailer Mass (ATM) the moment you load it up.
Why Payload Is Your True Storage Limit
Before you buy a single bin or drawer, understand your trailer’s payload. Payload is the difference between your trailer’s ATM (the maximum total weight it can legally carry, including itself) and its tare weight (empty weight as supplied).
Most camper trailer storage guides treat payload as someone else’s problem. It isn’t. A typical mid-range camper trailer has 200–400 kg of payload. Add two adults’ camping gear, water, food, and a 40 L fridge, and that margin disappears faster than you expect.
| Model | Tare | ATM | Payload ceiling |
|---|---|---|---|
| Breath Essential | ~700 kg | ~750 kg | ~50 kg |
| Breath Plus | ~800 kg | ~900 kg | ~100 kg |
| Breath Ultra | ~900 kg | 1,000 kg | ~100 kg |
| Breath Max | ~1,200 kg | 1,400 kg | ~200 kg |
Check the compliance plate on your trailer for the exact certified figures.
The Essential’s tight ~50 kg payload means you must pick storage systems that add no weight — thin plastic containers, not steel drawers. The Max’s larger margin gives you real flexibility. Either way, know your number before you start organising.
Tip 1: Weigh your trailer at a public weighbridge before your first major trip. Many council tips and truck stops offer free or cheap weighbridge access. Knowing your real loaded weight protects you legally and mechanically.
For a full breakdown of trailer weights, towing laws and how to calculate payload, see our guide to camper trailer weight and towing in Australia.
Understanding Your Trailer’s Built-In Storage
Hard-shell trailers and canvas fold-out campers approach storage very differently. Canvas campers often have a few pockets, a single external box and whatever you bring in. Hard-shell teardrops are engineered with dedicated zones — under-bed drawers, galley cabinets, frunk compartments — and that structure does most of your organisation work before you buy a single container.
| Feature | Hard-shell teardrop | Canvas camper trailer |
|---|---|---|
| Dedicated under-bed drawers | Yes (factory fitted) | Rare, usually aftermarket |
| Lockable external storage | Yes, typically 2–4 compartments | One unlockable box standard |
| Kitchen cabinet with shelves | Yes | Usually just a slide-out shelf |
| Dust-sealed compartments | Factory sealed | Canvas pockets: not sealed |
| Interior shelving | Yes, fixed | Usually none |
| Storage adds to tare weight | Already counted | Aftermarket adds weight |
Tip 2: Before modifying your trailer with aftermarket storage, map every factory compartment first. Most owners discover they already have more organised space than they realised — they just haven’t used it systematically.

Map the factory drawers, cupboards and bin space before you buy a single aftermarket organiser.
Tip 3: Ask your dealer for the as-built tare weight, not just the brochure figure. Factory-fitted extras (second battery, water heater, solar) add to tare before you load a single item.
The 60/40 Weight Distribution Rule
How you distribute weight inside your trailer matters as much as how much you carry. The standard towing guideline for camper trailers is to load approximately 60% of your payload toward the front (closest to the tow vehicle) and 40% toward the rear.
Heavy items forward reduce trailer sway at highway speed. Heavy items too far back create a pendulum effect that can cause dangerous oscillation.
| Zone | What to put here | Why |
|---|---|---|
| Front/drawbar box | Water (if external), tools, heavy recovery gear | Closest to tow ball → best sway control |
| Under-bed drawer (front) | Canned food, full water containers, fridge | Heaviest kitchen items forward |
| Under-bed drawer (rear) | Clothing, bedding, lightweight camping gear | Lighter items rearward |
| External rear compartment | Chairs, awning arms, camp table (lightweight) | Light items at the back |
| Roof/rack | Nothing heavy — only lightweight items like solar panel or bike | Raises centre of gravity |
Tip 4: Fill your water tank last, after loading everything else. Water weighs 1 kg per litre. An 80 L tank is 80 kg when full — load it at the end and you’ll notice whether the front-to-rear balance still feels right when you hitch up.
Tip 5: Never pack heavy items in a rear-mounted bike rack or cargo carrier without accounting for the tongue weight change. Moving 20 kg to the rear of the trailer can shift enough weight off the tow ball to reduce steering feel on your tow vehicle.
For detailed towing setup guidance, see our teardrop camper towing tips guide.
Kitchen and Galley Storage: The Most Contested Space
The kitchen is where most people run out of space first. A typical camper galley has a single drawer, a small shelf, and good intentions. Here’s how to stretch it.
Tip 6: Collapsible everything. Silicone collapsible bowls compress to 2 cm. Nesting cookware takes the space of one pot instead of four. Coleman, Sea to Summit and Oztrail all make AU-available collapsible kitchenware. Buy it; never regret it.
Tip 7: Decant food into flat containers. Supermarket packaging is wasteful in a galley — bulky, heavy per calorie and not dust-proof. Decant rice, pasta, oats and coffee into flat-sided Sistema or OXO containers that stack efficiently. Label them. A set of 12 Sistema 1.1 L rectangular containers runs about $35 at Coles/Woolworths.
Tip 8: Use a hanging pantry organiser. A canvas hanging pantry ($15–$30, BCF/Anaconda) clips to a cabinet door and gives you 6–8 pockets for spices, sauces, condiments and cooking oil. It adds zero fixed weight, weighs around 200 g itself, and frees up an entire shelf.
Tip 9: One chopping board as the worktop lid. A thin bamboo board that exactly covers your sink opening doubles as a prep surface and packs flat under the dish rack or against the galley wall.
Tip 10: Dedicate one dry box to “trip-specific” food. Rather than reorganising the whole galley each trip, keep one Sistema or Pelican-style dry box that you pack with fresh food and trip-specific perishables. It lives outside the galley between trips.
| Kitchen item | Storage method | Approx. AU price |
|---|---|---|
| Collapsible bowls × 4 | One stack, 3 cm high | $25–$40 (Sea to Summit) |
| Nesting cookware (3-piece) | One pot space | $40–$120 (Oztrail/Sea to Summit) |
| Hanging pantry organiser | Door-mount, 8 pockets | $15–$30 (BCF/Anaconda) |
| Flat rectangular containers × 12 | Two shelf rows | $30–$40 (Sistema at Woolworths) |
| Bamboo chopping board | Flat against galley wall | $10–$20 |
| Silicone utensil roll | One drawer slot | $15–$25 |
For more on galley design and what each Breath model includes, see camper trailer kitchen features in Australia.
Bedroom and Clothing Storage: The Hidden Opportunity
The bedroom zone — typically under-bed drawers and a bedside ledge — is the least-optimised space in most camper trailers. People dump clothing in, close the drawer and deal with it.
Tip 11: Roll, don’t fold. Military roll technique compresses clothing by 30–40% and lets you see every item without unpacking. A pair of jeans takes half the space rolled as folded.
Tip 12: Compression packing cubes by category. Assign one cube per person, one for cold-weather layers, one for wet/dirty gear. Compression cubes (Eagle Creek, $30–$50 per pair) squeeze out air. More importantly, they keep your “clean” and “dirty” categories separate when you’re sharing a small space.
Tip 13: Use the bedside pocket. Most hard-shell teardrops have a small wall pocket or ledge beside the bed. Keep: torch, phone charger, earplugs, lip balm, allergy medication. Nothing else. The discipline of only using this space for night-time essentials means you never search for your torch in the dark.
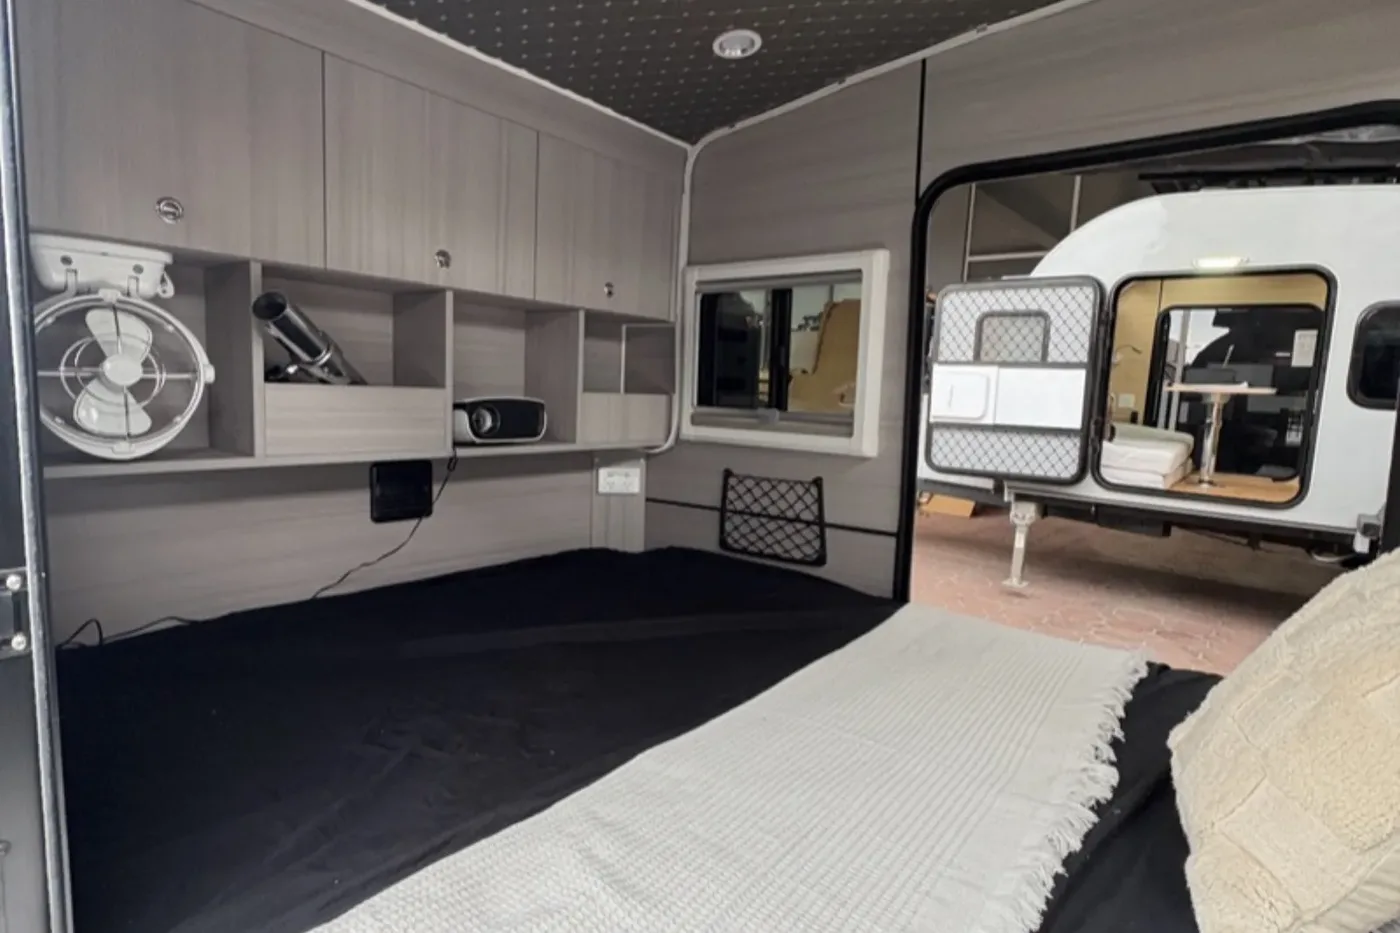
Cubbies beside the bed are for night-time essentials; everything else lives in the cupboards above.
Tip 14: One soft bag per person, not a suitcase. Rigid luggage is the enemy of camper trailer packing. Soft duffels and dry bags compress to fill the shape of the space available. A 40–60 L duffel per person is the right size for a typical 1–2 week trip.
Tip 15: Dirty laundry bag outside the drawer. A small mesh laundry bag that hangs from the door handle or hooks to the awning frame keeps dirty clothes out of the sleeping space entirely. It costs $5 and solves the “clean or dirty?” problem.
Outdoor Gear, Recovery Equipment and Undertrailer Storage
Not everything lives inside. The most space-efficient camper trailer setups treat the drawbar, undertrailer area and tow vehicle as part of the storage system.
Tip 16: Drawbar tool box for heavy recoveries. A steel or aluminium drawbar box (ARB, Ironman, Rhino-Rack: $180–$450) sits between the hitch and the trailer body, holds recovery tracks (MaxTrax at 2 kg each), snatch straps, tyre deflator and compressor, and keeps that weight exactly where you want it — near the tow ball.

The box on the drawbar keeps heavy gear forward, where the 60/40 rule wants it.
Tip 17: Undertrailer tube for long items. Most teardrop trailers have chassis tubes that are unused. A simple PVC tube ($15–$20 from Bunnings, cap both ends) can house fishing rods, tent poles, an awning pole and a collapsible paddle. Keep it off the ground with two U-bolts.
Tip 18: Recovery gear has its own slot — every time. Recovery equipment should always be in exactly the same spot, accessible without unpacking half the trailer. You should be able to reach your MaxTrax at 1 am in the rain without thinking. If you wouldn’t be able to do that right now, reorganise.
Tip 19: Tow vehicle roof rack for bulky-but-light items. A 1200×1350 mm alloy platform rack (Rhino-Rack, $400–$800) on a medium SUV can carry a swag roll, camp chairs, a collapsible kayak bag or a portacamp table — all items that take up a lot of space relative to their weight. Roof racks hurt fuel economy (add 3–7%), so load them with the lightest items.
Tip 20: Bike rack weight implications. A rear-mounted bike rack moves weight backward. Two 15 kg bikes = 30 kg at the very rear of the trailer. Factor this into your 60/40 distribution. See our detailed guide to bike racks for camper trailers in Australia.
Environment-Specific Storage: Outback, Coastal and Alpine
Generic storage advice ignores the fact that Australian camping conditions vary dramatically. The same approach that works in a coastal campsite will fail you in outback dust.
Outback and red dirt
Tip 21: Dust-seal every container you care about. Red dust goes through everything that isn’t hermetically sealed. Any container holding electronics, medications, maps, spare parts or food you haven’t opened yet should be in a hard-sided sealed bin (Pelican, NANUK, Seahorse: $50–$300) or a heavy-duty dry bag with a roll-top seal.
Tip 22: Electrics in a sealed case. Camera batteries, USB cables, solar charge controllers and satellite communicators all fail when fine dust infiltrates them. An IP67-rated case ($20–$50) for your electrical spares pack is cheap insurance on a trip where the nearest tech store is 400 km away.
Tip 23: Label outward-facing compartments with a paint pen. In dusty conditions you don’t want to open multiple compartments to find the right one. A small white paint pen on the handle edge of each compartment ($3 at Bunnings) — “kitchen”, “tools”, “first aid” — costs nothing and saves minutes of fumbling.
Coastal
Tip 24: Rinse metal latches after beach access. Salt spray attacks steel latches in one trip. A quick freshwater rinse of all external metal fittings after a beach camp prevents the slow corrosion that turns a $25 replacement latch into a stripped compartment door. Silicone spray on hinges after drying lasts 2–3 months.
Tip 25: Mesh bags for wet gear. Towels, wetsuits, snorkel gear and dog towels drip. Put them in mesh laundry bags that hang from the awning or the tow vehicle tow bar rather than inside the trailer. They’re dry within two hours and never introduce salt or moisture into the interior.
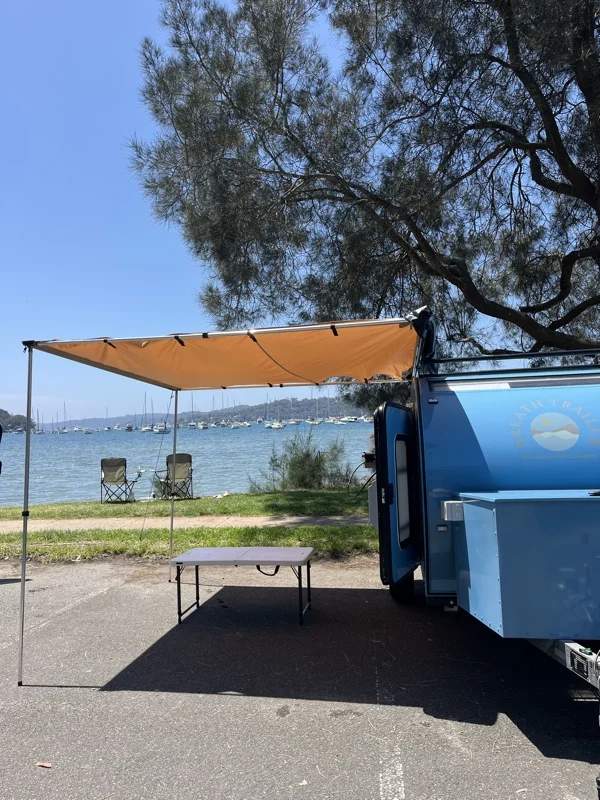
Coastal camps bring salt spray and condensation, so keep wet gear outside under the awning.
Tip 26: Dry box for electronics, always. Coastal camping creates condensation even without rain. A sea-facing site overnight can coat everything in moisture. Electronics in a dry box is non-optional.
Alpine and cold weather
Tip 27: Insulate your water containers overnight. Water left in undertrailer drawers in freezing conditions can freeze, expand and crack containers or pipes. Either empty containers before bed, or wrap them in a sleeping bag stuff sack as insulation.
Tip 28: Layer access, not deep packing. In cold weather you don’t want to unpack an entire drawer to find your beanie. Pack cold-weather layers at the top of every storage zone. If you need a layer at 6 am, it should be reachable without removing anything.
Tip 29: Keep fire lighting equipment centrally. In alpine conditions where you might need warmth quickly, your fire kit (lighter, fire starters, dry kindling bag) should be in the most accessible compartment — the same one every trip.
Home Storage Between Trips
The time your trailer spends at home matters. Poor storage between trips creates the mould, corrosion and pest problems that cause expensive repairs.
| Storage type | Cost | Pros | Cons |
|---|---|---|---|
| Home driveway under cover | $0–$200 for a carport | Convenient, easy access | HOA rules in some areas; UV on covers |
| Purpose-built shed on property | $2,000–$10,000 | Best protection; secure | Large capital cost, permits needed |
| Commercial storage facility | $15–$30/week ($780–$1,560/yr) | Climate control options; off your property | Cost over years; less convenient access |
| Open-air storage facility | $8–$15/week ($416–$780/yr) | Cheap | UV exposure; limited security |
Tip 30: Winterise before long-term storage. Before any storage period over 8 weeks: drain the water system completely, prop the galley open 10 mm to prevent mould, remove the fridge door seal to prevent compression set, disconnect the battery and store it on a tender, and check tyre pressures (they lose ~1 psi/month). This 30-minute checklist prevents the common $200–$800 repairs people discover when they unpack a stored trailer.
For a full seasonal maintenance schedule, see camper trailer maintenance and care.
Per-Model Storage Overview: Breath Trailer Range
| Essential | Plus | Ultra | Max | |
|---|---|---|---|---|
| Price (2026) | $23,320 | $29,766 | $34,749 | $42,900 |
| Payload ceiling | ~50 kg | ~100 kg | ~100 kg | ~200 kg |
| Under-bed drawers | Yes, 2 | Yes, 2 | Yes, 2 | Yes, 2 + wardrobe |
| External compartments | 2 | 2 | 2 | 3 |
| Galley cabinet | Yes | Yes | Yes | Yes |
| Interior shelving | Yes | Yes | Yes | Yes |
| Locking compartments | All | All | All | All |
| Wardrobe / hanging space | No | No | No | Yes |
| Bathroom cabinet | No | No | No | Yes |
| Best for | Weekend to fortnight | Fortnights, 3–4 trips/yr | Regular touring, couples | Long touring, all climates |
The Max’s extra wardrobe and bathroom cabinet make a real difference on trips of 3+ weeks. The Plus and Ultra share the same basic layout with identical lockable compartment count — the Ultra’s edge is the external shower and larger tare budget allowing for heavier auxiliary storage (a drawbar toolbox pushes it toward its ATM limit faster on a Plus).
For full spec comparisons, see the Breath Trailer comparison page.
5 Storage Mistakes to Avoid
| Mistake | Why it matters | Fix |
|---|---|---|
| Overloading the rear | Trailer sway at speed, uneven tyre wear | 60/40 forward loading; weigh at a weighbridge |
| Open food containers | Attracts ants, mice and possums at any site in Australia | All food in hard-sided sealed containers |
| Wet gear inside | Mould in 48 h in humid conditions | Mesh bags outside; dry before storing inside |
| Metal latches untreated | Corrosion after one coastal trip | Freshwater rinse + silicone spray after salt exposure |
| Single large duffel bags | Nothing is findable; compression impossible | Packing cubes by category, one bag per person |
FAQ
How much weight can I actually put in a teardrop camper trailer? It depends on the model. The Breath Essential has roughly 50 kg of payload, the Plus and Ultra around 100 kg, and the Max approximately 200 kg. Always check the compliance plate for the certified ATM and subtract the actual as-built tare weight. For full payload guidance, see camper trailer weight Australia.
What are the best containers for Australian outback camping? Pelican, NANUK and Seahorse hard cases are the gold standard for dust and water protection, starting around $50 for small cases. For everyday food and gear, Sistema rectangular containers are widely available at Coles and Woolworths for $30–$40 per 12-pack and seal tightly enough for dusty conditions.
How do I stop things shifting in drawers on corrugated roads? Anti-slip drawer liner (Bunnings, ~$10/roll) inside every drawer is the baseline. For anything fragile, wrap it in a microfibre cloth and pack it snugly so there’s no movement. Avoid leaving half-empty drawers — pack until the drawer is full or secure loose items with a bungee strap inside.
Is it worth buying aftermarket storage drawers for a teardrop? If your teardrop is already purpose-built with factory drawers (as all Breath models are), aftermarket drawer systems are rarely worth the added tare weight. The exception is if you’re planning a very long trip (3+ months) and need specific categorisation that the factory layout doesn’t provide. A set of lightweight plastic stacking bins is usually a better investment than heavy steel drawer systems for a trailer with a tight payload budget.
Where should I store recovery gear in a camper trailer? Recovery gear (MaxTrax, snatch strap, shackles) is heaviest and most urgent when needed — put it in the drawbar toolbox or the most accessible external compartment. It should never be buried under clothing or kitchen equipment. See must-have accessories for off-road adventures for a complete list.
What’s the best way to keep a camper trailer tidy on a long trip? The single most effective habit is the “everything has a spot and always goes back” rule. Assign a fixed location to every item before you leave home — not just a general zone, but a specific compartment. The second night of any trip is when organisation falls apart if you haven’t established the habit. A laminated card inside the main drawer with a storage map costs nothing and keeps everyone aligned.
Recommended Reading
- Camper Trailer Packing List: What to Bring on Every Trip
- Teardrop Camper Accessories: What to Add First
- Camper Trailer Security: How to Protect Your Investment
- Camper Trailer Maintenance and Care Australia
- Must-Have Off-Road Accessories for Australian Adventures
Ready to choose the right trailer for your storage needs? Compare all four Breath Trailer models at /comparison/ or book a viewing to see the storage layout in person.