Common Camper Trailer Problems and How to Avoid Them (2026)
Water ingress, canvas mould, bearing failure and 12V faults: how each starts, what the repair bill looks like, and how to spot it early.
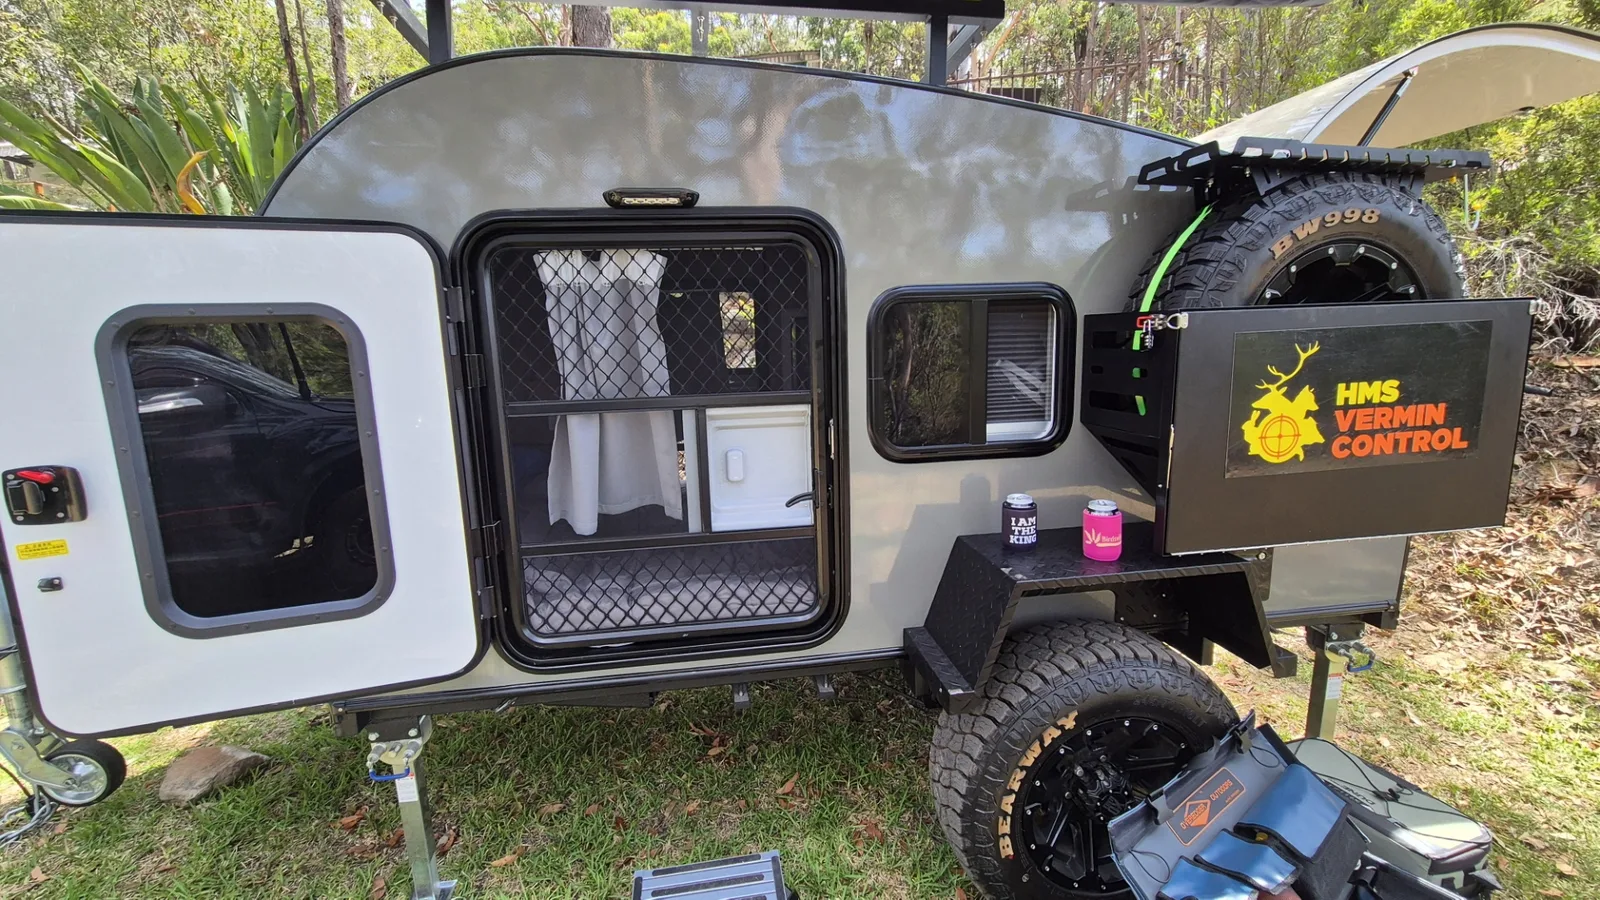
Australia’s roads aren’t kind to camper trailers. Corrugated outback tracks, coastal salt air, summer heat above 45 °C, and river crossings that look innocent but aren’t — the Australian environment finds every weakness in a trailer’s design, build quality, and maintenance record.
The good news: most common camper trailer problems are predictable, detectable early, and either cheap to prevent or expensive to ignore. A 2024 ACCC report found that nearly 80% of caravan and camper trailer faults reported under Australian Consumer Law were preventable with basic pre-purchase checks and routine servicing. Understanding what goes wrong — and why — is the difference between a trip that becomes a story and a trip that becomes a claim.
This guide covers the 10 most common camper trailer problems in Australia in 2026, the warning signs for each, how much they cost to fix, and how to avoid them entirely.
The 10 Most Common Problems at a Glance
| # | Problem | Risk Level | Avg Repair Cost (AUD) | Canvas Trailer | Hard-Shell Trailer |
|---|---|---|---|---|---|
| 1 | Canvas mould & waterproofing failure | High | $300–$2,500+ | Very high risk | Not applicable |
| 2 | Water ingress through seals | High | $500–$5,000 | High risk | Low risk (rubber seals only) |
| 3 | Tyre blowout (aged/underinflated) | High | $200–$800 + towing | Equal risk | Equal risk |
| 4 | Wheel bearing failure | High | $150–$300/axle | Equal risk | Equal risk |
| 5 | 12V electrical faults | Medium | $50–$600 | Higher risk (7-pin shake) | Lower risk (robust wiring) |
| 6 | Suspension failure / excessive bounce | Medium | $800–$4,000 | Equal risk | Equal risk |
| 7 | Hitch/coupling rattle and wear | Medium | $80–$500 | Equal risk | Equal risk |
| 8 | Chassis corrosion | High | $300–$3,000+ | Higher risk (steel frames) | Lower risk (aluminium/galv) |
| 9 | Grey water overflow / plumbing leaks | Low–Medium | $150–$800 | Lower risk | Higher risk (built-in plumbing) |
| 10 | 12V fridge failure | Medium | $100–$400 | Medium risk | Medium risk |
1. Canvas Mould and Waterproofing Failure
This is the single most common problem with traditional canvas camper trailers in Australia, and it’s the one that catches most owners off guard. Canvas packed away even slightly damp — after a morning dew, a quick river crossing, or a shower that stopped just before you broke camp — creates the perfect environment for mould to colonise within 24–48 hours.
How it happens: canvas fibres trap moisture. Once mould takes hold, it digests the fibre itself, not just the surface coating. Black mould on canvas is not just cosmetic — it structurally degrades the material and can spread to stitching, zips, and annex walls. In severe cases, the canvas is a write-off.
Warning signs: musty smell when you first open the trailer; visible black or green spotting; canvas that feels brittle or thin at stress points (corners, zip tracks, pull points).
Prevention:
- Always pack up bone dry. If you can’t, pack up quickly and re-open at home that same day.
- Re-proof with a canvas-compatible waterproofing spray (Nikwax, Camp-Dry) at least once a year, or after every 5–6 trips.
- Store in a ventilated shed or use a breathable cotton storage bag — never a sealed plastic bag or hard case without moisture absorbers.
- If mould appears, treat immediately with a specialised canvas cleaner (Canvas Magic, Elite Canvas). Do not use household bleach — it strips the waterproofing and weakens fibres.
Cost to fix: minor mould treatment $30–$100 DIY; canvas replacement $300–$2,500+ depending on size; full tent replacement $1,000–$4,000.
The hard-shell advantage: a sealed fibreglass or aluminium shell has no canvas to mould, re-proof, or replace. This is one of the most practical long-term cost advantages of a hard-shell teardrop like the Breath Trailer range over canvas-based campers — see the comparison of teardrop vs camper trailer for a full breakdown.
2. Water Ingress Through Seals and Seams
Water damage is the most expensive camper trailer problem to fix and the hardest to detect until it’s serious. Water finds its way in through degraded rubber seals around windows, doors, pop-up edges, and cable entry points. Once inside, it rots timber frames (common in older canvas-based campers), causes delamination, and breeds mould in insulation — invisible for months until the smell gives it away.
High-risk entry points:
- Rear tailgate seals (especially if locking latches are adjusted too loose)
- Window and vent surrounds
- Cable and hose entry glands
- Roof seams and external joins
Warning signs: soft spots in walls or floor; condensation inside cupboards; a musty smell only inside the trailer; visible staining around window frames; paint bubbling on the outer surface.
Prevention:
- Inspect all rubber seals annually — compression test: the seal should resist a piece of paper being pulled through when the door is closed.
- Re-seal joints with appropriate RV sealant (Sikaflex 221 or equivalent) every 2–3 years.
- Never pressure-wash directly at seals or vents — the jet forces water past intact seals.
- Check the tailgate locking latches are adjusted firm enough to compress the seal fully.
Cost to fix: re-sealing a single point $50–$200; full frame replacement after water rot $2,000–$8,000+; write-off risk on older trailers with composite floors.
Related reading: Why Quality Control Matters When Buying a Camper Trailer for the pre-purchase water-ingress inspection points to check on any used trailer.
3. Tyre Blowouts and Aged Tyres
Tyre failures are the most common roadside emergency for camper trailer owners across Australia. Unlike car tyres, trailer tyres are often out of sight and out of mind — and Australian conditions are brutal: hot asphalt above 40 °C, sharp limestone gravel, and the constant flex of corrugated outback roads stress tyres far harder than urban use.
The age trap: the leading cause of trailer tyre blowouts is not wear — it’s age-related internal degradation. Rubber oxidises and hardens from the inside regardless of how much the tyre has been used. A tyre that looks fine on the outside can have cracked internal structure. The manufacturing date is moulded into the sidewall: a four-digit DOT code (e.g., “2219” = week 22 of 2019).
Rule of thumb in Australia: any trailer tyre over 6 years old should be replaced regardless of tread depth. The risk of catastrophic failure at highway speed is high.
| Tyre Age | Condition | Action |
|---|---|---|
| Under 4 years | Good tread | Check pressure; inspect sidewalls |
| 4–6 years | Inspect carefully | Check for cracking; consider replacement |
| Over 6 years | Any condition | Replace immediately |
| Unknown age (no DOT code) | Any condition | Replace immediately |
Other blowout causes:
- Underinflation: the most common cause. Heat builds up in the sidewall until the tyre fails. Check cold pressure before every trip.
- Overloading: exceeding the trailer’s ATM overloads the tyres and suspension together. Always know your payload. (Camper trailer weight guide)
- Road damage: sharp rocks, corrugations, and creek crossings cause impact damage — carry a full spare rated for your trailer’s weight.
Prevention:
- Check tyre pressure cold before every trip (usually 40–55 psi for trailer tyres, check your manufacturer’s spec).
- Carry a quality tyre gauge, not a servo forecourt gauge.
- Inspect sidewalls every trip for bubbles, cuts, or cracking.
- Carry a quality spare rated to at least the ATM of your trailer.
Cost if it goes wrong: tyre + fitting $200–$350; emergency towing in remote areas $400–$1,500+; chassis damage from a dragged blowout $1,000+.
4. Wheel Bearing Failure
Already covered in depth in Why Wheel Bearings Matter on a Camper Trailer, but it belongs on this list because it’s both common and dangerous. A bearing that seizes at highway speed can cause a wheel to detach — a catastrophic outcome.
Interval reminders for Australian conditions:
| Environment | Recommended Service Interval |
|---|---|
| Sealed roads only | Every 20,000 km or 12 months |
| Mixed sealed/gravel | Every 10,000 km or 6 months |
| Outback corrugations | Every 5,000 km |
| Coastal / salt air | Every 5,000–7,500 km |
| River crossings | After every crossing |
Professional repack: $150–$300 per axle at a workshop. Emergency towing before the repair adds $400+ — always cheaper to service on schedule.
5. 12V Electrical Faults
The 12V system is the nervous system of a modern camper trailer — running the fridge, lights, water pump, USB charging, and often a diesel heater or CPAP machine. It’s also one of the most fault-prone systems, particularly in trailers that have been driven on rough roads.
Most common 12V faults in Australian conditions:
| Fault | Cause | Symptom | Fix |
|---|---|---|---|
| Loose 7-pin plug | Vibration on corrugations | Fridge stops working; trailer lights flicker | Solid Anderson plug + cable ties; check crimp joints |
| Blown fuse | Short circuit or overload | Single circuit dead | Replace fuse; investigate cause |
| Corroded Anderson/7-pin pins | Humidity, dust, river crossings | Poor charge, random faults | Clean with electrical contact cleaner; replace pins |
| Flat auxiliary battery | DC-DC charger not wired | Fridge dead at camp | Proper DC-DC charger installation |
| Water pump wiring fault | Chafe against frame | Pump won’t run or runs continuously | Inspect routing; add conduit protection |
The 7-pin problem: standard 7-pin round plugs are not sealed against dust or water. They are notorious for vibration-loosening on corrugated tracks — exactly the conditions that outback travellers face. Upgrading to a solid Anderson SB50 plug for the main charging circuit is one of the best reliability upgrades for any trailer.
AS/NZS 3001.2:2022 — Australia’s standard for RV electrical systems — mandates fuse protection within 300 mm of every battery terminal and proper cable sizing to prevent fire risk. See The Complete Guide to Camper Trailer Power Systems for the full compliance overview.
Prevention:
- Do a full 12V systems check before every trip: test the fridge, pump, lights, and charger.
- Inspect cable routing for chafe points annually.
- Carry spare fuses (the correct ratings), a multimeter, and electrical contact cleaner.
- Budget $200–$600 to have a qualified auto-electrician inspect and re-terminate any wiring over 5 years old.
6. Suspension Failure and Excessive Bounce
Australian outback corrugations cause suspension fatigue at a rate that would take decades to accumulate on European roads. Leaf spring suspension — common on entry-level camper trailers — can crack or lose arch after sustained corrugation travel, leading to a trailer that bottoms out, pitches violently, and damages everything inside.
Warning signs: trailer bottoms out on bumps it previously handled easily; visible cracks in leaf springs; uneven tyre wear; trailer that kicks to the side under braking.
The full engineering breakdown is in Why Suspension Matters on an Off-Road Camper, but the short version: if you plan to use the Gibb River Road, Cape York, or the Birdsville Track, independent coil suspension is worth the upgrade cost.
Typical repair costs:
- Leaf spring replacement: $300–$800 per spring
- Independent coil suspension retrofit: $3,000–$8,500
- Shock absorber replacement: $200–$600
7. Hitch and Coupling Rattle and Wear
A loose hitch coupling is more than annoying — it indicates wear in the latching mechanism that can allow the trailer to detach from the ball. In Australia, trailer separation is a specific road offence under state heavy vehicle codes and creates serious liability in the event of an accident.
Causes of coupling wear:
- Incorrect ball size (must match the coupling rating — 50 mm is standard for most camper trailers)
- Worn latch spring or latch pin
- Dirt or stones jammed in the latch mechanism
- Operating without a rubber ball cup (reduces metal-to-metal wear)
Signs of coupling wear: audible clunk when accelerating or braking; visible play between the coupling and ball; difficulty latching; the coupling requires a hard strike to engage.
Prevention:
- Grease the tow ball and coupling every 3–4 trips.
- Inspect the latch spring and pin annually — cost of a replacement pin kit: $20–$50.
- Fit a rubber ball cup to reduce wear rate and noise.
- Carry the correct anti-rattle pin/clamp for the hitch receiver if your tow bar uses one.
When to replace: any coupling that shows visible cracks, deep corrosion pitting, or a damaged latch mechanism should be replaced, not repaired. A new coupling is $80–$300 — far less than the consequences of a detachment.
8. Chassis Corrosion
Australian conditions — coastal salt spray, river crossings, and the humidity cycle of wet-dry seasons in the north — accelerate chassis corrosion in ways that manufacturers in Europe or the US never design for. A chassis that looks acceptable in a factory in Victoria can begin to show serious rust within two years of use in Far North Queensland or along the WA coast.
Risk factors:
- Steel chassis that were painted without pre-treatment (rust under the paint)
- Untreated welds (the highest corrosion initiation point)
- Storage in grass or on bare earth (ground moisture wicks up)
- River crossings without post-trip inspection
Signs of serious corrosion: orange streaks running from welds; paint bubbling or flaking over the chassis rails; structural corrosion visible at the A-frame, drawbar, or spring hangers.
Prevention:
- Inspect the chassis every 12 months — a torch and a screwdriver to probe suspicious areas.
- Apply a chassis coating (Lanoline-based sprays are popular in Australia: RP7 Rust Converter, Lanotec) annually.
- After river crossings, rinse the chassis with fresh water and dry if possible.
- For coastal environments: inspect every 6 months minimum.
The manufacturing decision: hot-dip galvanising at the factory — the whole chassis dipped in molten zinc — provides 25+ years of corrosion protection and is the gold standard. Check whether a trailer’s chassis is galvanised or painted-only before buying. See What Makes a Premium Camper Trailer Different? for what to look for.
9. Grey Water Overflow and Plumbing Leaks
As more camper trailers ship with built-in kitchens, external showers, and grey water tanks, plumbing faults become a growing problem category. Grey water overflow — the tank fills faster than the owners realise — is the most common issue, but fitting failures, cracked tanks from off-road flex, and pump faults also appear regularly.
Grey water rules in Australia: most national parks, state forests, and crown land require you to retain grey water — releasing it on the ground is illegal in most jurisdictions. An overflow that dumps grey water at a campsite can result in fines and exclusion from campgrounds.
Prevention:
- Monitor the grey water tank gauge daily; empty at every opportunity.
- Inspect all hose fittings for leaks after the first off-road trip (vibration can loosen push-fit connections).
- When winterising or before long storage, drain and flush the entire plumbing system.
- Check the pump filter every 6 months — blocked filters cause pump burnout.
Self-containment models: the Breath Trailer Ultra (external shower, 60 L grey water tank) and Max (full internal bathroom, 80 L grey water tank) both include grey water retention systems. The Breath Max is specifically rated for self-contained free camping under CMCA standards — meaning the grey water system is engineered to hold a full trip’s output without overflow risk when monitored daily.
10. 12V Fridge Failure
The 12V compressor fridge is often the most expensive single accessory in a camper trailer setup — good ones cost $800–$1,800 (Dometic, Engel, Bushman). When they fail in the outback, the loss isn’t just the fridge — it’s the food, the medications, and potentially the trip.
Most common fridge failure causes:
| Cause | Prevention |
|---|---|
| Insufficient 12V power supply | Verify charge current; size battery correctly |
| Poor ventilation (fridge in enclosed space) | Ensure 50 mm clearance on all sides; vent the slide-out |
| Loose power connector (vibration) | Use Anderson SB50 with locking pin; secure cable routing |
| Blocked condenser fins | Clean annually with compressed air or soft brush |
| Overfilled with warm food | Pre-chill items before loading; don’t block internal airflow |
| Running on low battery voltage | Fridge controller cuts out at ~11.4V; LiFePO4 avoids this plateau |
The full fridge selection and power sizing guide is in How to Keep Food Cold While Camping Off Grid.
What to carry: a plug-in DC voltmeter ($15), a spare 20A blade fuse, and the fridge’s error code guide (most modern compressor fridges flash an error code). Many faults that look like fridge death are actually power supply issues resolvable in five minutes.
Hard-Shell vs Canvas: How Build Type Changes the Problem Profile
| Problem | Canvas Camper | Hard-Shell Teardrop |
|---|---|---|
| Canvas mould | Very high risk — ongoing maintenance burden | Eliminated entirely |
| Water ingress | High risk — canvas seams + zip failures | Low risk — rubber seals only |
| 12V electrical | Higher risk — 7-pin shake on rough roads | Same risk, often better-quality wiring |
| Chassis corrosion | Higher risk — older-style steel frames common | Lower risk — aluminium extrusions or galv steel |
| Setup time | 10–40 minutes | 5 minutes — hard shell clicks open |
| Weight | 400–700 kg typical | 700–1,200 kg typical (more robust hardware) |
| Running maintenance cost | Higher (canvas, poles, zips, reproofing) | Lower (seals, bearings, standard service) |
The hard-shell advantage is concentrated in the top two problem categories — which also happen to be the most expensive to repair. This is one reason hard-shell teardrops tend to have lower total cost of ownership over 5 years, despite a higher purchase price. See the full resale value analysis for the 5-year numbers.
Annual Maintenance Schedule to Avoid All 10 Problems
| Interval | Task |
|---|---|
| Before every trip | Tyre pressure; coupling security; 12V systems test; water tank level |
| Every trip | Post-drive coupling check; look for any new rattles or pulling |
| Every 3 months | Tow ball grease; coupling latch inspection; fridge vent clear |
| Every 6 months | Wheel bearing check (more often in coastal/outback environments); seal inspection; chassis inspection |
| Annually | Full wheel bearing service; electrical system check; plumbing flush; reseal joins if needed |
| Every 2–3 years | Full brake inspection (electric and override); suspension geometry check |
For a complete service schedule with DIY vs workshop costs, see Teardrop Camper Maintenance and Care Australia.
Pre-Purchase Inspection: Catch the Problems Before They’re Yours
Buying a used camper trailer? These are the points most often missed by buyers and most often concealed (sometimes unintentionally) by sellers:
- Canvas condition — open it fully and inspect every seam corner and zip
- Tyre DOT date — reject any tyre over 6 years without a negotiated price reduction
- Coupling latch — pull and push the coupling on the ball; there should be zero play
- Hub temperature test — drive 10 km, stop, and carefully feel the hubs (they should be warm, never too hot to hold)
- Water staining inside — lift floor mats and open overhead lockers; look for staining
- 12V test — plug in, run the fridge, turn on lights, run the water pump
- Chassis screwdriver test — probe around welds and floor joins; soft material indicates rust or rot
Full 10-point inspection checklist: 10 Things to Look for Before Buying a Camper Trailer.
How the Breath Trailer Range Is Built to Avoid These Problems
| Problem | Breath Trailer Prevention |
|---|---|
| Canvas mould | No canvas — sealed fibreglass/aluminium hard shell on all 4 models |
| Water ingress | EPDM rubber seals; aircraft-grade bond at all joins; sealed cable glands |
| Tyre blowout | Load-rated tyres matched to each model’s ATM; 15” alloy rims (Essential, Plus) or 16” (Ultra, Max) |
| Wheel bearing failure | Holden LM wheel bearings; service at 10,000 km intervals included in guide |
| 12V electrical faults | Anderson SB50 main connector; fused distribution boards; wiring rated to AS/NZS 3001.2 |
| Suspension | Independent coil suspension standard on Ultra and Max; leaf spring on Essential and Plus |
| Chassis corrosion | Powder-coated galvanised steel drawbar; aluminium extrusion body frame |
| Grey water overflow | 60 L tank (Ultra) / 80 L tank (Max) with level gauge; CMCA self-containment rated |
| Fridge failure | Stainless slide-out galley with Dometic CFX3 pre-wired; vented kitchen recess |
FAQ
What are the most expensive camper trailer problems to fix in Australia?
Water ingress and structural corrosion — both can cost $2,000–$8,000+ to repair properly and are the most common reasons older trailers are written off. Canvas replacement is next at $1,000–$4,000. All three are far cheaper to prevent than to fix.
How often should I service my camper trailer in Australia?
Minimum annually for a sealed-road trailer; every 6 months or 5,000–10,000 km if you’re doing off-road travel. Post-trip inspection after any river crossings. See the full maintenance schedule.
Does a hard-shell teardrop trailer have fewer problems than a canvas one?
Yes, particularly for the two most expensive problem categories: canvas mould (eliminated entirely) and water ingress (significantly lower risk with rubber seals vs fabric seams and zips). Mechanical components — bearings, tyres, suspension, hitch — carry equal risk regardless of shell type.
How do I stop my camper trailer getting water damage?
Annual seal inspection and reseal with Sikaflex 221; never pressure-wash directly at seals; check tailgate latch compression; inspect window surrounds. On a canvas trailer, add the annual re-proofing process and the pack-up-dry discipline.
What is the most common electrical problem in Australian camper trailers?
Vibration-loosened connectors — particularly the 7-pin round plug on the tow vehicle — are the number one reported fault. The fix is upgrading to a solid Anderson SB50 for the main charging circuit and securing all cable runs with proper conduit and clamps rated for vibration.
What tyre age is safe for towing a camper trailer?
Under 6 years for trailer tyres in Australian conditions. Check the DOT date code moulded into the sidewall. A 4-digit code like “2219” means week 22 of 2019 — already over 6 years old as of 2026 and overdue for replacement.
The Bottom Line
Most camper trailer problems are preventable with annual servicing, pre-trip checks, and informed buying decisions. The two that catch owners most off guard — canvas mould and water ingress — are also the two that a hard-shell teardrop eliminates or dramatically reduces. For the mechanical components that all trailers share (bearings, tyres, suspension, electrics), a consistent service schedule is the single most effective protection.
If you’re comparing trailers, the Breath Trailer comparison page covers all four models (Essential $23,320 through Max $47,190) with their standard inclusions, ATM ratings, and the features built in to reduce long-term maintenance costs.
Ready to explore a trailer that’s engineered to reduce the problems on this list from day one? Book a viewing at our Sydney workshop and we’ll walk through every system with you.